
How to Apply Gesso to Canvas: A Beginner's Guide
Before we dive into the colorful world of painting, let's talk about something that often feels like homework: gesso. I get it. When you're itching to splash paint onto a canvas, adding an extra step like gessoing can feel like a chore, a delay before the real fun begins. For years, I approached gesso as a 'necessary evil' – a tedious pre-flight check. But somewhere along my artistic journey, I had an epiphany: gesso isn't just about preparing a surface; it's about laying the foundation for something truly remarkable. It's the silent promise you make to your canvas, ensuring your art has the best possible chance to shine and endure. Think of it as an act of love, really.This isn't some textbook explanation; this is me, sharing my own trial-and-error, the little tips I've picked up, and why I've come to genuinely appreciate this humble, yet mighty, white (or sometimes clear!) substance.
How to Apply Gesso to Canvas: A Beginner's Guide
Before we dive into the colorful world of painting, let's talk about something that often feels like homework: gesso. I get it. When you're itching to splash paint onto a canvas, adding an extra step like gessoing can feel like a chore, a delay before the real fun begins. For years, I approached gesso as a 'necessary evil' – a tedious pre-flight check. But somewhere along my artistic journey, I had an epiphany: gesso isn't just about preparing a surface; it's about laying the foundation for something truly remarkable. It's the silent promise you make to your canvas, ensuring your art has the best possible chance to shine and endure. Think of it as an act of love, really.
This isn't some textbook explanation; this is me, sharing my own trial-and-error, the little tips I've picked up, and why I've come to genuinely appreciate this humble, yet mighty, white (or sometimes clear!) substance.
What You'll Learn in This Guide
In this comprehensive guide, you'll discover:
- The history and evolution of gesso
- Why gesso is essential for every artist
- Step-by-step instructions for applying gesso
- Advanced techniques and creative uses of gesso
- Common mistakes and how to avoid them
- Tips for choosing the right gesso for your project
- Frequently asked questions about gesso
By the end of this guide, you'll have a deep understanding of gesso and how to use it to enhance your artwork.
Why Gesso is Essential for Every Artist
Gesso is often overlooked, but it plays a crucial role in ensuring the longevity and vibrancy of your artwork. Whether you're a beginner or a seasoned artist, understanding the importance of gesso can transform your approach to painting. It's not just about the technicalities; it's about respecting the process and the materials that bring your art to life.
The History of Gesso
Gesso has been used for centuries, dating back to the Renaissance era. Traditional gesso was made from rabbit-skin glue and chalk, providing a rigid and absorbent surface for tempera paints. Over time, artists have adapted gesso to suit modern needs, leading to the development of acrylic gesso, which is more flexible and easier to work with. Understanding the history of gesso can give you a deeper appreciation for its role in art.
Evolution of Gesso Over Time
The transition from traditional gesso to modern acrylic gesso reflects the evolution of artistic techniques and materials. Traditional gesso, with its rigid texture, was ideal for tempera paints, while acrylic gesso offers flexibility and ease of use, making it suitable for a wide range of modern applications. This evolution highlights the adaptability of artists and their materials over time.
Why Gesso Matters in Art
Gesso is more than just a preparatory step; it's a bridge between your creative vision and the physical medium. Whether you're a seasoned artist or just starting, understanding gesso can transform your approach to painting. It's not just about the technicalities; it's about respecting the process and the materials that bring your art to life.
The Role of Gesso in Artistic Expression
Gesso is not just a practical tool; it's a medium that enhances the vibrancy and longevity of your artwork. By providing a stable and absorbent surface, gesso ensures that your paint adheres properly and retains its brilliance over time. This makes it an essential component in both traditional and contemporary art practices.
What is Gesso, Anyway? (And Why Do We Even Bother?)
Before we get our hands messy, let's quickly demystify gesso. At its core, gesso is a primer – usually a white, acrylic-based substance (though traditional gesso exists, we'll mostly talk about the acrylic stuff here, because it's just so forgiving for us modern folks). It's got a slightly toothy texture when dry, which is absolutely key for your paint to grab onto. I recall a phase where I thought I could skip it on a pre-primed canvas – big mistake. The paint just sat there, looking dull, and then soaked right into the fibers like a sponge.
If you're curious about the deeper dive into what gesso is and its history, you can always check out my other thoughts on What is Gesso in Painting?. But for now, here's my personal take on why it's non-negotiable:
- Adhesion: Paint needs something to stick to. Gesso provides that perfect slightly absorbent, rough surface.
- Protection: It seals the canvas fibers, protecting them from the acids in some paints and preventing oils from rotting the fabric.
- Brightness: Gesso gives your colors a vibrant, pure backdrop. Without it, your paint can look muted as the canvas absorbs some of its vibrancy.
- Smoothness (or Texture!): You control the surface. Want it silky smooth? Sand between layers. Want more texture? Apply it thicker or with a different tool.
The Chemistry of Gesso
Gesso is a fascinating blend of chemistry and art. The acrylic polymer in modern gesso binds to the canvas fibers, creating a stable and durable surface. This chemical bond ensures that your paint adheres properly and lasts longer. Traditional gesso, made from rabbit-skin glue and chalk, offers a different texture and finish, but it's less flexible and more prone to cracking over time. Understanding the chemistry behind gesso can help you choose the right type for your project.
The Science Behind Gesso
Gesso isn't just a practical tool; it's a product of chemistry. The acrylic polymer in modern gesso binds to the canvas fibers, creating a stable and durable surface. This chemical bond ensures that your paint adheres properly and lasts longer. Traditional gesso, made from rabbit-skin glue and chalk, offers a different texture and finish, but it's less flexible and more prone to cracking over time. Understanding the science behind gesso can help you choose the right type for your project.
How Gesso Enhances Paint Adhesion
The science of adhesion is crucial in painting. Gesso creates a slightly absorbent surface that allows paint to bond effectively. This is particularly important for acrylic and oil paints, which require a stable surface to prevent cracking and peeling. By understanding how gesso enhances adhesion, you can ensure that your artwork remains vibrant and intact for years to come.
The Role of Gesso in Paint Longevity
Gesso not only enhances adhesion but also plays a critical role in the longevity of your artwork. By sealing the canvas fibers and providing a stable surface, gesso prevents the paint from deteriorating over time. This ensures that your artwork remains vibrant and intact, preserving its beauty for future generations.
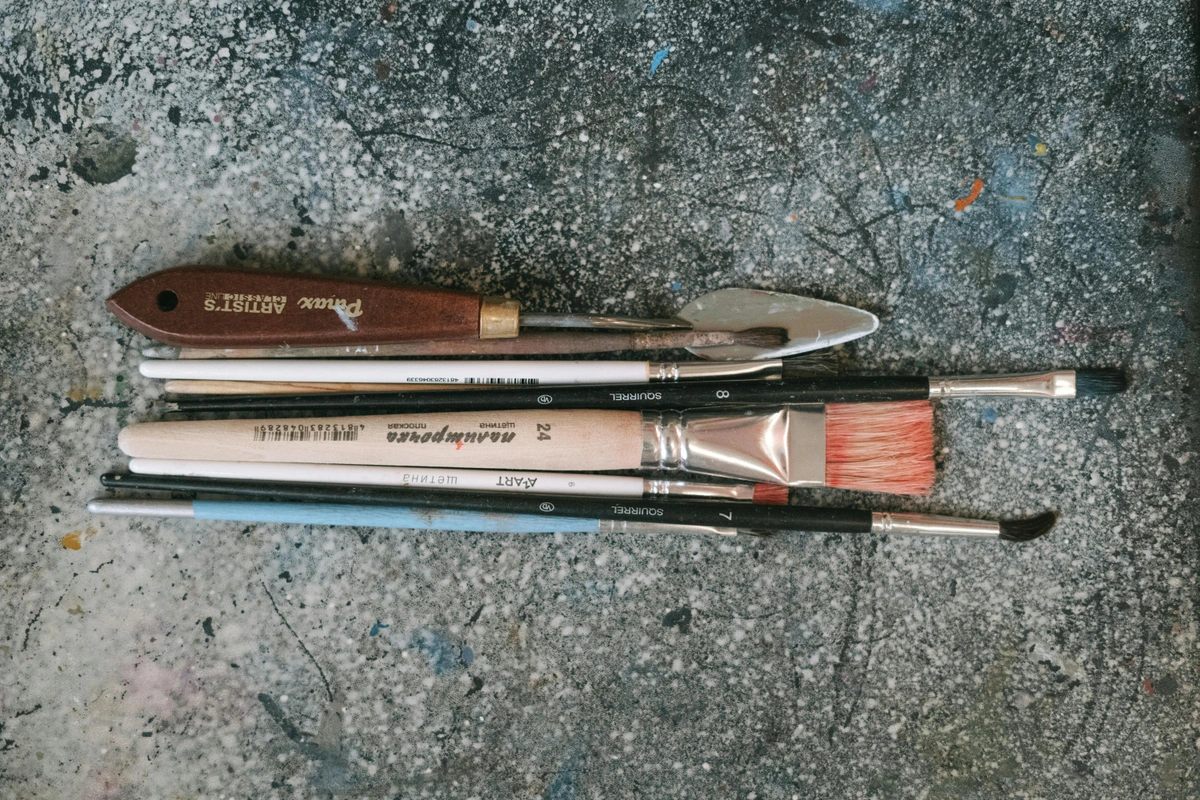
Gathering Your Gesso Toolkit: The Essentials (No Fancy Stuff Needed)
You don't need a professional art studio to get this right. Most of what you need, you probably already have lying around. Here's my personal checklist:
- The Gesso Itself: Obvious, right? I usually opt for a good quality artist's acrylic gesso. White is standard, but clear and colored options are out there if you want to experiment!
- Your Canvas (or Surface): Stretched canvas, canvas board, wood panel – gesso loves them all.
- A Brush or Roller: For larger canvases, a foam roller is fantastic for speed and evenness. For smaller pieces, a wide, flat synthetic brush works wonders. Don't use your best painting brushes for this; gesso can be tough on bristles.
- Water: Essential for thinning your gesso, which I'll explain in a moment.
- Fine-Grit Sandpaper (Optional, but Recommended): About 220-grit. It's for creating that dreamy, smooth surface.
- Drop Cloth or Newspaper: Trust me on this one. Gesso gets everywhere.
- Container for Diluting: A disposable cup or an old jam jar.
Alternative Tools for Applying Gesso
While brushes and rollers are the most common tools for applying gesso, you can also experiment with other tools like sponges, palette knives, or even credit cards. Each tool can create a unique texture and finish, allowing you to customize your canvas to suit your artistic vision.
Choosing the Right Gesso for Your Project
Not all gesso is created equal. Here's a quick guide to help you choose the right one for your needs:
Type of Gesso | Best For | Key Features |
|---|---|---|
| Acrylic Gesso | Most projects | Flexible, quick-drying, and easy to sand |
| Traditional Gesso | Historical techniques | Made from rabbit-skin glue and chalk, offers a unique texture |
| Clear Gesso | Natural canvas look | Provides tooth and protection without altering the canvas color |
| Colored Gesso | Creative backgrounds | Available in various hues to influence the mood of your painting |
| Textured Gesso | Abstract art | Includes aggregates for extra texture and depth |

Specialty Gesso Options
In addition to the standard types of gesso, there are specialty options available for specific artistic needs. For example, some gessos are formulated for use on metal or glass surfaces, while others are designed to create unique textures or finishes. Exploring these specialty options can open up new creative possibilities for your artwork.
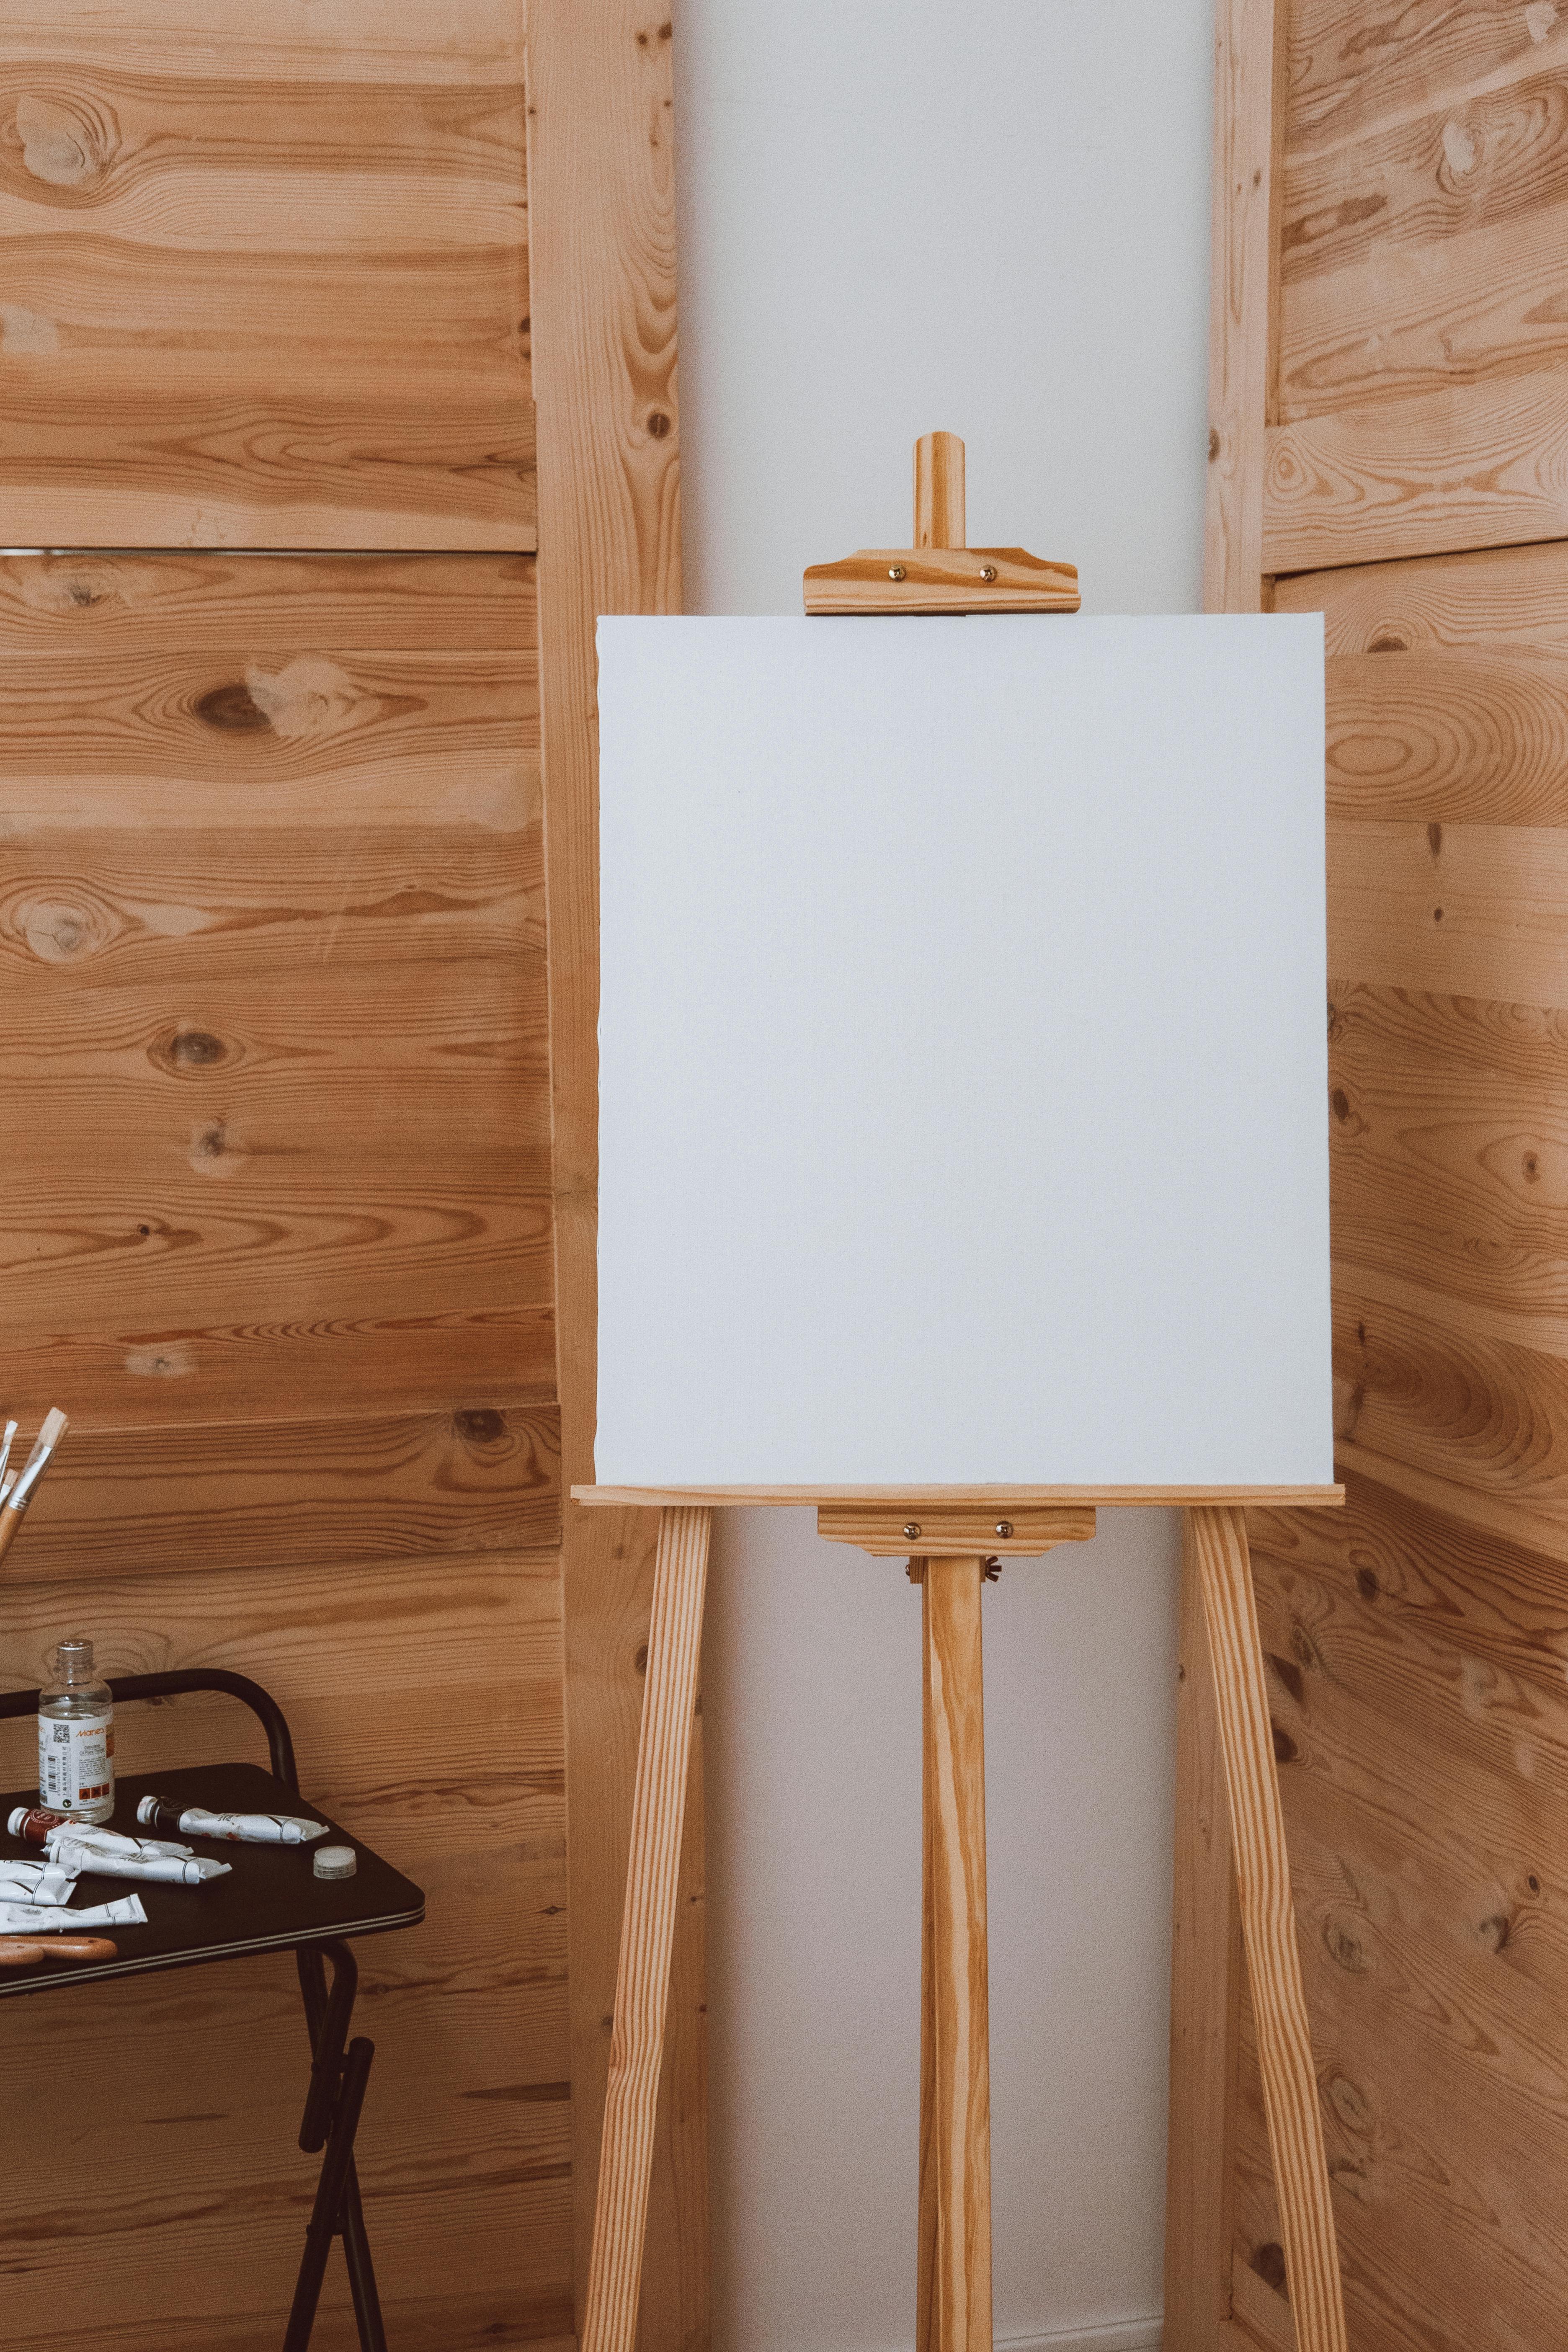
Prepping Your Canvas: A Clean Slate is a Happy Slate
Before the gesso even touches the canvas, a little prep goes a long way. If you've got a brand-new raw canvas, you might notice some dust or stray fibers. A quick wipe down with a damp cloth (and letting it dry completely!) is a good idea. For pre-primed canvases, they usually just need a quick dusting.
Sometimes, pre-primed canvases aren't as 'primed' as you'd think. They often come with a single, thin coat of gesso that's more for shelf-life than actual painting readiness. I always add at least one or two more layers, even on these. It just makes such a difference to the paint's performance.
If you're really interested in the whole shebang of getting your canvas ready, I've got a whole other ramble about How to Prepare a Canvas for Acrylic Painting that you might find useful.
The Importance of a Clean Workspace
A clean workspace is essential for achieving the best results with gesso. Dust and debris can easily stick to wet gesso, creating imperfections in your surface. By keeping your workspace clean and organized, you can ensure that your gesso application is smooth and even, setting the stage for a successful painting.
Common Mistakes to Avoid Before Applying Gesso
Preparation is key, and skipping steps can lead to issues down the line. Here are some common mistakes to avoid:
- Skipping the Dusting Step: Even a little dust can ruin the smoothness of your gesso layers.
- Using a Wet Cloth: Always ensure your cloth is damp, not wet, to avoid soaking the canvas.
- Ignoring Pre-Primed Canvases: Assuming they're ready to go can lead to disappointing results. Always add extra layers.
- Rushing the Drying Process: Patience is crucial. Let each layer dry completely before moving on.
How to Fix Common Gesso Mistakes
If you've made a mistake while applying gesso, don't worry! Many issues can be fixed with a little patience and effort. For example, if your gesso has dried with brush marks, you can lightly sand the surface to smooth it out. If you've applied too much gesso, you can sand it down or add another thin layer to even it out. Understanding how to fix common mistakes can help you achieve a perfect surface for your artwork.
The Application Process: My Go-To Method (Because I've Tried Them All)
Alright, here's where the magic happens. Or, more accurately, where the systematic layering begins.
Step 1: Dilution (Or Not? My Thoughts)
This is a personal preference, but I almost always dilute my gesso slightly with water – maybe 10-20%. It makes it flow smoother, reduces brush marks, and allows for thinner, more even layers. Just pour some gesso into your disposable container, add a splash of water, and mix thoroughly. You're aiming for the consistency of thin cream, not milk, not yogurt. If it feels too thick, add a tiny bit more water. If you're using a roller, you might get away with less dilution.
Understanding the Right Consistency
The consistency of your gesso is crucial for achieving the best results. If your gesso is too thick, it can create visible brush marks and an uneven surface. On the other hand, if it's too thin, it may not provide adequate coverage. Experiment with different consistencies to find the one that works best for your project.
Step 2: The First Layer: Thin and Even
Using your chosen brush or roller, apply your first thin coat. I always start with horizontal strokes, working across the entire canvas. The key here is evenness. Don't glob it on. Think of it as gently coating the fibers. Once you're done, let it dry completely. This can take anywhere from 30 minutes to a couple of hours, depending on humidity and how thick you applied it. It should feel cool and dry to the touch. This first layer is doing the heavy lifting, sealing the canvas.
The Importance of the First Layer
The first layer of gesso is critical for sealing the canvas and creating a stable surface for subsequent layers. This layer ensures that the canvas fibers are protected and that the paint will adhere properly. Taking the time to apply this layer evenly and allowing it to dry completely is essential for achieving the best results.
Step 3: Sanding (If You're Feeling Fancy)
Once that first layer is bone dry, you can lightly sand it with your fine-grit sandpaper. This smooths out any brushstrokes or bumps and helps create a beautiful, uniform surface for your subsequent layers. I'm not talking about aggressive sanding; just a gentle, even pass over the entire surface. Wipe off any dust with a dry cloth afterwards. This step is optional, but it elevates the final painting experience so much, especially if you're aiming for detail.
Tips for Effective Sanding
Sanding is a simple but effective technique for achieving a smooth surface. Use a fine-grit sandpaper and apply gentle, even pressure to avoid damaging the gesso layer. After sanding, wipe the surface with a dry cloth to remove any dust or debris. This will ensure that your next layer of gesso adheres properly and creates a flawless surface.
Step 4: Subsequent Layers: Building it Up
Now, for the second layer. This time, I apply it with vertical strokes. Why? It helps to crisscross the fibers and ensures incredibly even coverage. Repeat the drying process. For most acrylic painting, two to three layers are usually sufficient. If you want an extra smooth finish, you can sand lightly again after the second layer before applying a third. For very thin washes or glazes, more layers of gesso can be beneficial to really prevent absorption – and trust me, I've spent enough time mastering Mastering Glazing Techniques in Oil Painting (though that's for oils, the principle of a non-absorbent ground is similar) to appreciate a good surface!
The Benefits of Multiple Layers
Applying multiple layers of gesso ensures that your canvas is fully sealed and ready for painting. Each layer builds on the previous one, creating a stable and durable surface. This is particularly important for techniques like glazing, where a non-absorbent surface is essential for achieving the best results.

My artwork, Creative Commons Zero (CC0)
Step 5: Drying & Curing: Patience is a Virtue (Especially Here)
After your final layer, let the gesso cure completely. While it might feel dry to the touch in an hour or two, it needs more time to fully harden and be ready to accept paint without any issues. I usually let my gessoed canvases sit overnight, or even a full 24 hours, especially if I've applied multiple layers. Rushing this step can lead to your paint cracking or not adhering properly down the line. And who wants that after all your hard work?
The Science of Curing
Curing is a critical process that allows the gesso to fully harden and bond to the canvas. This process ensures that your paint will adhere properly and that your artwork will remain vibrant and intact for years to come. Understanding the science of curing can help you achieve the best results with your gesso application.
Troubleshooting & Common Pitfalls (My Own Blunders Included)
We all make mistakes, especially when learning something new. Here are a few I've definitely made:
- Too Thick Gesso, Brush Marks Galore: If your gesso is too thick, or you apply it too heavily, you'll end up with prominent brush strokes. This is where diluting and light sanding become your best friends.
- Not Enough Layers, Dull Colors: Under-gessoing means your canvas will still absorb too much paint, leading to muted colors and requiring more paint to achieve vibrancy. My advice: always err on the side of one extra layer.
- Dust & Debris: Little bits of lint or dust love to stick to wet gesso. Make sure your workspace is clean, and wipe your canvas before each coat.
- Rushing Drying Time: As mentioned, this is a big one. Be patient! Your future vibrant art will thank you.
Learning from Mistakes
Making mistakes is a natural part of the learning process. By understanding common pitfalls and how to avoid them, you can improve your gesso application technique and achieve better results. Don't be afraid to experiment and learn from your mistakes – it's all part of the artistic journey.
Advanced Techniques for Applying Gesso
Once you've mastered the basics, you can experiment with advanced techniques to achieve unique effects:
- Layering with Different Tools: Use a sponge, palette knife, or even a credit card to create varied textures.
- Mixing Media: Combine gesso with other mediums like modeling paste for added texture and depth.
- Creating Patterns: Use stencils or masks to apply gesso in specific patterns or designs.
- Toning the Canvas: Add a tint to your gesso to create a toned ground, which can influence the overall mood of your painting.
Exploring Creative Possibilities
Advanced techniques for applying gesso can open up a world of creative possibilities. By experimenting with different tools, media, and techniques, you can create unique textures and finishes that enhance your artwork. Don't be afraid to push the boundaries and explore new ways to use gesso in your artistic practice.
Beyond Basic White Gesso: Exploring Options
Once you're comfortable with the basics, a whole world of gesso opens up:
- Clear Gesso: Fantastic if you want the natural canvas color or a visible underpainting to show through, but still need the tooth and protection.
- Colored Gesso: Available in various hues. Starting with a colored ground can be a really interesting way to influence the mood and color harmony of your painting. I've used black gesso for dramatic portraits and warm greys for landscapes. It's a game-changer for understanding balance in art composition from the very start.
- Textured Gesso: Some gessos include aggregates to create extra texture, which can be amazing for abstract pieces or when you want to build up heavy impasto.
Choosing the Right Gesso for Your Artistic Vision
The type of gesso you choose can have a significant impact on the final look and feel of your artwork. Whether you're looking for a natural canvas look, a colored ground, or extra texture, there's a gesso option that can help you achieve your artistic vision. Experiment with different types of gesso to find the one that works best for your project.
Creative Uses of Gesso in Mixed Media
Gesso isn't just for priming canvases. It can be used in a variety of creative ways:
- Collage Work: Use gesso to seal and protect collage elements before painting over them.
- Altered Books: Apply gesso to book pages to create a sturdy surface for mixed media art.
- Sculptural Elements: Build up layers of gesso to create three-dimensional effects on your canvas.
- Underpainting: Use colored gesso to create an underpainting that peeks through your final layers of paint.
Gesso in Mixed Media Art
Gesso is a versatile medium that can be used in a variety of mixed media projects. Whether you're working on a collage, altered book, or sculptural piece, gesso can help you create a sturdy and durable surface for your artwork. Experiment with different techniques to discover new ways to incorporate gesso into your mixed media projects.
Why This Matters for Your Art (It's More Than Just a Base)
Applying gesso might seem like a small, technical step, but it's fundamentally about respect for your materials and your art. A properly gessoed canvas means your colors will sing, your paint will last, and your creative vision won't be hampered by an uncooperative surface. It's about setting yourself up for success, allowing you to focus on the expressive part of painting without worrying about the underlying stability.
It’s one of those foundational things that, once you get it right, you barely think about it – it just works. Like those core skills in basic brushstrokes for acrylic painting, gesso application becomes second nature. And when it comes to creating art that will hopefully be cherished for years, maybe even hanging in a museum one day (I have my own museum in Den Bosch, you know!), these details truly count.
The Role of Gesso in Artistic Expression
Gesso is more than just a preparatory step; it's a medium that enhances the vibrancy and longevity of your artwork. By providing a stable and absorbent surface, gesso ensures that your paint adheres properly and retains its brilliance over time. This makes it an essential component in both traditional and contemporary art practices.
The Long-Term Benefits of Proper Gesso Application
Properly applying gesso isn't just about immediate results; it's an investment in the longevity of your artwork:
- Archival Quality: A well-prepared canvas ensures your artwork stands the test of time.
- Vibrancy: Colors remain true and vibrant, resisting fading and dulling over the years.
- Structural Integrity: Prevents cracking and peeling, preserving the physical integrity of your painting.
- Professional Finish: A smooth, well-prepared surface elevates the overall quality of your artwork, making it more appealing to collectors and galleries.
Preserving Your Artwork for Future Generations
By properly applying gesso, you're not just preparing your canvas for painting; you're ensuring that your artwork will remain vibrant and intact for years to come. This investment in the longevity of your artwork is essential for preserving your creative vision and sharing it with future generations.
Frequently Asked Questions About Gesso
Do I really need to gesso pre-primed canvases?
In my humble opinion, yes. Most commercially pre-primed canvases have a very thin layer. Adding 1-2 more layers of good quality gesso dramatically improves paint adhesion, vibrancy, and longevity. Think of it as an insurance policy for your art.
How many layers of gesso should I apply?
For most acrylic painting, 2-3 thin, even layers are ideal. For oil painting, you might want 3-4 layers to ensure good sealing. If you want an extra smooth finish, more layers with sanding in between can achieve that.
Can I use regular house paint instead of gesso?
While some artists experiment, I wouldn't recommend it, especially for fine art you want to last. House paint isn't formulated to provide the same archival quality, absorbency, or tooth as artist's gesso. It might seem like a shortcut, but it could compromise your artwork's longevity.
How long does gesso take to dry?
Each thin layer usually feels dry to the touch in 30 minutes to 2 hours, depending on humidity and thickness. However, it needs to cure for much longer – ideally overnight or even 24 hours – to fully harden before you start painting. Patience here prevents future problems.
Can I gesso over an old painting?
Yes, you absolutely can! It's a great way to reuse canvases or start fresh. Just make sure the old painting is completely dry, and apply 2-3 layers of gesso over it. Sanding might be needed if there's significant texture from the previous artwork.
What's the difference between acrylic and traditional gesso?
Acrylic gesso is flexible, quick-drying, and easy to sand, making it ideal for most modern applications. Traditional gesso, made from rabbit-skin glue and chalk, offers a unique texture but is less flexible and more prone to cracking over time.
Can I tint gesso to create a colored ground?
Absolutely! Tinting gesso with a small amount of acrylic paint can create a colored ground that influences the overall mood and color harmony of your painting. This technique is especially useful for portraits and landscapes.
How do I store leftover gesso?
Store gesso in an airtight container to prevent it from drying out. If it thickens over time, you can thin it with a little water to restore its original consistency.
Can I use gesso on surfaces other than canvas?
Yes! Gesso can be applied to a variety of surfaces, including wood, paper, and even metal. Just ensure the surface is clean and free of dust before applying gesso.
What should I do if my gesso cracks after drying?
Cracking can occur if the gesso is applied too thickly or if it dries too quickly. To fix this, sand down the cracked areas and apply a thin, even layer of gesso. Allow it to dry completely before painting.
Can I use gesso for mixed media projects?
Yes! Gesso is a versatile medium that can be used in a variety of mixed media projects. Whether you're working on a collage, altered book, or sculptural piece, gesso can help you create a sturdy and durable surface for your artwork.
How does gesso enhance the vibrancy of my paint?
Gesso provides a stable and absorbent surface that allows paint to bond effectively. This ensures that your colors remain true and vibrant, resisting fading and dulling over the years. By properly applying gesso, you can enhance the vibrancy and longevity of your artwork.
Can I apply gesso with a sponge?
Yes, applying gesso with a sponge can create a unique texture and finish. It's a great way to experiment with different techniques and achieve varied effects in your artwork.
Is gesso necessary for watercolor painting?
While gesso is not traditionally used in watercolor painting, it can be applied to create a textured surface or to prepare a canvas for mixed media techniques that include watercolor.
Can I mix gesso with other mediums?
Yes, gesso can be mixed with other mediums like modeling paste to create unique textures and effects. This can add depth and dimension to your artwork, making it more visually interesting.
What is the best way to clean gesso off brushes?
Clean your brushes immediately after using gesso with warm, soapy water. This will prevent the gesso from drying and damaging the bristles. For stubborn residue, you can use a brush cleaner or a small amount of vinegar.
Can I use gesso on fabric?
Yes, gesso can be applied to fabric to create a sturdy surface for painting. However, it's important to ensure that the fabric is tightly stretched and free of wrinkles before applying gesso. This will help prevent cracking and ensure a smooth finish.
How does gesso affect the texture of my painting?
Gesso can significantly affect the texture of your painting. Applying it thickly or with different tools can create a variety of textures, from smooth to highly textured. Experiment with different application techniques to achieve the desired effect.
Can I use gesso to repair damaged artwork?
Yes, gesso can be used to repair damaged artwork. Apply a thin layer of gesso to the damaged area, allow it to dry completely, and then sand it smooth. This will create a stable surface for touch-ups and repainting.
What is the shelf life of gesso?
The shelf life of gesso can vary depending on the brand and type. Generally, unopened gesso can last for several years if stored in a cool, dry place. Once opened, it's best to use it within a year to ensure optimal performance.
Can I use gesso to create a glossy finish?
While gesso is typically used to create a matte finish, you can mix it with a gloss medium to achieve a glossy effect. This can add a unique dimension to your artwork and enhance its visual appeal.
A Final Word on Preparation
So, there you have it. My not-so-secret guide to applying gesso. It’s not the most glamorous part of painting, I'll admit, but it’s one of the most vital. Taking the time to properly prepare your canvas is a statement – a commitment to your craft and to the beautiful artwork waiting to emerge. It’s a quiet moment of creation, even before the color touches the surface, much like the many steps in my own artistic timeline that led me here. So, next time you reach for that gesso bottle, remember it's not a delay; it's an invitation to a stronger, more vibrant artistic future. And who knows, maybe one day your work will be for sale on a website like mine for others to cherish! If you want to explore more, feel free to browse my art for sale.
Additional Resources and Further Reading
If you're eager to dive deeper into the world of gesso and painting techniques, here are some additional resources:
- Gesso: The Unsung Hero of Painting Surfaces: Explore the history and significance of gesso in art.
- Basic Brushstrokes for Acrylic Painting: Master the foundational techniques for acrylic painting.
- How to Varnish an Acrylic Painting: Learn how to protect and enhance your finished artwork.
- Understanding Balance in Art Composition: Discover the principles of creating balanced and harmonious compositions.
- The Definitive Guide to Oil Painting Techniques: Explore advanced techniques for oil painting.
- Mastering Glazing Techniques in Oil Painting: Learn how to create stunning glazing effects in your oil paintings.
Exploring the World of Art
The world of art is vast and full of possibilities. By exploring additional resources and further reading, you can deepen your understanding of gesso and painting techniques, and discover new ways to enhance your artistic practice. Whether you're a beginner or an experienced artist, there's always more to learn and explore in the world of art.
Conclusion
Applying gesso is more than just a preparatory step; it's an essential part of the artistic process. By taking the time to properly prepare your canvas, you're setting the stage for a successful and vibrant painting. Whether you're a beginner or an experienced artist, understanding the importance of gesso and mastering its application can elevate your artwork to new heights. So, embrace the process, experiment with different techniques, and enjoy the journey of creating something truly remarkable.
The Artistic Journey
The journey of creating art is a continuous process of learning, experimenting, and growing. By mastering the application of gesso, you're not just preparing your canvas for painting; you're investing in the longevity and vibrancy of your artwork. So, take the time to explore, experiment, and enjoy the journey of creating something truly remarkable.
Final Thoughts
Remember, every great painting starts with a well-prepared canvas. By understanding the importance of gesso and mastering its application, you're setting yourself up for success. So, embrace the process, experiment with different techniques, and enjoy the journey of creating something truly remarkable. Happy painting!