
Hand-Holding Techniques in Art & Painting: The Ultimate Guide
A deep exploration of the art of hand-holding techniques for painting, covering everything from brush control and grip to physical gesture and expressive mark-making. Includes practical how-tos, comparisons of classic grips, FAQs, and insights on how these techniques shape an artist's unique voice.
Hand-Holding Techniques in Art and Painting: The Secret Life of Your Brush Hand
I'll be honest with you—for the longest time, I thought holding a paintbrush was just, you know, holding it. Like a fork. You grab it, you point it at the canvas, and you get to work. It took me years of making clumsy, awkward marks to realize that my hand itself was the problem. The way I held my brush wasn't just a detail; it was the entire conversation between my mind and the canvas.
Think about it this way: every painter develops a unique handwriting—not just in their composition or color choices, but in the very DNA of their brushstrokes. The way you hold your brush becomes as distinct as your signature, a physical fingerprint that makes your work unmistakably yours. It's not something you consciously choose so much as something that emerges from the repeated choices you make under pressure. This isn't just about technical proficiency; it's about discovering the intimate dialogue between your intention and the mark it leaves behind.
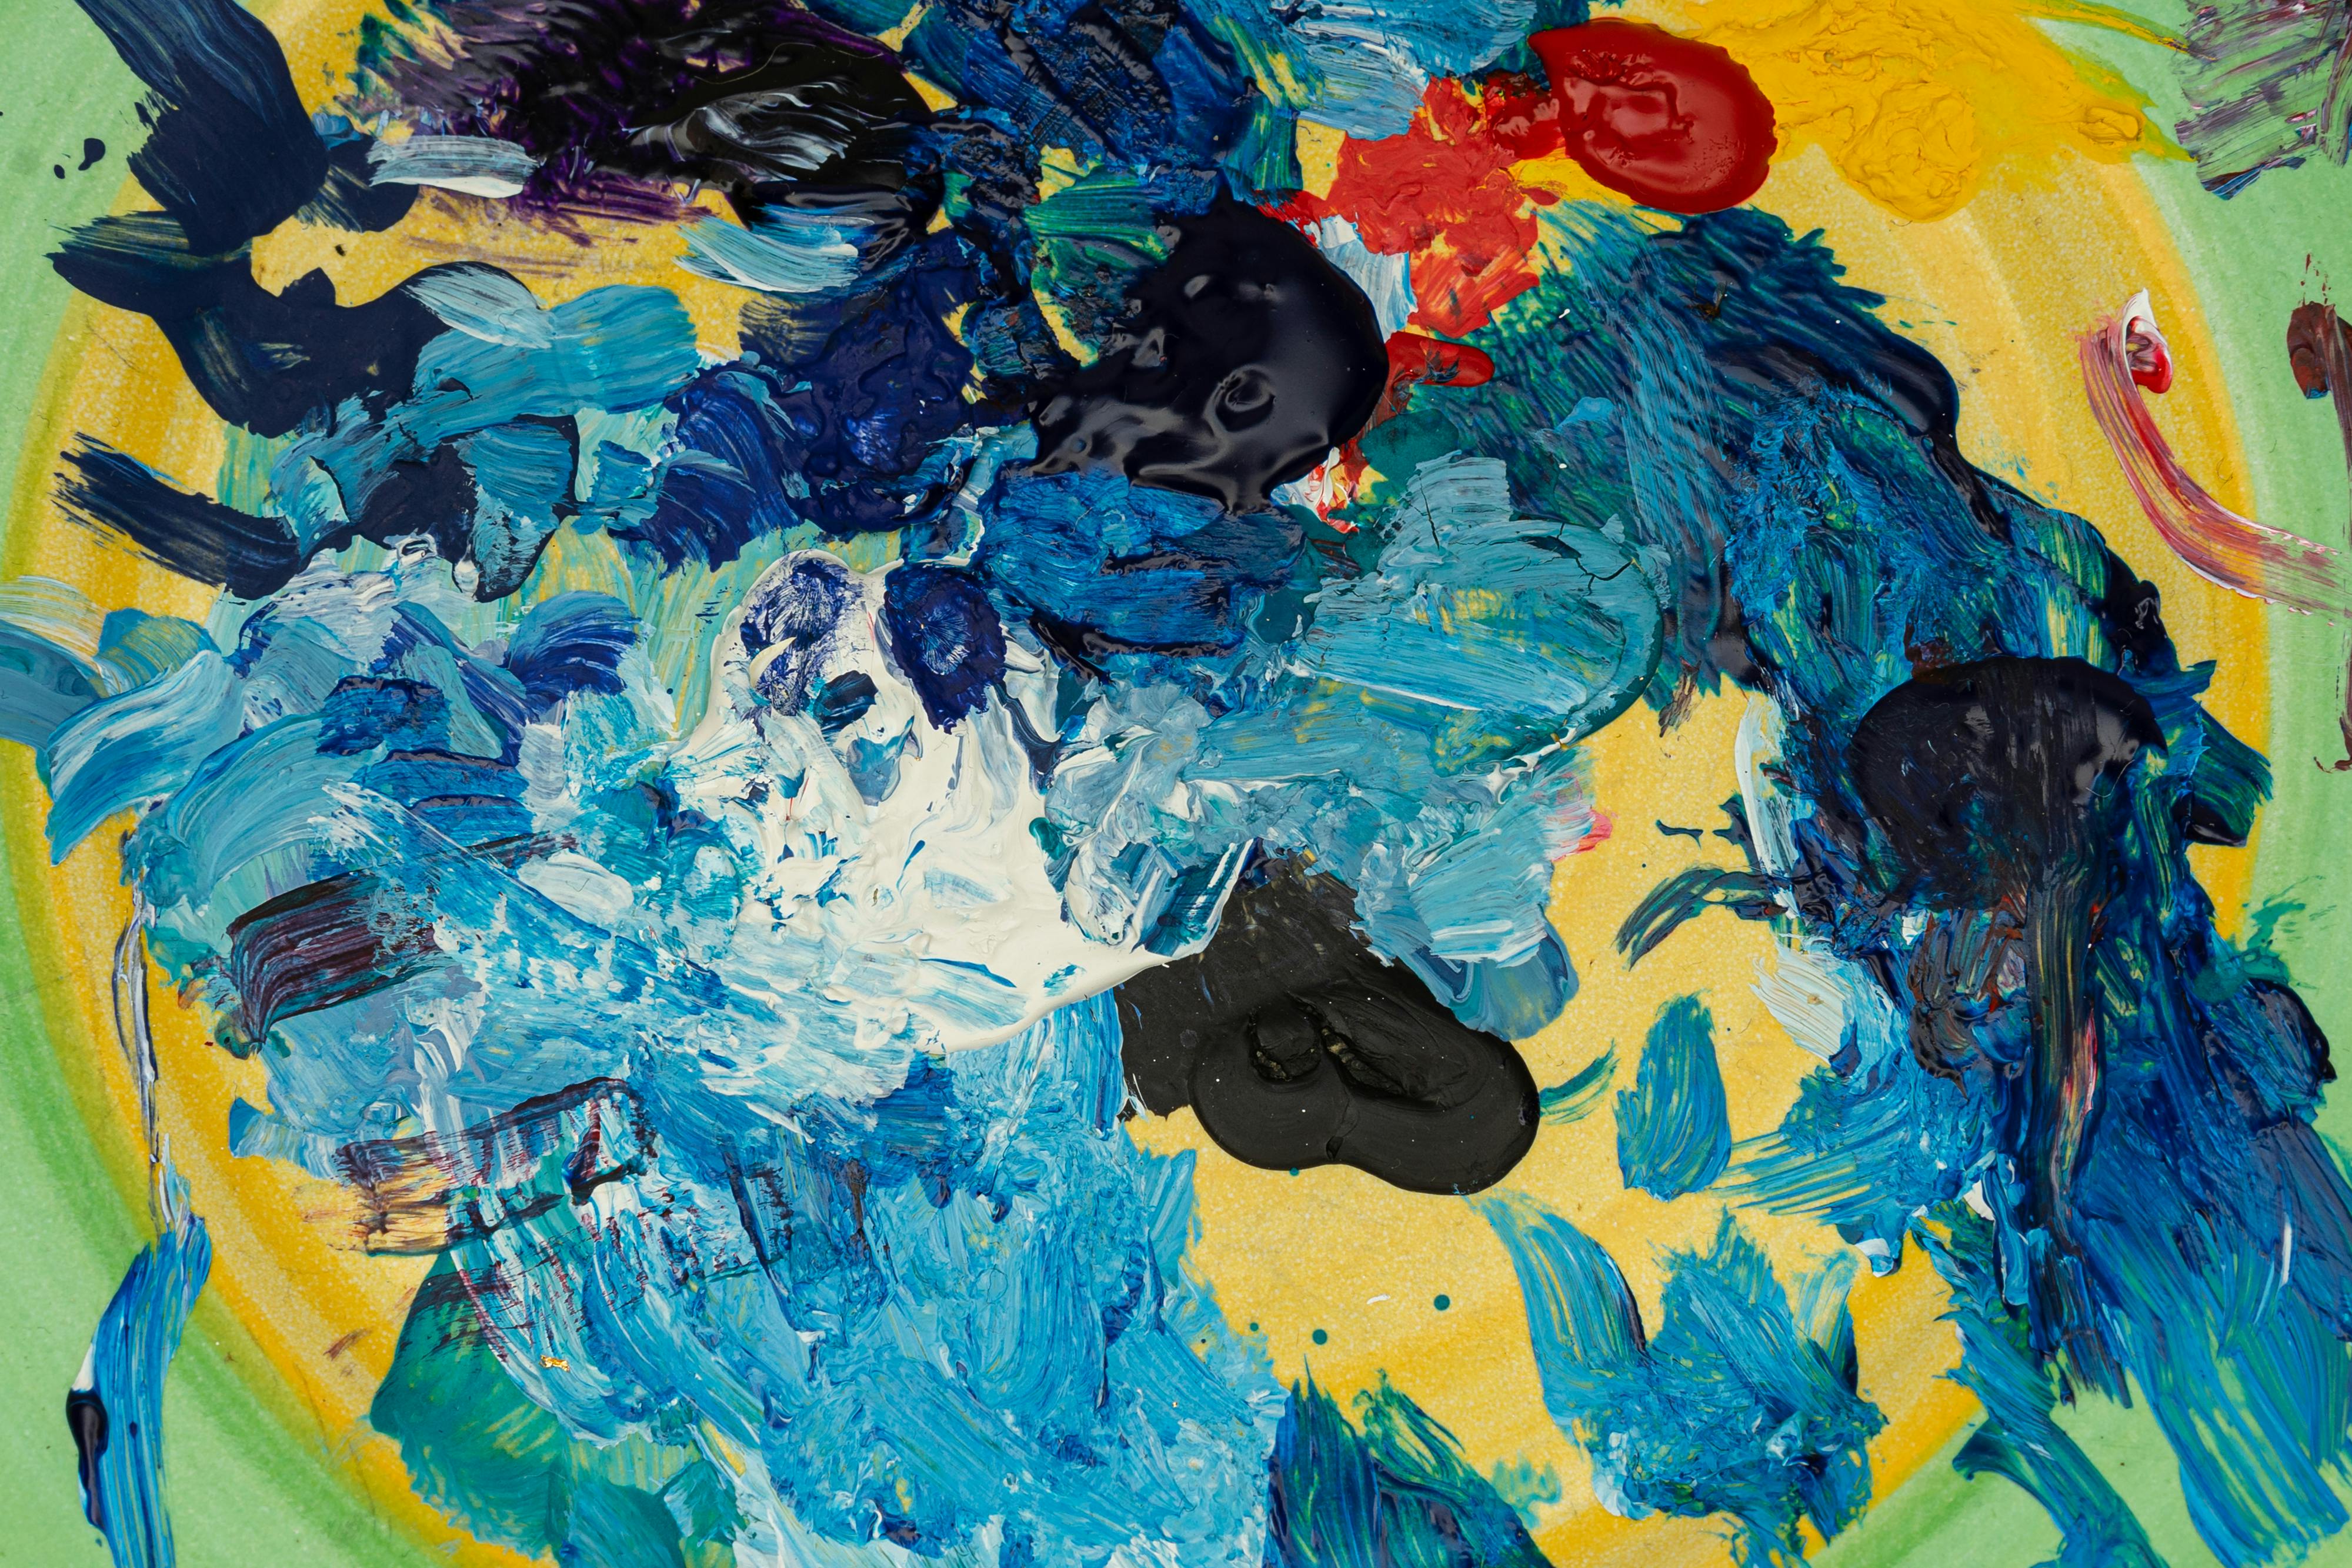
Every single movement you make carves your intention into the mark. The weight of your arm, the curve of your fingers, how tightly you clench your jaw in concentration—all of it travels down the brush handle and into the paint. A light, airy touch creates whispers on the canvas. A heavy, deliberate press shouts. Everything in between is a full spectrum of human expression, and it all starts with the quiet geometry of your hand, that final translator of every idea, every emotion, every quirk of your personality into a visible sign. Even your heartbeat, that tiny, constant tremor, can be tracked in the micro-vibrations of a long, slow line—proof that you're not just making a mark, you are leaving a fossil of your presence.

I've poured everything I know about this into one place, determined to make this the most comprehensive guide you'll find. I don't care if you've never picked up a brush or if you've been painting for decades and just realized you've been holding it wrong this whole time. We're starting from the ground up. We're not just talking about different grips; we're diving into the neuroscience of muscle memory, questioning every piece of conventional wisdom, and connecting it all back to the mark on the canvas. Think of this less as a lesson and more as a long, meandering conversation between you, me, and the brush in your hand.
Foundational Principles: Grip, Pressure, and Posture
These three forces—grip, pressure, and angle—are the pillars holding up every great painting you've ever admired. They seem mechanical on the surface, but their roots are deeply psychological. Insecurities create a tight grip. Confidence manifests as bold pressure. Tentativeness leads to awkward angles. I want you to think of them not as rules to follow, but as the three main ingredients you are constantly mixing to create a specific flavor of mark. A hurried, heavy-handed line is a different statement than a slow, gentle one, even if they both land in the same place.
Before we dive into the how, let's talk about the why. It's easy to dismiss this topic as purely technical, like learning to type. But the way you hold your brush is deeply intertwined with the kind of artist you are, or want to become. A tight, controlled grip produces tight, controlled paintings. A loose, gestural grip produces loose, gestural paintings. It's not just about mark-making; it's about psychology.

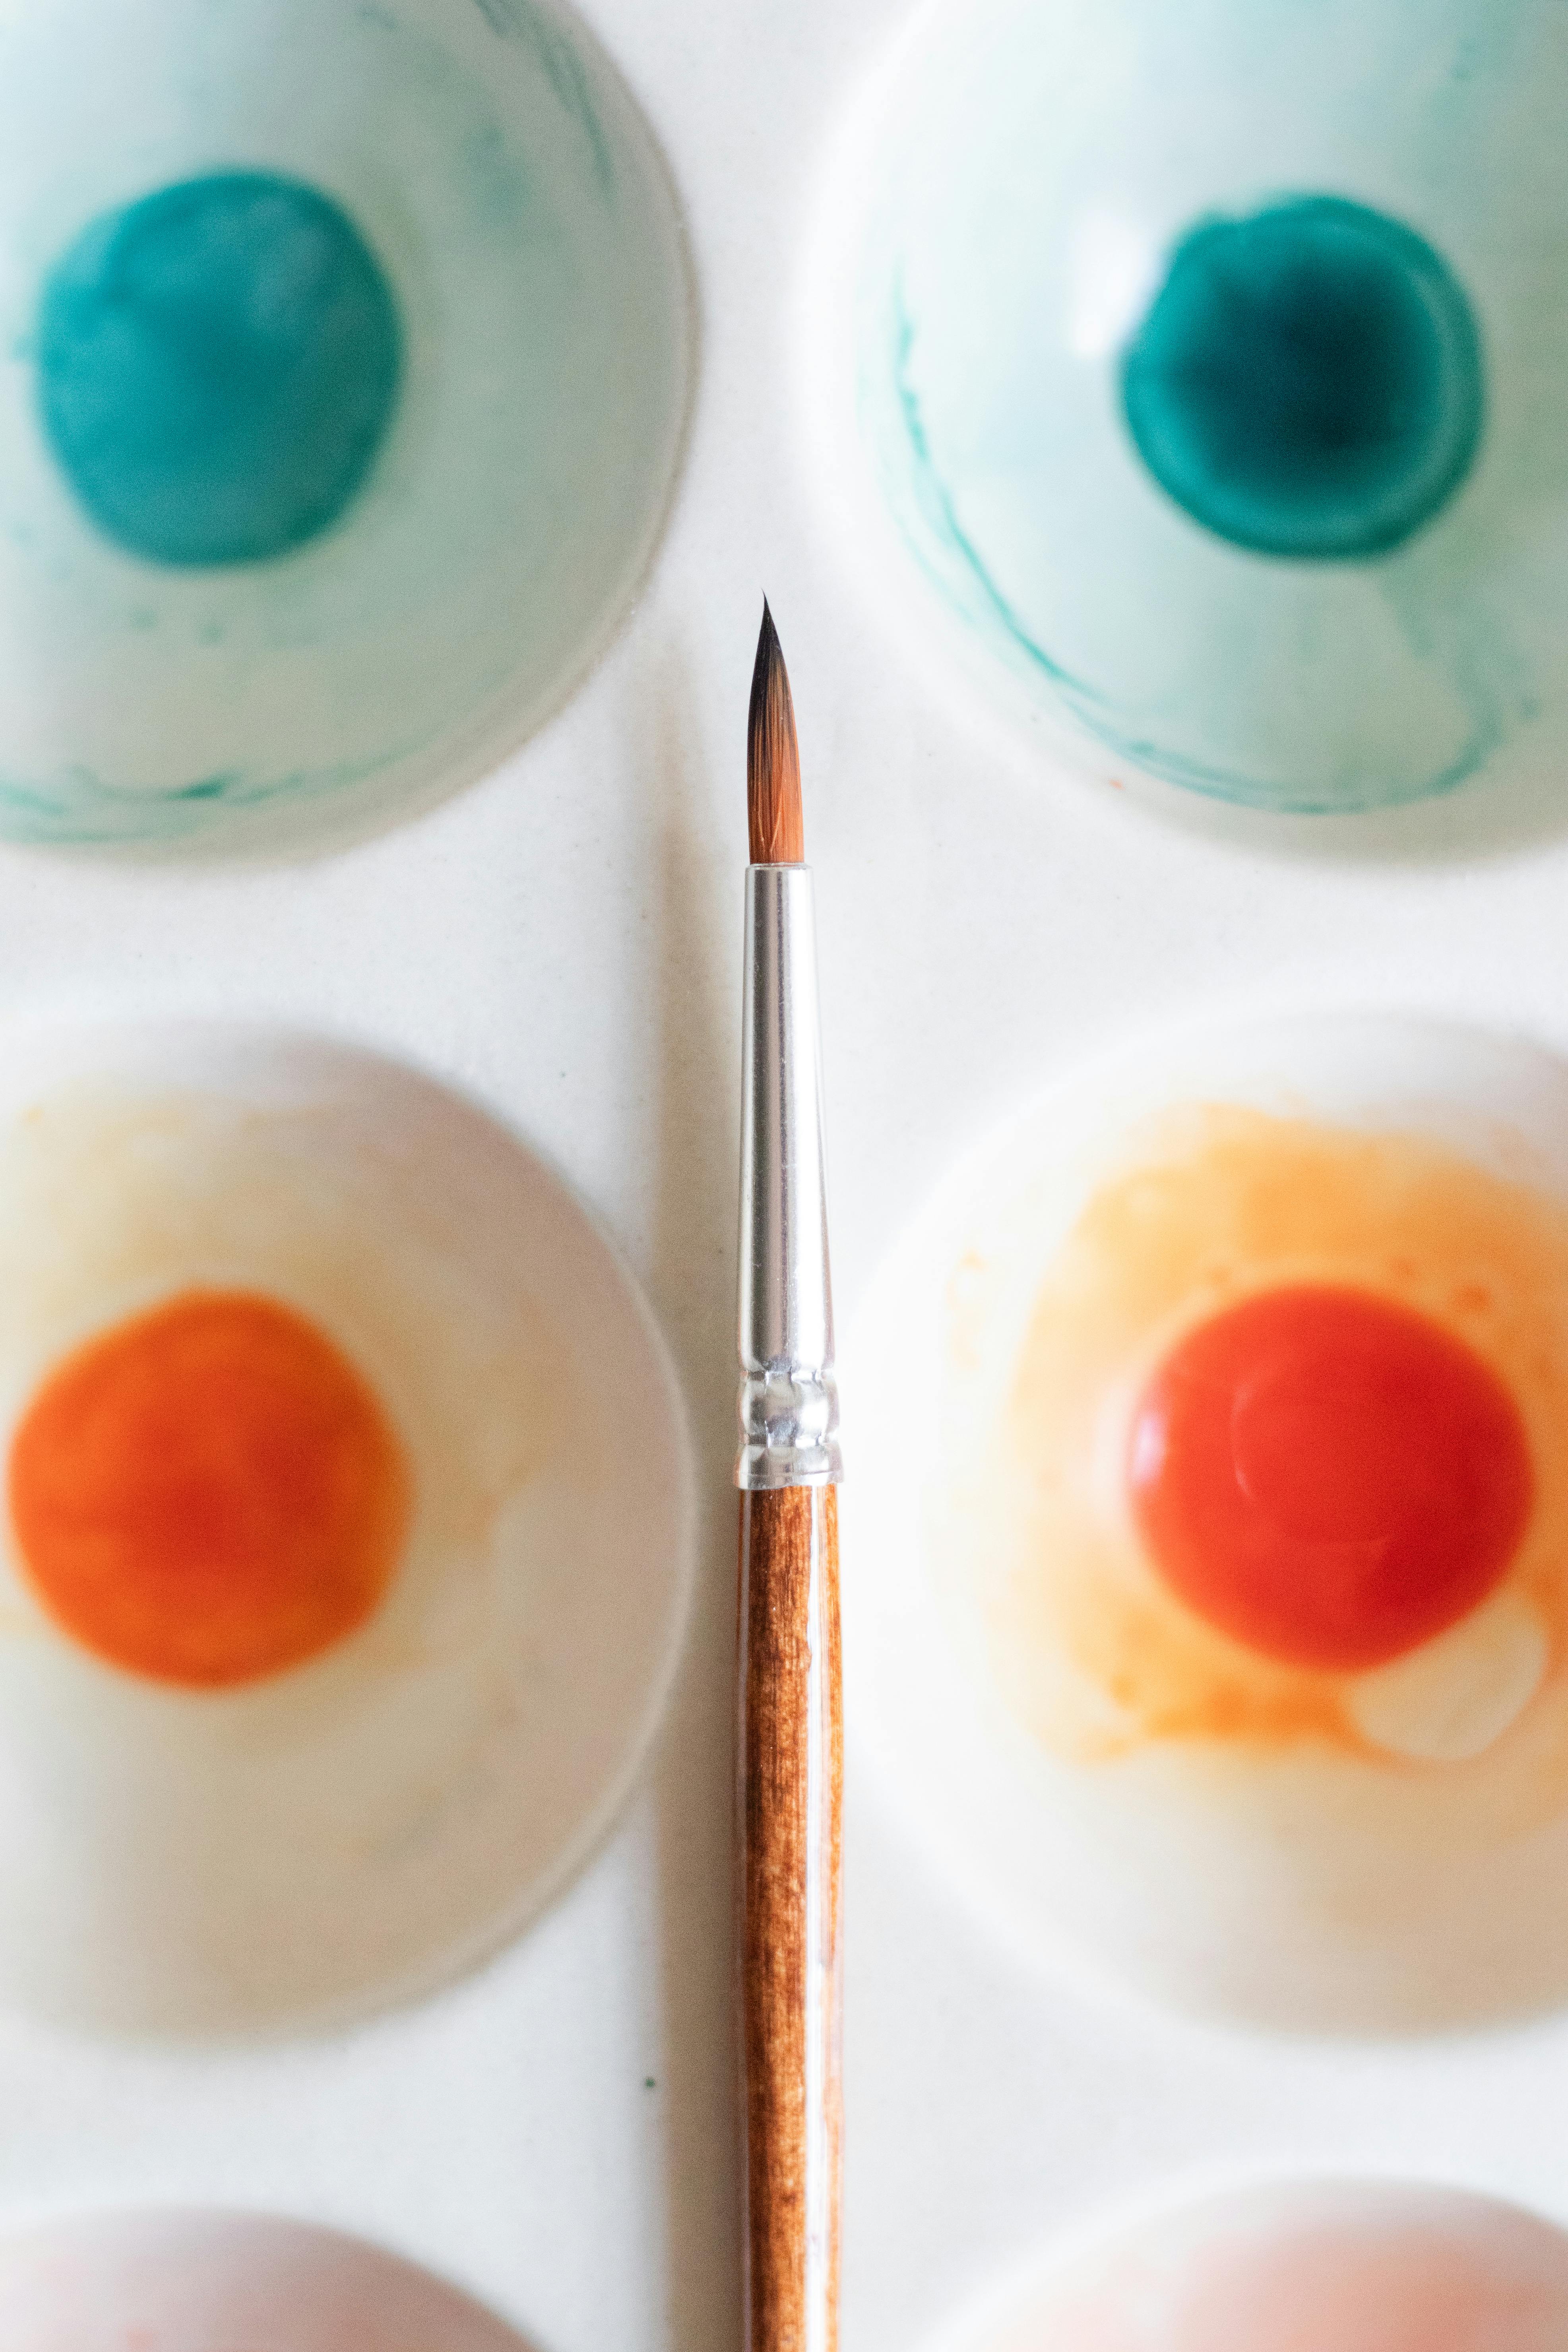
Understanding the Tools: Getting to Know Your Brush
Have you ever truly listened to a brush? I don't mean with your ears, but with your hands. The difference between a cheap, mass-produced brush and a finely crafted tool is the difference between talking to a stranger and having a deep conversation with an old friend. Your brush is not just a stick with hairs on the end; it's a complex instrument, a transducer that converts your internal state into a visible mark. It's an amplifier for your nerve impulses.
I used to have a favorite brush, an old, beat-up thing with a broken handle. I swore by it. Looking back, I realize it wasn't that the brush was magic; it was that I knew its language. I knew exactly how much pressure it could take before it splayed, how much water it would hold, how it felt when the heel was loaded with paint versus the tip. That deep, intimate familiarity—knowing its quirks, its breaking points, its sweet spots—is what you're aiming for. It's a relationship built on thousands of small, wordless interactions.

We tend to name our tools, to anthropomorphize them. A brush that behaves well is "responsive," one that doesn't is "stubborn." This isn't just sentimentality; it's the beginning of a working relationship. Think of it as a dance partner. Every single mark it makes is a physical negotiation between the pliability of the bristles, the wetness of the paint, and the texture of your surface. A stiff, synthetic bright brush with short bristles behaves completely differently than a long, soft sable brush saturated with watercolor. The tool itself suggests how it wants to be held. A mop brush basically asks to be held delicately, like you're cradling a feather, while a Filbert brush, with its rounded tip, practically begs you to use the side of the bristles to sculpt a shape.
And here's a secret: the handle matters, too. A thin, lightweight handle changes the entire perception of a brush compared to a thick, heavy one. Don't just think about the bristles; think about the whole tool holistically.
A heavy, fully-loaded brush behaves fundamentally differently than a thirsty one. A brush saturated with paint might need a firmer grip and a more upright angle to control the flow; you're trying to keep a lid on a small explosion of color. A dry, stiff brush, on the other hand, is perfect for scumbling or dry-brush techniques, and for those, you might hold it almost horizontally to let the bristles skip across the canvas texture, creating a broken, textured effect. These two brushes, even if identical in shape, demand a completely different physical vocabulary from you. Understanding this is understanding the fundamental negotiation of painting.
Knowing your brush's anatomy is the first step in this partnership.
- The Tip or "Toe": The very end of the bristles. This is your surgeon's scalpel, your calligrapher's nib. It's for precision, for signing your name, for placing the final dot of light in an eye.
- The Belly: The widest, fattest part of the brush. This is your reservoir, the part of the sponge that soaks up the most paint. It's what gives a brush its volume and expressive power when pressed.
- The Heel: Where the bristles meet the ferrule. It's often overlooked, but it's a key pivot point. Scumbling or scrubbing with the heel of a brush gives you a very different texture than using the tip.
- The Ferrule: The metal band that holds everything together. A loose ferrule is a death sentence for a brush. It should be solid, and the seam should be smooth to avoid damaging the bristles.
- The Handle: Your primary contact point. Its length, weight, and girth determine its balance and feel in your hand.
Your hand position on this anatomy is a tuning dial for control. Using the very end of the handle gives you a delicate touch, while choking up near the ferrule gives you writing-level control. Experiment with holding the same brush in different places to see how it changes the nature of your mark. For example, painting with the side of a round brush, right near the ferrule, gives you a surprisingly sharp, chisel-like edge—a fantastic trick for painting tree branches or architectural details.
The Three Core Pillars of Control
Every mark you make is a negotiation between three fundamental forces. This is the holy trinity of mark-making. Mastery isn't about perfection in any one, but about learning to conduct the orchestra, knowing when to let one section sing while the others provide subtle background harmony. I used to believe technique was about following rules until I realized it's actually about understanding the dialogue between these forces—like a jazz musician who knows the scales so well they can forget them and just play.
1. Your Grip is the primary dial for control. It's where your fingers make contact with the handle, and it determines everything from broad, sweeping movements to the tiniest, most delicate touches. The most common mistake I see is the "death grip"—holding the brush like you're hanging off a cliff. Your hand cramps within minutes, spontaneity dies, and every stroke becomes a struggle. On the flip side, a grip that's too loose, a "limp handshake," gives you no authority, leading to weak, hesitant lines. The ideal is a state of dynamic tension.
Think of it not as static clenching, but as active readiness. Imagine a tennis player's grip on the racket as they wait for a 120 mph serve. They are alert and ready, not rigid. Their grip is a flexible conduit for explosive energy, not a stiff vise. Finding that sweet spot—confident but relaxed, firm but not tense—is a lifelong practice. It's the tactile equivalent of holding a small bird; enough pressure so it doesn't fly away, but not so much that you hurt it. It's a dialogue, not a command.
2. Pressure is the soul of the mark. This is where your physical force becomes visible emotion on the canvas. Press down, and the bristles splay out, creating a wide, textured swath of feeling. Lift up, and you're left with a fine, hair-like line of inquiry. Modulating pressure mid-stroke is one of the most dynamic ways to bring life to your work; it's how a simple, flat line transforms into a calligraphic flourish that has a distinct beginning, middle, and end.
Think of it like a pianist controlling the volume by touch alone. The sheet music might say "forte," but how the pianist achieves it is what separates greatness from adequacy. It's the difference between a note that simply sounds, and a note that sings. Try this simple exercise: on a scrap of paper, draw a straight line. Now, in a single, fluid motion, draw another line that starts with heavy pressure and ends with the lightest whisper of a touch. You've just given a simple line a story, a birth and a fading echo. That's the power of pressure.
3. The Angle of Attack is the unsung hero of nuance, the secret gesture that activates a different part of the brush's personality. The angle at which the brush meets the canvas changes everything about the mark it creates. A 90-degree, straight-up-and-down approach gives you a hard-edged, dense mark, perfect for stippling or defining a sharp architectural corner. It's a definitive, stamp-like statement.
But tilt it to a 45-degree angle, and you engage the side or "chisel" edge of the brush. This is how you create softer lines, fill corners with a wash without getting a hard edge, or lay down broad, sweeping strokes with a flat brush. It's a subtle skill that many artists never consciously consider, but once you start paying attention to it, a whole new world of expressive potential opens up. You'll start to see the brush not just as a point, but as a multi-faceted tool with edges, a belly, and a heel, each capable of whispering a distinct part of your vision.
Common Hand-Holding Techniques and Grips
Let's get practical. Here are the fundamental ways artists hold a brush, each with its own personality and purpose. I like to think of them as different ways of shaking hands with your painting—a formal handshake, a firm grip, a delicate touch. The key to mastery is not to find the "right" one, but to become so fluent in all of them that switching is a subconscious act, like a driver shifting gears without thinking about the clutch.

Your Physical Foundation: The Role of Posture and Body Mechanics
Before you even pick up a brush, think about your body. Your hand is the end point of a kinetic chain that starts at your feet, runs through your core, your shoulder, and your arm. A stiff body creates stiff marks. A relaxed, engaged body makes fluid, confident ones. It's all connected. This chain is more than just anatomy; it's the fundamental wiring that translates your internal state into external expression. If your back is rigid, your whole posture is wrong, and that tension will travel down your arm and into every mark you make. Your core should be engaged—you should feel grounded and solid—but your upper body should be loose and free to move. This is the physical basis of expressive painting.
Standing gives you the most freedom. Your whole arm becomes a compass, pivoting from the shoulder. It's perfect for large, gestural work. Your feet become anchors, your legs shock absorbers, your torso the central pillar of a mechanism designed to translate broad physical energy into a controlled mark. If you're sitting, make sure you're not hunched over your work like a monk illuminating a manuscript. Sit up straight, keep the painting at a comfortable distance, and try to keep your forearm from resting completely on the table. That little bit of "float" in your arm gives you a much wider range of motion and a lighter touch, and it's often the most neglected aspect of body mechanics for artists who work at a desk.
And breathe. It sounds silly, but I've caught myself holding my breath during a tricky detail more times than I can count. Try syncing your brushstrokes to your breathing—lengthening a stroke on an exhale can create remarkable smoothness. This simple act does more than just steady your hand; it connects your autonomic nervous system to the rhythm of the work, turning a mechanical action into a form of moving meditation.

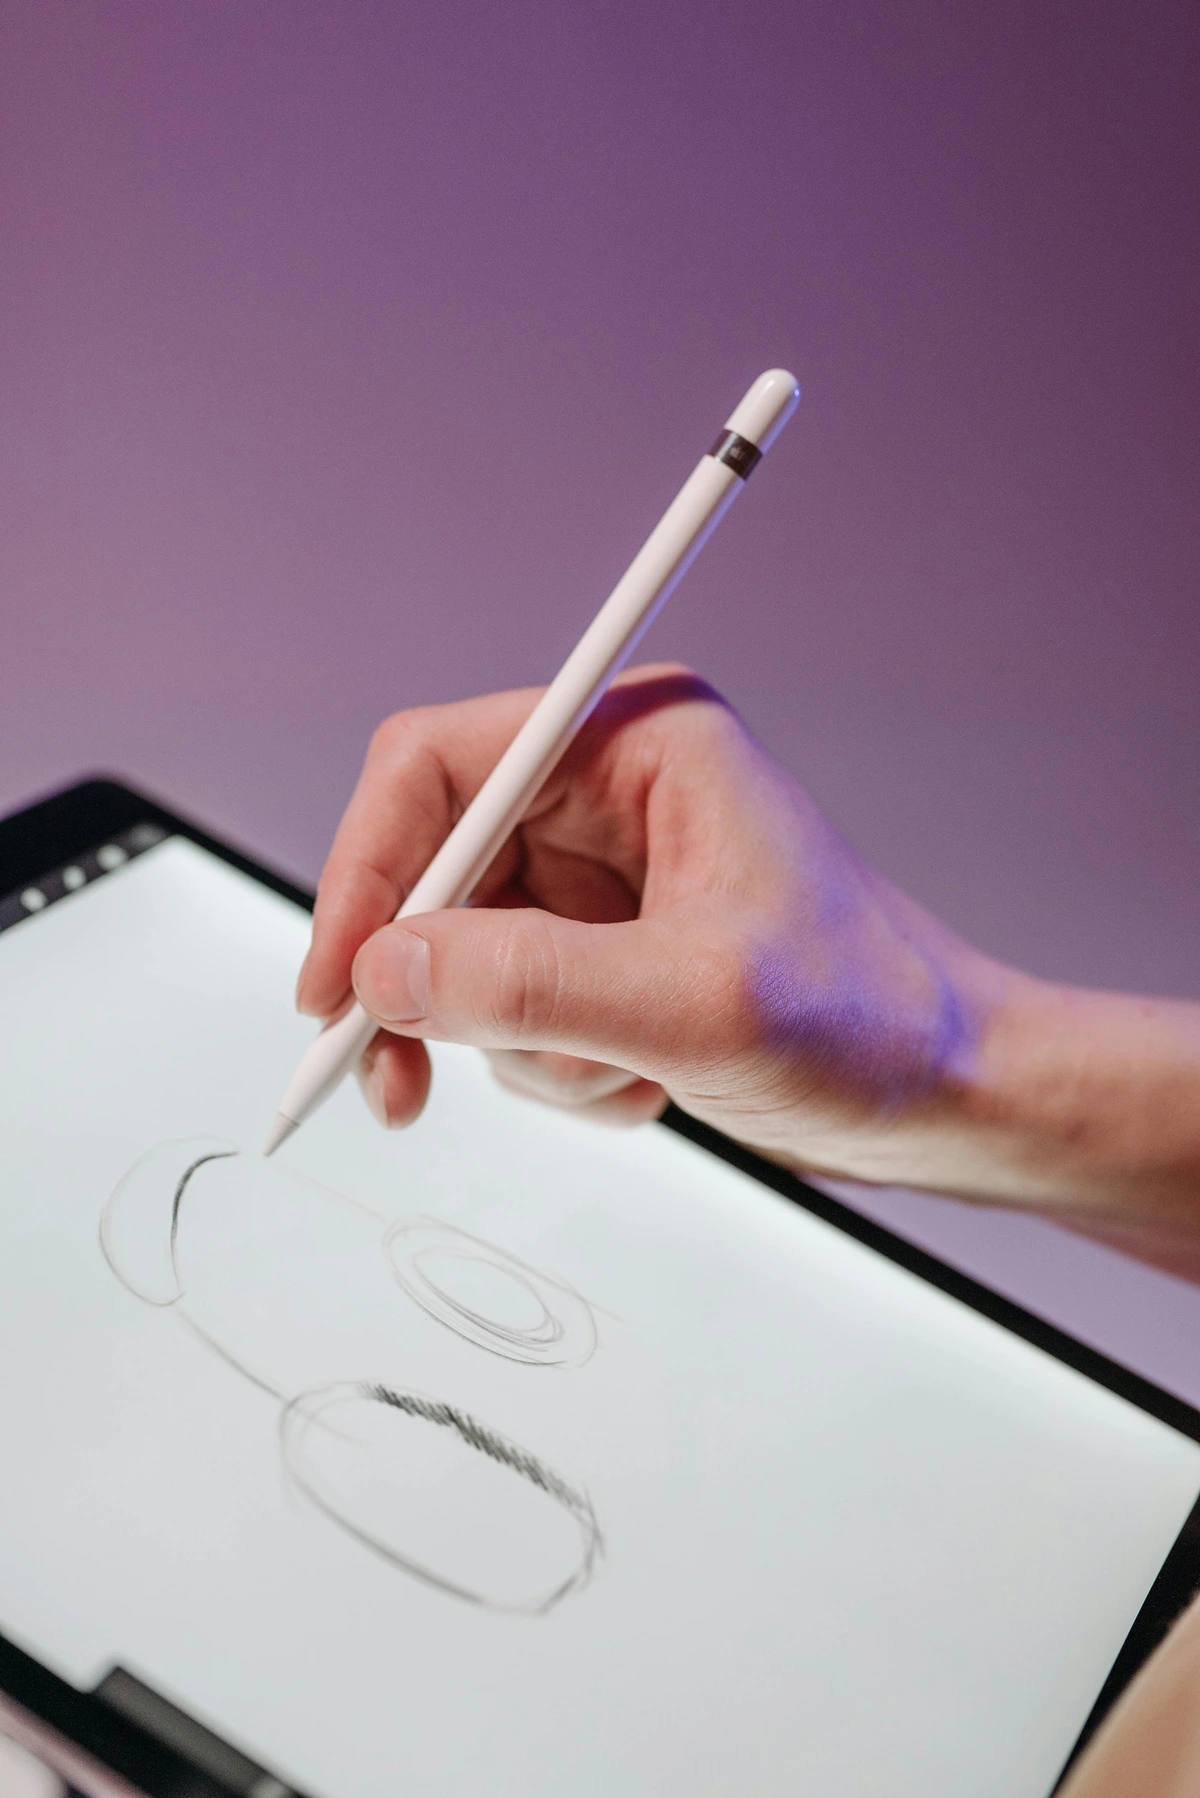
The Overhand Grip (Pencil Grip)
This is what most people default to, and for good reason. You hold the brush just like a pencil, with your thumb and index finger on opposite sides of the handle, and your middle finger providing support. It's familiar, comfortable, and offers a lot of precision for details. It connects directly to thousands of hours of muscle memory we've all built since childhood. If you've ever written a letter, held a pair of chopsticks, or used a screwdriver, your hand already knows this position.
- Best for: Fine lines, intricate detail work, signing your name in the corner, any time you need writing-level control. It's the grip for drawing on top of the painting, rather than building the painting itself.
- The feeling: It feels like writing. You're using the same fine motor skills, which is great for accuracy but can sometimes lead to a tight, controlled feel if you're not careful. Many painters get stuck here, producing incredibly detailed but ultimately lifeless work because every mark is born from a place of intense control.
- A quick tip: To avoid getting cramped up, try to keep your wrist loose and move from your elbow or even your shoulder for slightly longer strokes. Don't just hunch over and draw from the knuckles like you're finishing a particularly tricky page of homework. You can also vary your hand position on the handle. "Choking up" on the brush (holding it closer to the ferrule) offers maximum control for tiny details, while holding it further back gives you a softer, less committed touch.
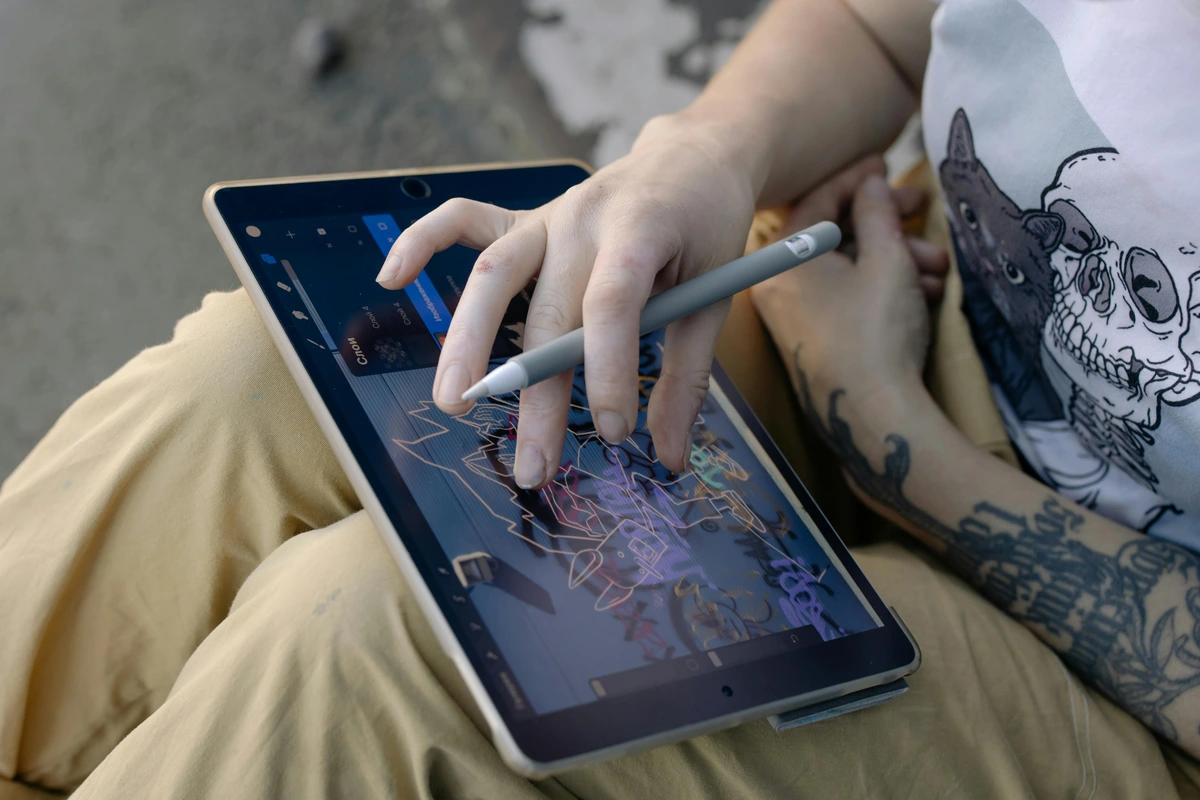
The Underhand Grip
This is where things start to get more painterly. The handle of the brush rests in the crook of your hand, passing under your palm, while your fingers rest on top of the handle. This is a grip for much broader, more physical gestures. It's also called the "mahl stick grip" because it's similar to how you'd hold a mahl stick for support, but here the brush itself becomes the instrument.
What makes this grip so transformative is how it changes your relationship with the canvas. Instead of "drawing" lines, you're "placing" paint with broad, decisive movements that originate from your entire upper body rather than just your fingers.

- Best for: Large washes, blocking in big shapes, and expressive, gestural marks. You sacrifice pin-point precision for sweeping, confident strokes. It's the ideal grip for the initial stages of a painting.
- The feeling: It feels more connected to your whole arm. Your shoulder and elbow become the main drivers, allowing for a much looser and more energetic application of paint. It can feel awkward at first if you're used to the pencil grip, but it's incredibly liberating. You're no longer "drawing" on the canvas; you're "placing" paint onto it with larger, more decisive movements.
The Extended Reach Grip
Forget the name for a second and just try this: hold the brush at the very end of the handle with just your thumb and forefinger. Your whole hand is now floating in the air, far from the canvas. This grip is all about lightness and reach. It's for laying down a delicate wash over a large area without your hand smudging the paper, or for making tentative, exploratory marks without committing too much weight.
- Best for: Covering large areas with light washes, creating soft atmospheric effects, and making initial compositional sketches. It's also essential for pastel or charcoal artists who need to avoid smudging their work.
- The feeling: It feels like you're directing the brush from afar, like a conductor's baton. The control is less about pressure and more about guiding the movement of the tool. It's a fantastic way to stay loose in the early stages. One way to think about it is that this grip gives you a "birds-eye view" of the mark as it's happening, which helps you maintain a sense of the whole composition while working on a small part.
The Touch-Up Artist's Grip (Fingertip Control)
This is the extreme version of the extended reach grip. You're not just at the end of the handle; you're pinching the very last centimetre of it. For the most delicate of touches—placing a single, perfect highlight in a wet-in-wet painting, a precise dot for an eye, or a subtle glazing stroke—this is your go-to.
- Best for: The absolute final, hair-thin details, scumbling, and adding tiny points of light. It's the grip for the mark you only get one chance to make.
- The feeling: You're coaxing the paint onto the surface rather than applying it. It requires intense focus and a completely relaxed hand. Any tension here will telegraph directly into a wobbly line.
Here is a quick comparison of these core techniques:

Let's put these core techniques into a quick-reference table. This is your cheat sheet for understanding the different dialects your brush can speak. | :--- | :--- | :--- | :--- | :--- | | Overhand Grip | Thumb and forefinger on opposite sides of the handle, like a pencil. Your most familiar grip. | Detail work, drawing, fine lines, signatures. | Fingers, knuckles, and wrist. | It feels like writing. It's the default for precision and conscious, deliberate control. | | Underhand Grip | Handle passes under the palm, with the fingers draped over the top for stability. | Broad strokes, blocking in shapes, expressive washes, gestural marks. | The entire arm, pivoting from the shoulder. | It feels more connected and physical. You're 'placing' paint, not 'drawing' it. It's incredibly liberating for large, loose work. | | Extended Reach Grip | The brush is held at the very end of the handle, between the thumb and forefinger. | Covering large areas with light washes, keeping your hand off the paper. | A light touch from the wrist and elbow. | You feel like a conductor directing the brush from afar, with a focus on guiding movement over applying pressure. It promotes a soft, atmospheric touch. | | Touch-Up Grip | Pinching the absolute tip of the handle for maximum distance. | The most delicate of final details, single dots, perfect highlights, fine glazing. | Primarily the fingers only. | It's the ultimate in fine-motor control. You feel like you're coaxing the paint onto the surface. Breathing control is key. |
Beyond the Grip: The Role of Gesture and Movement
Holding the brush correctly is only half the story. How you move is just as important. The grip is the static shape; the gesture is the dynamic action. This is where your painting transforms from a static image into a record of movement. It's the difference between a photograph of a dancer and the dance itself.
The Four Pivot Points of Movement
Every stroke you make happens by pivoting your arm around one of four main points. The one you choose dictates the character and scale of your mark. It's like shifting gears in a car; you need the right one for the speed and terrain.

1. Finger and Knuckle Movement This is the smallest, most precise pivot point. For tiny details, you barely move your hand at all, just flexing your fingers to guide the brush tip. Think of painting individual eyelashes, signing your name, or adding the catchlight in an eye. This is your highest "gear," offering maximum control for minimum distance. It's the surgery of painting, used for the final, life-giving details that can make or break a piece. The movement is so small that your breathing can affect it.
2. Wrist Movement This is your default pivot for most small to medium-sized shapes. A flick of the wrist creates a quick, energetic stroke full of life. A slow, controlled rotation of the wrist can create elegant curves, perfect for painting a piece of fruit or a flowing drapery fold. It’s the workhorse of most detailed painting, the gear you use for 90% of your day-to-day driving. It provides the perfect blend of control and fluidity for most general mark-making, and it's the primary pivot point for expressive, calligraphic lines.
3. Elbow Movement For longer, straighter lines, you lock your wrist and let your forearm pivot from the elbow. This keeps the line smooth and prevents the wobbles that come from trying to draw a long line from the wrist. This is the secret to smooth, architectural lines or laying down long, fluid branches on a tree. It gives you range without sacrificing too much control. It's the motion of a draftsman, perfect for defining structure and perspective with confidence. It's the primary pivot for deliberate, considered drawing.
4. Shoulder Movement This is the realm of big, bold, expressive gestures, the language of abstract expressionism. Here, your arm becomes a single unit, pivoting from the shoulder socket. It’s connected to your core, giving you access to the most powerful, dynamic, and fluid movements. This is your lowest gear, used for maximum torque and sweeping statements. It's how you block in the entire composition at the start of a painting without getting lost in meaningless detail. This is the full-body language of action painting, where your whole upper body becomes a compass for creating large, intentional arcs and shapes.
Energy, Direction, and Flow
A gesture in art isn't just a line; it's a line that carries energy, direction, and meaning. It's a frozen record of a physical movement. Was the stroke fast and violent, a flick of passion? Or was it slow, meditative, and deliberate? Is your stroke pushing the paint into the canvas with force, or is it skimming the surface lightly? Are you pulling the brush towards you, or pushing it away? These choices are the DNA of your artistic handwriting, the thing that makes your work unmistakably yours. The direction of a stroke can imply form; painting a sphere with curved, wrapping strokes reinforces its roundness far more than a flat application of tone. A fast, slashing stroke can convey anxiety or swift motion, while a slow, careful one can suggest stillness and contemplation.
This is what separates a good technician from a true artist. A technician can execute a perfect line. An artist knows which line—with all its imperfections, energy, and soul—is the right one for the feeling they want to convey. This is where you begin to paint not just what you see, but what you feel. It's the difference between painting a leaf and painting the feeling of a crisp autumn day. The Japanese aesthetic of wabi-sabi, the beauty of imperfection, is alive and well in a confident, "imperfect" stroke that contains the right energy.

Practical Applications and How-To
What does all this theory look like in practice? Let's walk through a few scenarios. The following are complete workflows, showing you not just the grip, but the brush choice, the posture, and the step-by-step process. We'll break down complex tasks like painting an eye into their constituent grips and pivot points. Think of these as recipes. The ingredients are your tools, the techniques are your methods, and the finished dish is the effect you're trying to achieve on the canvas.
How to Paint a Realistic Eye
This is detail work, through and through. The goal is surgical precision without the associated tension. Control, in this context, doesn't mean tight; it means decisive.

- Brush Choice: A small, high-quality round brush with a fine point. A size #2 or #4 in sable or a sharp synthetic is perfect. Make sure it has a great snap and a needle-sharp tip.
- Posture: You'll want to be seated, with the canvas or paper close to you. Sit up straight to avoid getting cramped. I often see students hunching over, which tenses the shoulder and defeats the purpose. Resting the base of your palm or pinky finger on the canvas can provide excellent stability for micro-movements.
- The Grip: Predominantly the Overhand Grip. You can choke up on the handle slightly for extra stability, with your index finger lightly resting on the ferrule. This gives you writing-level control.
- The Process:
- The Iris: Use the very tip of the brush, pivoting from your knuckles and wrist for tiny, stippling marks that create the texture of the iris. Load the brush with a slightly dry mix of paint to prevent uncontrollable flooding.
- The Eyelashes: These are all about flicking. Use a slightly diluted paint so it flows easily. Rest your pinky on the canvas for stability and flick the brush upward with a quick motion from your wrist. It's a fast, confident, single motion. Don't draw the lash; launch it.
- The Catchlight: This is where you switch to the Touch-Up Artist's Grip. Hold the very end of the brush, barely making contact with the canvas to place a single, perfect dot of white. Breathe out as you do it for maximum steadiness. If you mess up, let it dry completely before lifting it with the sharp corner of a palette knife.
Starting a Painting: Blocking In
This is my favorite part—getting the big idea down as quickly as possible. The goal is to see the composition and the major value shapes without getting bogged down in detail. This initial layer is the soul of the painting; everything else is just dressing. It sets the emotional temperature for the entire piece.
- Brush Choice: A large, soft brush like a mop brush for watercolor or a big filbert for oils/acrylics. You want to cover a lot of ground quickly. A big, floppy brush prevents you from getting stuck on small details, forcing you to think in terms of masses. My rule of thumb is to use the biggest brush you can for as long as you can.
- Posture: Stand up if you can, a comfortable distance from the easel. You need room to move. Your feet should be shoulder-width apart, your core engaged. You're not just standing; you're grounding yourself.
- The Grip: The Underhand Grip is perfect here. Let the handle rest under your palm. Your whole hand should feel relaxed, almost limp. Your arm is the engine, not your fingers. Your fingers are just there to keep the brush from flying away.
- The Process:
- Mix a Wash: Mix a large puddle of a neutral color (like Burnt Umber or Ultramarine Blue) and thin it with a medium or water to the consistency of light cream. Have way more paint mixed than you think you need; running out mid-wash is the enemy of a unified underpainting. I use a plastic cup for this, not a tiny well on my palette.
- Map the Shapes: Load your brush generously. Now, instead of drawing an outline, move your entire arm from the shoulder. Use your body to turn, creating big, sweeping arcs that map out the biggest shapes in your composition. You're not painting an object like a 'head'; you're painting the dark shadow shape that happens to be a head. The looseness of this grip forces you to see the forest, not the trees. If you mess up, wipe it off or paint over it. This stage is about speed and decisions, not perfection. Try to cover the entire canvas with these initial shapes in under 10 minutes.
Creating Texture: Grass, Hair, and Water
This is where you get to be really physical and playful with your brush. Expressive marks are all about texture and energy. Forget about painting "things"; you're painting forces. The force of wind through grass, the shimmer of light on water, the way hair catches the light.
- Brush Choice: A stiff, worn-out brush, a fan brush, a filbert, or even unconventional tools like a toothbrush for spattering. Texture is about variety.
- Posture: Standing or sitting, you need to be free to make quick, almost aggressive movements. Don't be afraid to move your whole body.
- The Grip: This varies. Use the Overhand Grip for controlled flicks, but apply it with energy. The grip itself might change mid-process.
- The Process:
- For Grass: Load the brush with a mix of greens and a bit of yellow. Hold the brush almost vertically and use a series of quick, upward flicks from the wrist. Start at the base of your stroke and "pull" the grass up. Vary the pressure so some marks are thick and some are thin. For distant grass, use a lighter touch and a more muted color.
- For Water Ripples: Use a dry-brush technique. Wipe most of the paint off your brush. Hold the brush at a very shallow angle and lightly drag it sideways across the canvas texture. The bristles will skip, creating broken, shimmering lines that suggest light on water. For the crest of a wave, use the very tip of a dry brush with a tiny bit of thick white paint.
- For Hair: Combine techniques. Use the side of a thin, dry brush to create the overall flow and direction of the hair. Then, come back in with the very tip loaded with a slightly different shade to paint individual, defining strands. Remember that the highlight is not white, but a lighter version of the hair's base color.
The Finishing Touches: Detail and Refinement
In the final stages, you're no longer building the house; you're hanging the curtains and placing the flowers. You're an editor, not a construction worker. It's tempting to keep adding, but often the most powerful statement is the one you choose not to make.

- Brush Choice: Your sharpest, smallest round brush. A liner brush or a rigger can be great for long, thin lines.
- Posture: Seated, close to the work. This is about focus. Create a little "tent" with your non-painting hand, resting it on the canvas or a mahl stick, to steady your painting hand completely.
- The Grip: The standard Overhand Grip is your primary tool, but keep the Touch-Up Artist's Grip in your back pocket for those moments of extreme precision.
- The Process: This is about decisive gestures. A tiny highlight in an eye, a sharp line on a distant building, the texture on a piece of bark. Don't noodle. Look at the area, identify the exact mark you want to make, take a breath, and then execute it in one confident motion. A single, well-placed stroke is always better than five timid, overworked ones. This is where your patience and practice really pay off. I have a personal rule: for every final detail I add, I must stop, put the brush down, and look at the painting from across the room before adding the next. It prevents me from getting lost in the weeds.
Advanced Strategies: Considerations for Different Artists
Your medium, tool, and experience level fundamentally change how you interact with your brush. What works for an oil painter laying in a thick impasto is a disaster for a watercolorist trying to preserve a delicate wash. But it goes deeper than that—your physical environment and even the scale of your work demand a completely different approach to brushwork. It's like the difference between piloting a speedboat and an ocean liner; the principles of navigation are the same, but the mechanics and feel are worlds apart. In this section, we'll look at how to adapt your approach based on scale, environment, experience, and even the specific chemistry of your chosen paint.
The Role of Scale: Life-Sized Murals vs. Miniature Portraits
The size of your canvas dictates the vocabulary of your movements. Painting a mural on a wall is a full-body athletic event. Painting a miniature is an exercise in microscopic control. The tools, the mindset, and the very language of the strokes change completely. It's a fundamentally different conversation with the surface.

- Large-Scale Work (Murals, Large Canvases):
- Grip: The Underhand Grip and modified, fist-like grips are your staples. You're often holding the brush further up the handle for leverage.
- Movement: This is all about shoulder and core movement. Your legs are your foundation, and footwork is a real part of the technique. You step into a stroke, using your body weight to apply paint consistently over a large area. An extension pole is often used, which changes the grip entirely and forces you to think about leverage and distance. You're not just moving your arm; you're often walking the length of a line.
- Brush Choice: Big. Rollers, large masonry brushes, flocking applicators, and even sprayers are part of the toolkit. You're often mixing paint by the quart, not the dab. A foam brush or a corner roller becomes a precision instrument in this world.
- Small-Scale Work (Miniatures, Tiny Canvases):
- Grip: The Overhand Grip and Touch-Up Grip are everything. Stability is paramount.
- Movement: The movement is entirely in the fingers, knuckles, and occasionally the wrist. Your breathing becomes a critical skill; many artists I know hold their breath for the final, crucial stroke. A steady hand is achieved through bracing—resting your hand, wrist, and forearm on a solid surface like a bridge or mahl stick. A magnifying glass or optivisor is often a necessity, not a luxury.
- Brush Choice: The smallest, sharpest brushes you can find. Single-hair brushes are a real thing. Kolinsky sable is prized for its ability to hold a perfect point. The handle is often short, which allows for more precise control, and the ferrule is thin to allow for maximum flexibility at the tip.
The mental state is also completely different. Large-scale work is rhythmic and physical. Small-scale work is an exercise in intense, quiet focus.
The Impact of Your Studio Setup
Your physical workspace is an extension of your body. An awkward setup creates awkward, compromised marks. Think of your studio not as a room, but as an instrument you are tuning to play your best work. Every element should be optimized to reduce friction between the initial idea and its final execution on the canvas.
- Easel Height and Angle: The position of your canvas is critical. For detailed work, a more upright easel brings the canvas closer to you. For large washes in watercolor, a flat or slightly tilted surface is better to control the flow of pigment. An H-frame easel allows you to adjust the angle dynamically. The goal is to have your brush meet the canvas at a natural, comfortable angle for the task at hand. I prefer an easel that can go from vertical to nearly horizontal—it's like having multiple studios in one.
- Lighting: This is a physical issue, not just a visual one. Bad lighting makes you hunch over, craning your neck to see, which leads to a tense shoulder, a cramped wrist, and tight, tentative marks. Good, consistent lighting that illuminates your canvas without glare allows you to sit or stand upright, keeping your whole body relaxed and ready for fluid motion. A combination of north-facing natural light and a high-CRI adjustable lamp is the gold standard.
- Your Palette: Is it in a comfortable, easily accessible spot? If you have to twist your body or reach awkwardly every time you load your brush, you're breaking your flow and introducing tension. Arrange your tools within a comfortable "bubble" that you can access without strain. This also includes your water jars, mediums, and paper towels. Every stretch is a break in concentration.
Advice for Beginners: Building a Foundation
If you're just starting out, the sheer amount of information can be overwhelming. My advice is to focus on one thing at a time.
- Embrace the Pencil Grip: The overhand "pencil" grip is your comfortable home base. Master it. Understand how it feels to draw a line, paint a small shape, and fill in a tiny area. Get so comfortable with it that you don't have to think about it. But know that it's a starting point, not a destination. It's your foundation, the place you can always return to when a more experimental grip feels uncertain.
- Experiment Relentlessly: Once you're comfortable, commit to breaking your own habits. Every time you paint, force yourself to use the Underhand Grip for the first ten minutes. It will feel clumsy and wrong. That's the point. This is how you build a broader visual vocabulary and break out of making tight, timid marks. Try a "grip of the day" where you pick one technique and stick with it for an entire session. This enforced awkwardness is the fastest route to growth.
- Focus on the Mark, Not the Object: Don't worry about painting a "tree." Worry about painting the specific mark that creates the feeling of the tree's bark. Is it a flick? A drag? A dot? Focusing on the physical action of the mark-making removes a huge amount of anxiety and lets you focus on the craft. This shift from representational thinking to action-based thinking is one of the most important leaps a new artist can make. It liberates you from the tyranny of the subject and allows you to focus on the pure language of paint.
Medium-Specific Techniques: Oil, Acrylic, and Watercolor
Your chosen medium comes with its own set of rules and freedoms. Each one demands a slightly different conversation with your brush, and misunderstanding this is where many artists hit an unnecessary wall.
Oil and Acrylic Painters: You work with a medium that allows for decisive physicality. The long open time of oils invites a direct, physical engagement, while the quick-drying nature of acrylics demands a different kind of decisiveness. Both allow for aggressive techniques like impasto and sgraffito. Don't be afraid to press hard, to scumble with a dry brush, or to use the wooden handle end of the brush to scratch fine lines into wet paint (a technique called sgraffito). You can layer, scrape away with a palette knife, and build up texture (impasto) in a way other mediums don't allow. For acrylics, remember they dry darker and are permanent once dry, so your window for blending is much shorter than with oils, which demands a different kind of decisiveness.
Watercolorists: Your relationship with the brush is a delicate dance of control and spontaneity. Because the paint is so fluid and dries permanently, your approach to pressure is different. The brush should be coaxed, not forced, and mastering the damp-but-not-dripping state is a lifelong pursuit. Watercolor is a medium of transparency and flow, and your brushwork should honor that. Modulating pressure is key—a light touch creates a whisper-thin line, while more pressure releases a flood of pigment. The Touch-Up Artist's Grip and the Extended Reach Grip are your best friends. They give you the delicate control needed for glazing, lifting, and final details. And never, ever forget to test your brush's wetness on a paper towel before it touches the paper. A common mistake is using a brush that's too wet, which leads to blooms and backruns—sometimes a happy accident, often a frustrating mess. Your brush should be damp, not dripping.
Ink and Sumi-e Painters: For those working with ink, particularly in disciplines like Japanese Sumi-e or Chinese calligraphy, the brush hold is everything. The brush is often held vertically, with the elbow held high off the table. This isn't just tradition; it's the most efficient way to allow the resilient, natural-hair brush to spring back into shape after each stroke. The entire philosophy is captured in the making of a single, perfectly executed mark. You cannot fake it, you cannot go back. It is a record of a single moment in time, a statement of presence. The focus is on the controlled release of ink through a combination of pressure, speed, and lift. A single stroke can go from a wide, inky swath to a hair-thin line, all based on how you control the pressure and angle. A vertical hold allows the bristles to spring back into shape naturally, giving each stroke a living pulse. The entire philosophy is captured in the making of a single, perfectly executed mark. You cannot fake it, you cannot go back. It is a record of a single moment in time.
The Problem-Solving Artist: Troubleshooting and Diagnostics
Even with the right technique, things can go wrong. These are the most common problems and their practical solutions. Think of this section not as a list of fixes, but as a diagnostic manual for your own body and tools.

My hand gets so tired and starts cramping when I paint. What am I doing wrong? This is the classic sign of the "death grip." You're holding the brush way too tightly, tensing muscles that don't need to be engaged. Consciously try to relax your hand between strokes. Literally shake it out. Hold the brush as if it's a small bird—with enough pressure so it doesn't fly away, but not so much that you hurt it. It also helps to take regular breaks, stretch your hands, and ensure your posture isn't forcing your muscles to compensate. The problem often starts far from the hand itself; a hunched shoulder can lead to a tense wrist. Beyond the mental cue, it's about building endurance. Your hand is a complex instrument with many small muscles that need training. Do simple exercises like squeezing a stress ball or stretching your fingers and wrists before you start painting. Over time, the muscles will strengthen, and you'll be able to maintain a relaxed grip for longer. Also, ironically, sometimes a lighter brush can cause more cramping as you over-grip to compensate for its lack of heft. Experiment to find a tool that feels balanced in your hand. The goal is to build the specific muscular endurance required for sustained creativity.
I can't make a straight line, they're always wobbly. How can I make them smoother? A wobbly line is almost always a slow line that originates from the wrist. For a smooth, long line, you need two things: speed and a larger pivot point. First, try locking your wrist and moving from your elbow. For an even smoother line, lock your elbow and pivot from your shoulder. The faster the motion, the less your body's natural micro-shakes will have time to register on the canvas. Practice by drawing a line with a pencil on a piece of paper, first slowly from your wrist (notice the wobble), then quickly from your shoulder (notice how it smooths out). A great exercise is to draw 50 lines as fast as you can across a page, using your shoulder. They won't be perfect, but they'll train your arm for fluidity. Another professional trick is to use a straight edge as a guide, but hold the brush at an angle that prevents paint from seeping under the edge. You can also lightly sketch the line first with a pencil, then use that as a visual guide for your confident, fast brush stroke. And remember, sometimes a slightly 'imperfect' line drawn with confidence has more life than a perfectly straight one drawn with hesitation.
I feel like I have no control. The paint never goes where I want it to. Why? This is often a problem of looking in the wrong place. If you're staring at the brush itself as you paint, you'll be clumsy. Instead, fix your eyes on the destination—the point on the canvas where you want the stroke to end. Your hand-eye coordination is remarkable; point your finger at an object across the room without looking at your finger. Your brain knows where it is. It's the same with a brush. Trust your hand and focus on the target, not the tool. This engages your proprioception, your body's innate sense of spatial awareness, and allows for far more fluid movement. Beyond that, it's a question of knowing your materials. Is your paint too thin and runny? Add a thickener. Is your brush too soft and floppy for the task? Choose a stiffer one. Control comes from the harmony between a confident hand and well-understood tools. I often tell students: you can't control what you don't understand.
Common Problems and Advanced Fixes
Here are a few more specific issues you might encounter, along with their deeper causes and solutions.
My washes are always uneven and blotchy. This is the classic watercolor headache. You're likely not working fast enough, your paper is the wrong type, or your brush is too small. A wash needs to be laid down quickly and confidently before the first part starts to dry, at which point it creates a hard edge (a "cauliflower" or "bloom"). Use a large brush—a size 12 or larger is ideal for anything beyond a tiny area. Mix more paint than you think you need; running out mid-wash is a disaster. For watercolor, hot-pressed paper is much less forgiving for even washes, whereas cold-pressed or rough paper is more absorbent. A thirsty brush that doesn't hold enough paint and water is also a common culprit. Pre-wetting the paper can help the wash flow more evenly, but it changes the character of the mark. It's a common beginner mistake to treat a wash like a series of small brushstrokes; instead, think of it as one continuous, decisive pour of color from a fully loaded brush.
My brush keeps losing its point. This is a sign of poor quality bristles or, more often, of pressing too hard too early in a stroke. You can't bully a brush into submission; you have to coax it. Start with the lightest touch and increase pressure as needed, rather than slamming the brush down from the start. A brush with a good 'snap'—the ability to spring back into its original shape—is what you need. It's the sign of high-quality bristles that have resilience.
Cheap synthetic brushes are notoriously bad for this; they're like overcooked pasta, limp and lifeless. Investing in a good Kolinsky sable or high-quality synthetic alternative for your detail work makes a world of difference. After each stroke, get into the habit of re-pointing the brush on your palette with a little twist between your fingers. It's like re-aligning the fletching on an arrow. And never, ever let paint dry in the ferrule—it's the quickest way to ruin a perfectly good brush.
I can't get crisp edges when I need them. This is a result of hesitation and a slow stroke. A crisp edge requires a confident, single pass. The moment your brain says 'I need to fix that little bit,' you've probably already ruined the edge. If you go back over a still-wet edge to "fix" it, you'll just mush the paint and create a blurry, muddied line. Wait for it to dry completely, then come back with a new, confident stroke. Using painter's tape is also a valid technique for getting impossibly sharp lines in acrylics or oils. The real key, though, is training your arm to make that perfect stroke in the first place, which comes back to practice and trusting your mark.
I feel like all my strokes look the same. This is the artist's equivalent of writer's block, and it's a surefire sign that you've fallen into a physical habit. It means you're unconsciously using the same grip, the same pivot point, and the same pressure for everything. You've stopped making conscious decisions and are just repeating a familiar motion. The way out is to actively break your pattern.
Set yourself a challenge: for the next ten minutes, you are forbidden from using the Overhand Grip. Or, try painting a subject using only your shoulder to move the brush. Or paint a study using only two colors. These self-imposed limitations force you to find new solutions, and in doing so, you discover new ways of making marks. For oil and acrylic painters, loading your brush is a skill in itself. You don't scoop up a dripping mountain of mashed potatoes if you only want a bite. Take only what you need, and wipe off what you don't. Loading intentionally for the mark you want to make—a fine point for a line, a full belly for a wash—is a game-changer for control. Your brush should be a chisel, not a shovel. Limitation is the mother of invention here. You don't scoop up a dripping mountain of mashed potatoes if you only want a bite. Take what you need, and wipe off what you don't. Developing this simple habit—loading intentionally for the mark you want to make—is a game-changer for control. Your brush should be a chisel, not a shovel.
Frequently Asked Questions (FAQ)
Here are some of the most common questions artists have about brush holding and control, answered in detail.
Is there one 'correct' way to hold a brush? No, absolutely not. And the insistence that there is one 'right' way is probably the single most damaging idea for developing artists. Think of grips as tools in a toolbox. There is no single 'correct' tool for building a house; you use a hammer for nails and a screwdriver for screws. The Overhand Grip is your precision screwdriver, great for detail. The Underhand Grip is your framing hammer, excellent for big, bold strokes. The goal is to become fluent enough with all of them that you can switch between them without thinking, using the one that best serves the mark you want to make. Don't just stick to one. Force yourself to experiment until each one is comfortable. The goal isn't to find one perfect grip and stay there, but to achieve subconscious fluency across all of them, allowing your intent to dictate your posture without a second thought. Fluency, not dogma, is the key.
My hand gets tired and cramped after a short time. What can I do? This is the "death grip" problem. You're holding on for dear life, tensing every muscle in your hand and forearm. The solution is both physical and mental. Mentally, you need to consciously relax your hand between strokes. Physically, you can build endurance with simple exercises like squeezing a stress ball or stretching your hands before a session. Also, make sure your overall posture is good. A hunched back leads to a cramped shoulder, which leads to a tense arm and a tight hand. The problem often starts far from the hand itself.
How do I keep my straight lines from looking wobbly? A wobbly line is a slow, hesitant line, a record of uncertainty. The fix is a combination of speed and a larger pivot point. Instead of drawing a long line from your wrist, lock your wrist and draw it using a smooth, quick motion from your elbow. For the absolutely straightest lines, pivot from your shoulder. The faster you move, the less time your body's natural micro-shakes have to register on the canvas. It feels counter-intuitive, but confidence and speed smooth out the imperfections. A line drawn with a fast, committed gesture from the shoulder will almost always be smoother than one drawn slowly and carefully from the fingers.
Does brush quality really matter that much? Yes, but not in the way you might think. A good brush isn't a magic wand that makes you a better painter. What a good brush gives you is consistency and responsiveness. A cheap brush might lose its point, shed bristles, or have a weak handle that wobbles. A good brush will hold its shape, spring back after a stroke, and reliably do what you ask of it. This reliability allows you to trust your tools and focus on your technique. For a beginner, one good quality mid-range brush is a better investment than a whole set of cheap ones. I'd rather have one excellent #8 round than ten mediocre brushes. That said, don't be afraid to use a cheap brush for rough work like applying gesso or scrubbing in texture—just know its limitations. A $2 chip brush is a fantastic texture tool.
I want to loosen up my painting style. How do I do that? Loosening up is about ceding control, which is terrifying for many of us. But it's essential for developing an expressive style. Start by changing your tools and scale. Work much larger than you're used to, and use bigger brushes. This physically prevents you from getting lost in details. Try time-limited exercises: set a timer for one minute and try to paint a simple object before it goes off. This forces you to make quick, decisive, and inevitably looser marks. Most importantly, give yourself permission to make a mess. Some of your best work will come from 'mistakes' that you learn to embrace. A great exercise is to paint a study using only a large house painting brush—you'll be amazed at the results. It forces you to simplify, which is the heart of a loose style.
What is the most important thing to practice for brush control? This is the secret, the one skill that underpins all others, more important than any specific grip or brand of brush. It's training your hand-eye coordination. This means training yourself to look at your destination, not your brush. When you draw a line, don't watch the tip of the brush. Look at the point where you want the line to end, and let your hand figure out the path. It feels weird at first, but your brain is incredibly good at this—it's how you can point at something across the room without looking at your own finger. You have an innate sense of where your body is in space called proprioception, and this skill teaches you to paint from that sense.
A great drill is to place two dots on a page and practice drawing fast, straight lines between them without looking at your hand. This single skill will do more for your precision than any other exercise. It should be a daily warm-up. Trusting your hand to get there frees your eyes to focus on the bigger picture, and it fundamentally separates the wobbly control of a beginner from the decisive, fluid control of an expert.

The Evolution of an Artist's Hand
As you progress on your artistic journey, your relationship with the brush will evolve through distinct phases. Recognizing which phase you're in can help you understand what to focus on next.

- Phase 1: The Novice (Focused on the Object): You are focused on what you are painting. Your hand is a clumsy, untrustworthy tool that never quite does what you want. Your "death grip" is strong, and you're just trying to get the shape to look somewhat like a tree or a face. The goal here is to build basic comfort and control. Every stroke is a struggle against the tool.
- Phase 2: The Technician (Focused on the Tool): You become fascinated with technique. You practice different grips, strokes, and brush types. You focus on producing a "good" mark—a line with a beautiful taper, a perfectly graded wash. The craftsmanship is paramount, but the art can feel a bit stiff or academic. This is a crucial learning period where you build your vocabulary. You learn to make the brush sing, but you're still just playing scales.
- Phase 3: The Artist (Focused on the Effect): At this stage, technique becomes subconscious. You no longer think, "I will now use an Overhand Grip." Instead, you think, "I need a delicate line here," and your hand automatically chooses the right grip and movement to achieve it. Your focus shifts from the tool and the technique to the final effect on the canvas—the emotion, the atmosphere, the story. This is when your voice truly begins to emerge. You're no longer playing scales; you're now playing a melody.
- Phase 4: The Master (Focused on the Feeling): For a master, the brush is not just a tool but a sensory extension of their own body. They feel the resistance of the canvas, the flow of the paint, and the spring of the bristles as a direct physical sensation. They are not just making marks; they are feeling their way through the painting. The line between thought, feeling, and action dissolves completely. The tool ceases to exist as a separate entity, and the artist is in a direct, unmediated conversation with the surface of the work.
The Final Mark: Your Hand as Your Voice
In the end, this entire exploration comes down to a simple, profound idea: your brushwork is your artistic voice. All this talk about grips and angles and pressure isn't about following a set of rigid rules. It's about building a rich vocabulary so that when you have something to say with your art—something nuanced, energetic, quiet, or bold—your hand knows exactly how to say it. It's about shifting from trying to control the brush to allowing the brush to become a transparent extension of your will.
Think of it like this: a novice speaker can convey a basic idea, but a poet has a thousand shades of meaning at their disposal. In the same way, the difference between a timid beginner and a master is not just what they see in their mind, but the immense library of physical techniques they can call upon to translate that vision into reality.
Your hands are the final, critical translators. The way you hold your brush is as unique as your signature, a physical manifestation of your thoughts. Technique isn't about rules; it's about having more options. Once these movements become second nature—a part of your muscle memory—they cease to be something you think about. They simply become part of how you speak visually, allowing you to focus entirely on the content and emotion of the work. You move from thinking about the brush to thinking with it.
By paying attention to these small, physical truths, you give yourself more ways to bring your inner world to the surface. The quiet conversation that starts in your mind can finally flow, unimpeded, through your arm, and out onto the canvas. This is where craft transcends technique and becomes something else entirely—a kind of poetry written in paint.
The Science Behind the Stroke: Proprioception and Muscle Memory
Let's get geeky for a moment, because what's happening between your brain and your hand is nothing short of magical. It's easy to think of brush control as a purely conscious skill, like typing or playing a scale. But the real magic happens when you stop thinking.
This is the domain of proprioception—your body's silent, sixth sense of self-awareness. It's the internal map that tells you where your hand is in space without you having to look. When you reach for a cup in the dark, that's proprioception. It's this internal GPS that allows a seasoned artist to strike a perfectly placed dot of white for a catchlight in an eye without consciously mapping the trajectory. When you make a confident brushstroke while staring at the destination on the canvas, not the brush itself, that's proprioception doing the heavy lifting. It's the physical intelligence that allows your body to translate a mental image into a physical reality on the canvas, bypassing conscious, clumsy instructions like 'move finger three millimeters to the left'.
Muscle memory is what happens when you've trained this sense through relentless repetition. But it's not just memory; it's a complete bypass of conscious thought. It's the difference between a novice driver white-knuckling the wheel and a racing driver who feels the car as an extension of their own body. At first, holding a brush in the Underhand Grip feels alien and awkward. You're clumsily aware of every joint. But after hours of practice, your shoulder, elbow, and wrist learn the geometry of that movement. The neural pathways become so well-worn that the movement becomes automatic. This is why professional athletes don't think about how to throw a ball mid-game; they just throw it. It's why a concert pianist's fingers fly across the keys without conscious command. And it's how you, the artist, will eventually be able to execute a complex series of washes and details, with your conscious mind entirely focused on the emotion of the piece, not the mechanism of applying paint.
Understanding this has profound implications for how you should practice. Don't just paint; train your proprioception. Close your eyes and draw a circle on a piece of paper. Now try a square. It will be terrible, but you're learning to trust a deeper part of your brain. Practice a single type of stroke—say, a dry-brush flick—for five minutes straight. You're not aiming to create a masterpiece; you're aiming to teach your arm the feeling of that movement, to burn it into your muscle memory so that when the time comes to paint a field of grass, your body already knows what to do.