Why Good Ventilation is Crucial for an Artist's Studio
Discover the hidden dangers lurking in your studio air, from VOCs in paints to dust from pastels. A personal take on why ventilation isn't just a chore—it's essential for your health and your art.
That 'Studio Smell'? Let's Talk About What's Really in Your Air – And How to Get Rid of It for Good
Reclaiming Your Creative Sanctuary: A Deep Dive into Studio Air Quality
Is there a specific scent to creativity? For years, I truly thought so. The heady, unmistakable aroma of oil paint, turpentine, and dusty canvas was, to me, the very perfume of progress. If my studio didn't carry that distinct, potent fragrance, I just wasn't pushing myself hard enough, right? Oh, how wrong I was. What I was mostly inhaling was a future headache, a potential health crisis, and a whole host of silent problems brewing in my creative sanctuary. It wasn't the essence of genius; it was just bad air, plain and simple, and it was slowly but surely chipping away at my well-being and, consequently, my ability to create with clarity and focus.
It's frankly embarrassing how long it took me to connect the dots. The brain fog after a long painting session, the subtle dizziness, the persistent sniffles – I’d just chalked it up to "the creative grind." We artists, bless our messy hearts, tend to romanticize the chaotic, paint-splattered studio. It’s a badge of honor, right? But beneath that romantic veneer lies a stark truth: that very environment might be actively working against your long-term health and, ironically, your ability to create. It's a trade-off I wish I hadn't made for so long. So, let’s get real. Let’s clear the air, both literally and figuratively, and talk about what's really floating around in your creative space, and more importantly, what you can do about it to reclaim your studio as a true sanctuary.
This isn't about fear-mongering; it's about empowerment. Understanding the unseen forces at play in your creative haven is the first step toward transforming it into a space that truly nurtures, rather than silently harms. Ready to breathe easier and create better? Let’s dive in.
Table of Contents
- The Invisible Roommates in Your Creative Sanctuary
- Meet the VOCs: The Chemical Cloud Keepers
- Don't Forget the Dust and Particulates
- Beyond the Basics: Other Silent Studio Threats
- More on Specific Chemical Hazards
- Exploring Physical Hazards
- The Unseen World: Biological Hazards
- The Sneaky Culprits: Aerosols, Adhesives, and Dyes
- What This Stuff Actually Does to You (The Not-So-Fun Part)
- So, What Does 'Good Ventilation' Even Mean?
- Dilution Ventilation: The Broad Sweep
- Local Exhaust Ventilation: Targeted Extraction
- General Tips for Optimizing Ventilation
- Monitoring Your Studio Environment
- What to Monitor: Your Studio's Environmental Report Card
- Personal Protective Equipment (PPE): Your First Line of Defense
- Beyond Ventilation: Safe Material Handling and Storage
- Labeling and Understanding Safety Data Sheets (SDS)
- Proper Storage and Disposal: Managing Your Material Inventory
- FAQ: Clearing the Air on Common Questions
- What is an Air Quality Index (AQI) and how does it relate to my studio?
- Is just opening a window enough?
- What about biological hazards like mold or dust mites? The Unseen Studio Ecosystem
- What's the difference between an air purifier and an exhaust fan?
- Are 'non-toxic' or 'odorless' materials completely safe?
- Can I use essential oils or air fresheners to mask studio smells? (Please, don't!)
- How often should I clean my studio, and how? The Artist's Cleaning Ritual
- How can I make my studio more ergonomically friendly? Protecting Your Most Valuable Tools
- Can I use natural or 'eco-friendly' art supplies for safety? The Greenwash Trap
- I work in my bedroom. What's the most important thing I can do? Creating a Safe Sleep-Work Balance
- How do I choose the right respirator cartridge?
- What about children or pets in the studio?
- What emergency supplies should I have on hand?
- Breathing Room for Your Creativity

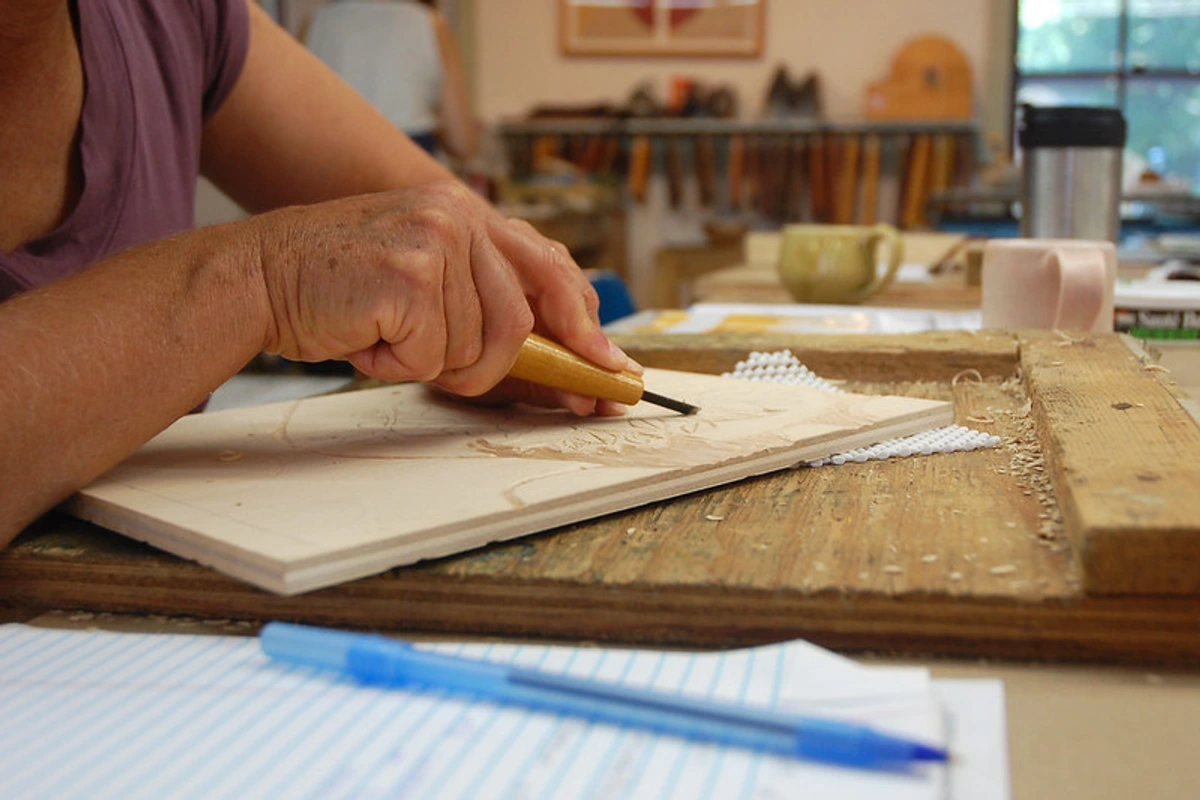
The Invisible Roommates in Your Creative Sanctuary
Let me tell you, when I was starting out, I thought 'air quality' was something for factories, not for my cozy little studio. My focus was purely on the canvas, the color, the composition. But I quickly learned, often through a persistent headache or a bout of inexplicable fatigue, that the air I was breathing was as much a part of my creative process as my brushes. It's not just about the smell; it's about the invisible cocktail of substances that can undermine your health and, ironically, your artistic output.
Understanding these elements is like learning the anatomy of your creative space. Once you know the bones and muscles, you can better protect and strengthen them. It's about moving from instinct to informed action. It's about empowering yourself with knowledge so you can transform your studio from a potential hazard into a true sanctuary of creativity.
When you're in the zone, deep in a piece, the last thing on your mind is air quality. But lurking in that creative bubble are a few uninvited guests. The two main culprits are Volatile Organic Compounds (VOCs) and Particulates. These aren't just abstract science terms; they're the tangible, albeit invisible, threats to your artistic longevity. But beyond these chemical and physical intruders, there are other less obvious dangers lurking, from biological agents to physical studio mishaps. Understanding this full spectrum is the first step towards true studio serenity, allowing you to create freely and safely.
A Brief Historical Context of Studio Safety
It's easy to feel like modern artists are suddenly burdened with these 'new' concerns about health and safety, but the truth is, artists have been battling studio hazards for centuries – often unknowingly, and with tragic consequences. Think of Renaissance masters or Old Dutch painters, working with pigments ground from toxic heavy metals like lead, mercury, or arsenic, often without any ventilation or protective gear. The vibrant reds and yellows from vermilion (mercury sulfide) or cadmium, the deep blacks from lead, or the brilliant greens from copper compounds were all beautiful but deadly. Many historical accounts detail artists suffering from chronic illnesses, tremors, blindness, or early deaths that, with hindsight, can clearly be linked to occupational exposure. Even the romantic notion of the "starving artist" might have roots in health issues that hampered productivity or led to early retirement (or worse). So, while we have new synthetic chemicals to contend with today, the fundamental challenge of managing toxic materials in the studio is as old as art itself. The key difference is that we now know better, and we have the tools and knowledge to act proactively.
Let’s pull back the curtain on these atmospheric squatters, dissecting what they are, where they come from, and why they deserve your immediate attention.
Meet the VOCs: The Chemical Cloud Keepers
Volatile Organic Compounds (VOCs) sounds like something from a chemistry exam, but the concept is simple. Think of them as tiny, invisible chemical particles that escape from wet or drying materials and float around in the air, ready to be inhaled. They're the main reason your studio has that 'smell,' and it's a smell that comes with a cost—your health and artistic longevity.
Imagine a tiny army of chemical vapors silently invading your personal space. These aren't just an unpleasant odor; they are active chemical agents capable of causing immediate irritation, allergic reactions, and insidious long-term damage to your respiratory system, nervous system, and organs. It’s a silent assault that often goes unnoticed until symptoms become undeniable.
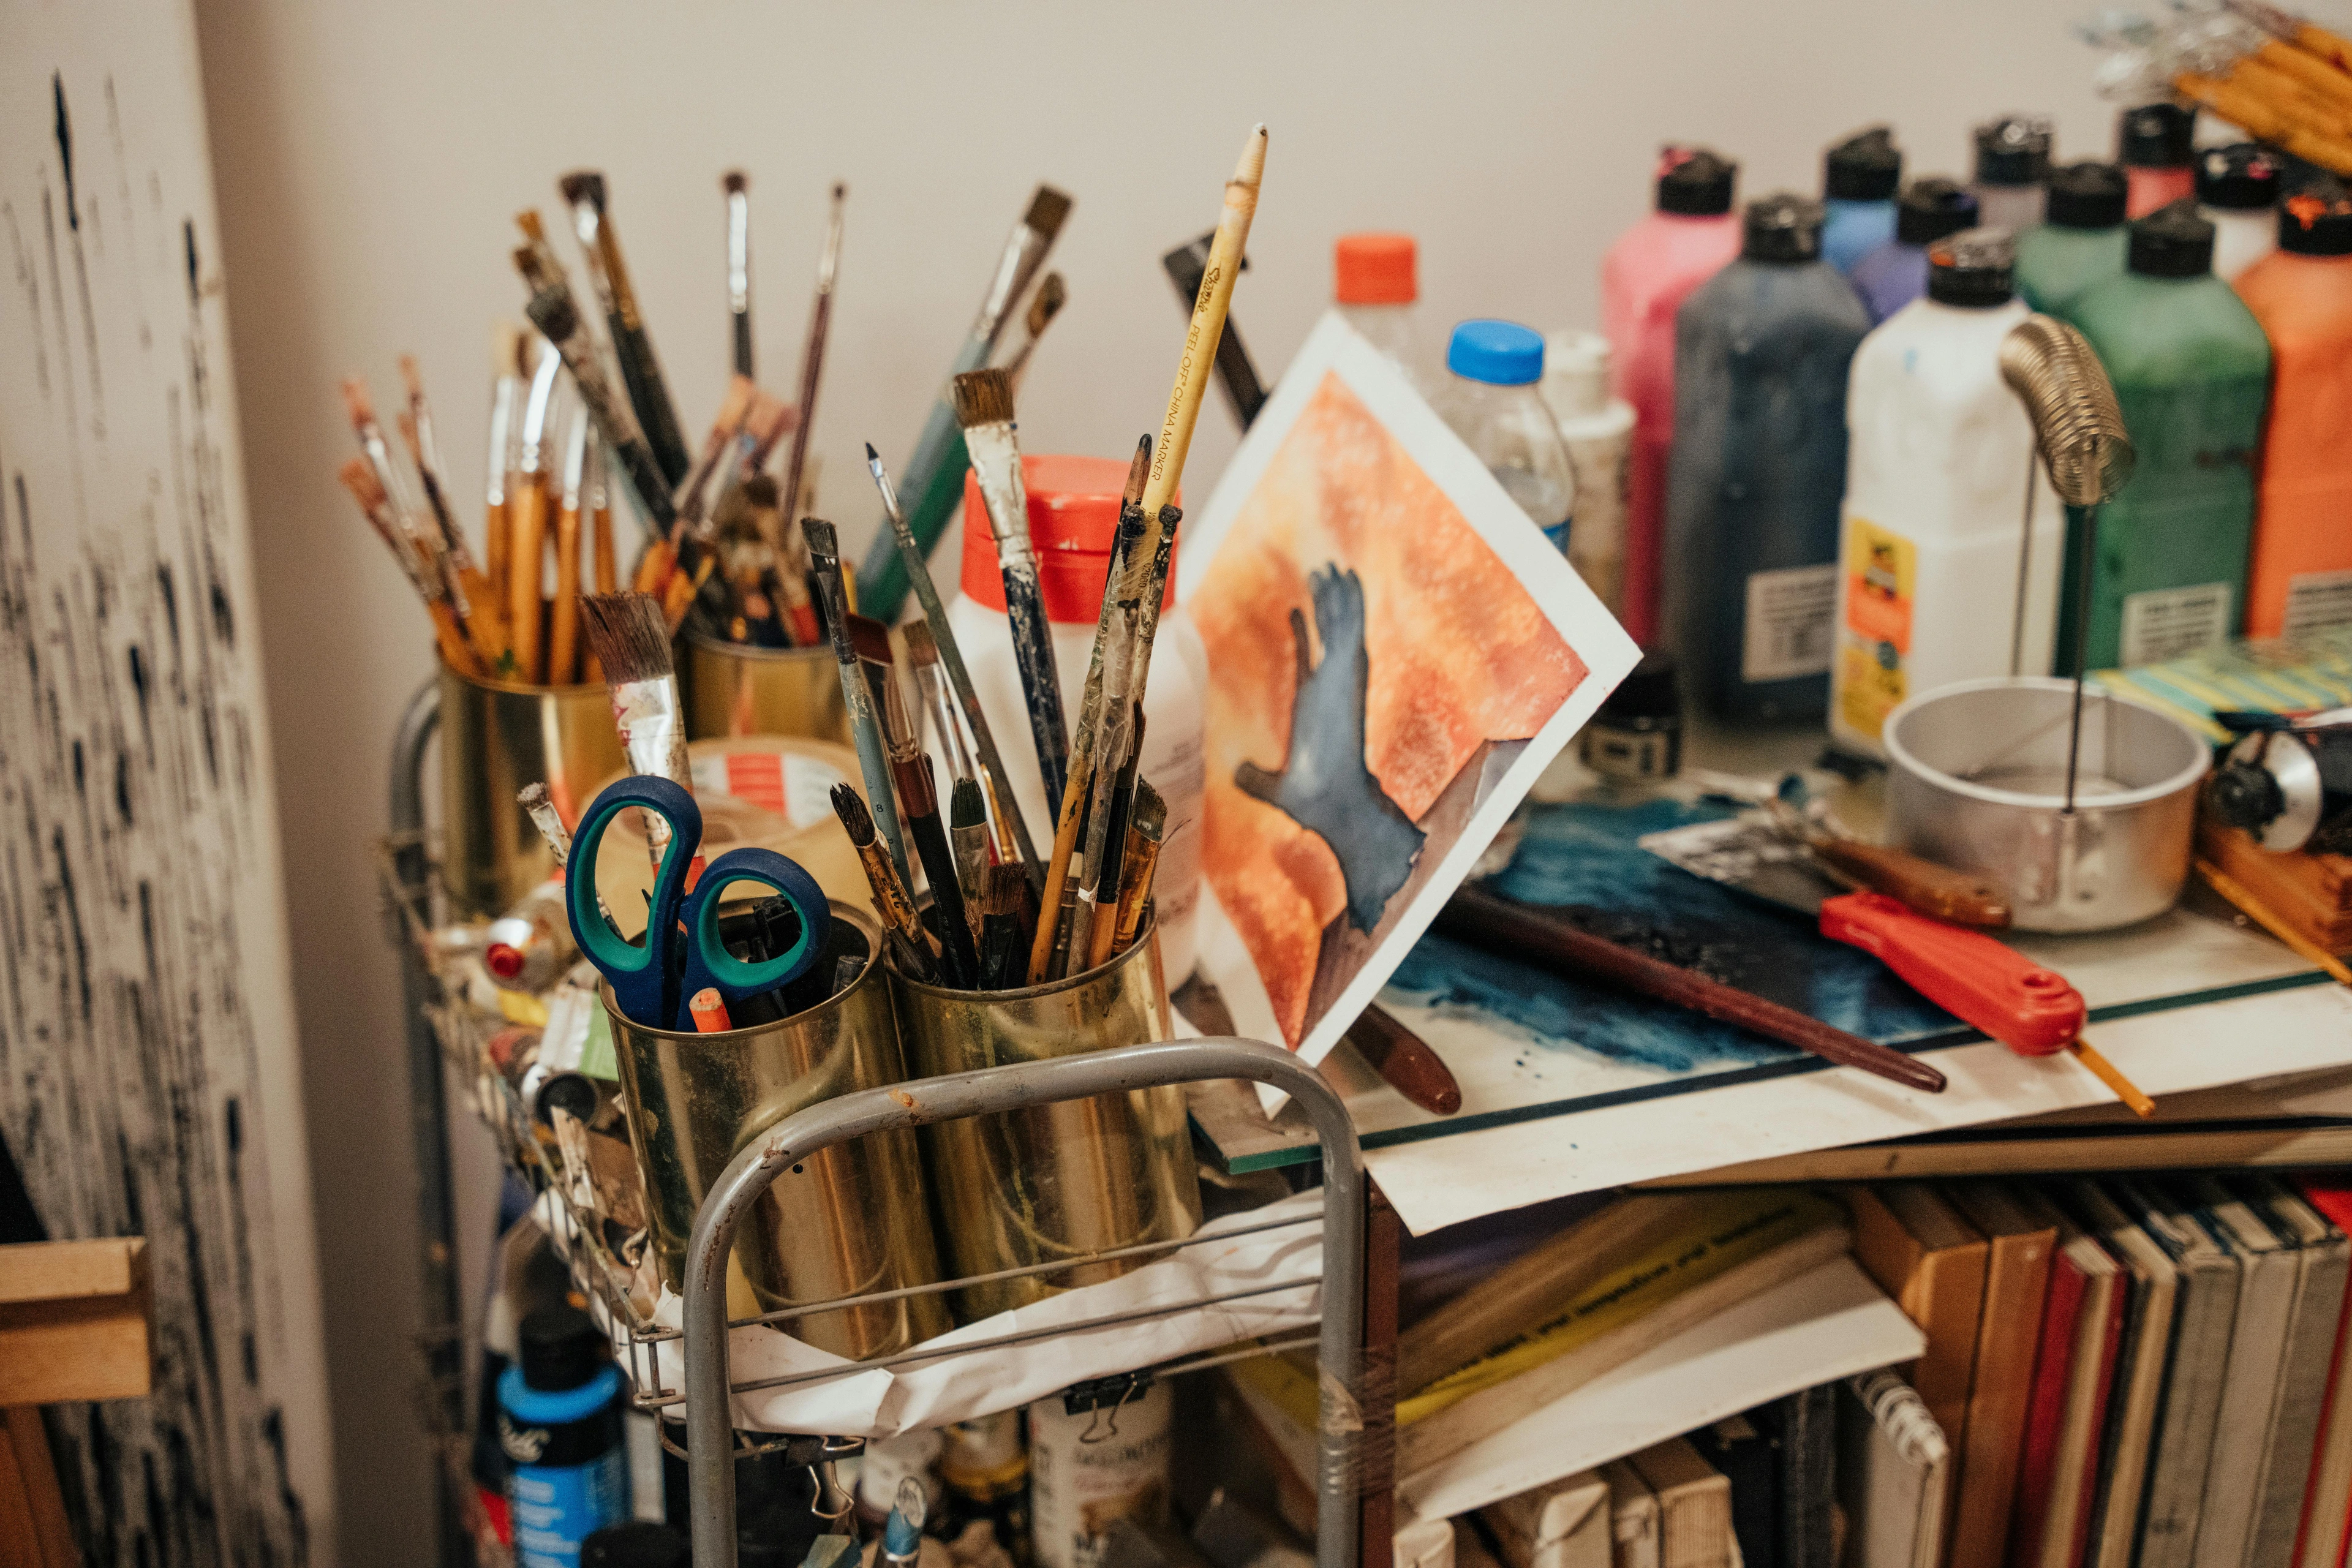
These invisible chemical clouds are released from a surprising number of our favorite, everyday art supplies. It's not always the most potent-smelling items that pose the greatest threat; sometimes the 'odorless' ones are the sneakiest, lulling you into a false sense of security. The key is recognizing the broad array of sources and understanding that even seemingly benign materials can be active emitters:

- Paints (Oil, Acrylic, Enamel): Beyond just drying, the binders and solvents in various paints contribute significantly to VOC off-gassing. Even some "water-based" acrylics can release formaldehyde or ammonia during curing, and some oil paints continue to off-gas for months as they oxidize and dry.
- Inks and Dyes: Screen printing inks, etching inks, fabric dyes, and even some markers contain strong solvents and pigments that release VOCs. The act of cleaning screens or blocks often involves potent chemical washes that are significant VOC emitters.
- Adhesives and Glues: Spray adhesives, contact cements, rubber cement, epoxy glues, and even some craft glues are notorious for high VOC emissions, often containing xylene, toluene, or other powerful solvents.
- Cleaning Supplies: Regular household cleaners, floor waxes, paint strippers, and even some art-specific brush soaps can contribute to the VOC load. Always check the labels for ammonia, bleach, glycol ethers, or other strong chemicals.
- Building Materials & Furniture: Surprisingly, even your studio walls, flooring, and furniture can be sources. New carpets, fresh paint on the walls, particleboard furniture, and glues used in construction can off-gas for months or even years – a phenomenon known as "new car smell" for your studio.
- Burning Materials: Processes like soldering, welding, using a heat gun on certain plastics or resins, or even burning incense can release a complex mix of VOCs and fumes, sometimes containing heavy metals or other dangerous compounds. Be especially wary of fumes from melting plastics.
It’s a truly vast and varied ecosystem of invisible chemicals, which is why a holistic approach to studio safety is so critical.

- Solvents: This is the undisputed champion of VOC emission. Turpentine, mineral spirits, paint thinners, brush cleaners – they are all essentially potent VOC factories, designed to evaporate quickly. Each time you open a container or clean a brush, you're releasing a cocktail of chemicals into your breathing space, chemicals that can be absorbed not only through your lungs but also directly through your skin. Even seemingly innocuous actions, like leaving a solvent-soaked rag exposed, can contribute significantly to the overall VOC burden in your studio, creating a constant, low-level exposure.
- Oil Paints: The drying process for oil paints, known as oxidation, is a slow but steady release of VOCs into your environment. The longer they cure, the more they off-gas. This isn't an instant burst, but a continuous, insidious release over days, weeks, or even months, depending on the paint's thickness, pigment, and binder composition. This 'invisible' off-gassing makes good ventilation crucial even after you've finished painting for the day.
- Varnishes and Fixatives: Especially those convenient aerosol sprays. That fine mist that beautifully protects your artwork? It's a cloud of solvents, propellants, and other chemicals being directly propelled into your breathing zone. Even brush-on varnishes and fixatives release VOCs as they dry, making proper ventilation absolutely essential. The ultrafine particles from aerosol sprays can also penetrate deep into the lungs.
- Certain Acrylic Mediums, Gessos, and Adhesives: While generally considered safer than oils and solvents, not all acrylic products are benign. Some mediums, gessos, spray adhesives, and even certain glues can contain chemicals like ammonia, formaldehyde, or phthalates that off-gas as they dry. Always check the labels! The terms "non-toxic" or "low VOC" can be misleading without careful scrutiny of the actual ingredients. I've learned that truly understanding what's in your materials means diving into the Material Safety Data Sheets (MSDS/SDS) – it's less fun than painting, but far more crucial for your health.
- Industrial Markers & Enamels: Many permanent markers, enamel paints, and specialty inks contain xylene, toluene, and other potent VOCs to ensure quick drying and durability. These chemicals are particularly harsh and can cause immediate irritation and nervous system effects, making them prime candidates for dedicated local exhaust ventilation. Their powerful fumes demand respect and careful handling.
Here’s a quick overview of some common VOCs and their primary health concerns:
Common VOCs in Art Supplies | Primary Sources | Potential Health Effects | Long-Term Risks |
|---|---|---|---|
| Turpentine | Oil painting solvents, varnishes | Respiratory irritation, headaches, dizziness, skin allergies | Chronic respiratory illness, kidney damage, central nervous system depression, reproductive issues |
| Mineral Spirits | Paint thinners, brush cleaners, mediums | Headaches, dizziness, nausea, skin irritation, central nervous system effects | Liver and kidney damage, nervous system disorders, dermatitis |
| Xylene & Toluene | Industrial markers, enamel paints, some adhesives | Headaches, dizziness, nervous system damage, reproductive issues | Irreversible brain and nervous system damage, hearing loss, liver and kidney damage, potential carcinogen |
| Formaldehyde | Some glues, acrylic gessos, binders | Respiratory irritation, allergic reactions, potential carcinogen | Nasal and lung cancer, leukemia, asthma exacerbation |
| Ammonia | Certain acrylic mediums, cleaning agents | Eye and respiratory irritation, headaches | Chronic bronchitis, permanent lung damage with high exposure |
| Phthalates | Plasticizers in some acrylics, vinyls | Endocrine disruption, developmental issues | Reproductive and developmental problems, increased cancer risk |
| Acetone | Nail polish remover, some glues | Headaches, dizziness, skin irritation, central nervous system depression | Organ damage (kidneys, liver) with chronic high exposure |
| Styrene | Some resins, plastics, polyester resins | Respiratory irritation, nervous system effects, potential carcinogen | Hearing loss, nervous system damage, increased cancer risk, particularly leukemia and lymphoma |
| Benzene | Found in trace amounts in some solvents, inks, and paints (often a contaminant), fossil fuels | Dizziness, headache, rapid heart rate, tremors | Leukemia and other blood cancers, bone marrow damage, reproductive issues, aplastic anemia |
| Glycol Ethers | Water-based paints, acrylics, cleaning solutions | Headaches, nausea, eye/throat irritation, blood disorders | Kidney and liver damage, reproductive issues |
| Isocyanates | Polyurethane products, spray foams, varnishes, resins | Severe respiratory sensitization (asthma), skin irritation | Chronic asthma, permanent lung damage, severe allergic reactions |
| Ethanol/Methanol | Shellac, some inks, certain cleaning agents, denatured alcohol | Headaches, dizziness, nausea, eye irritation, blurred vision | Blindness (methanol), liver damage, nervous system disorders, death (methanol poisoning) |

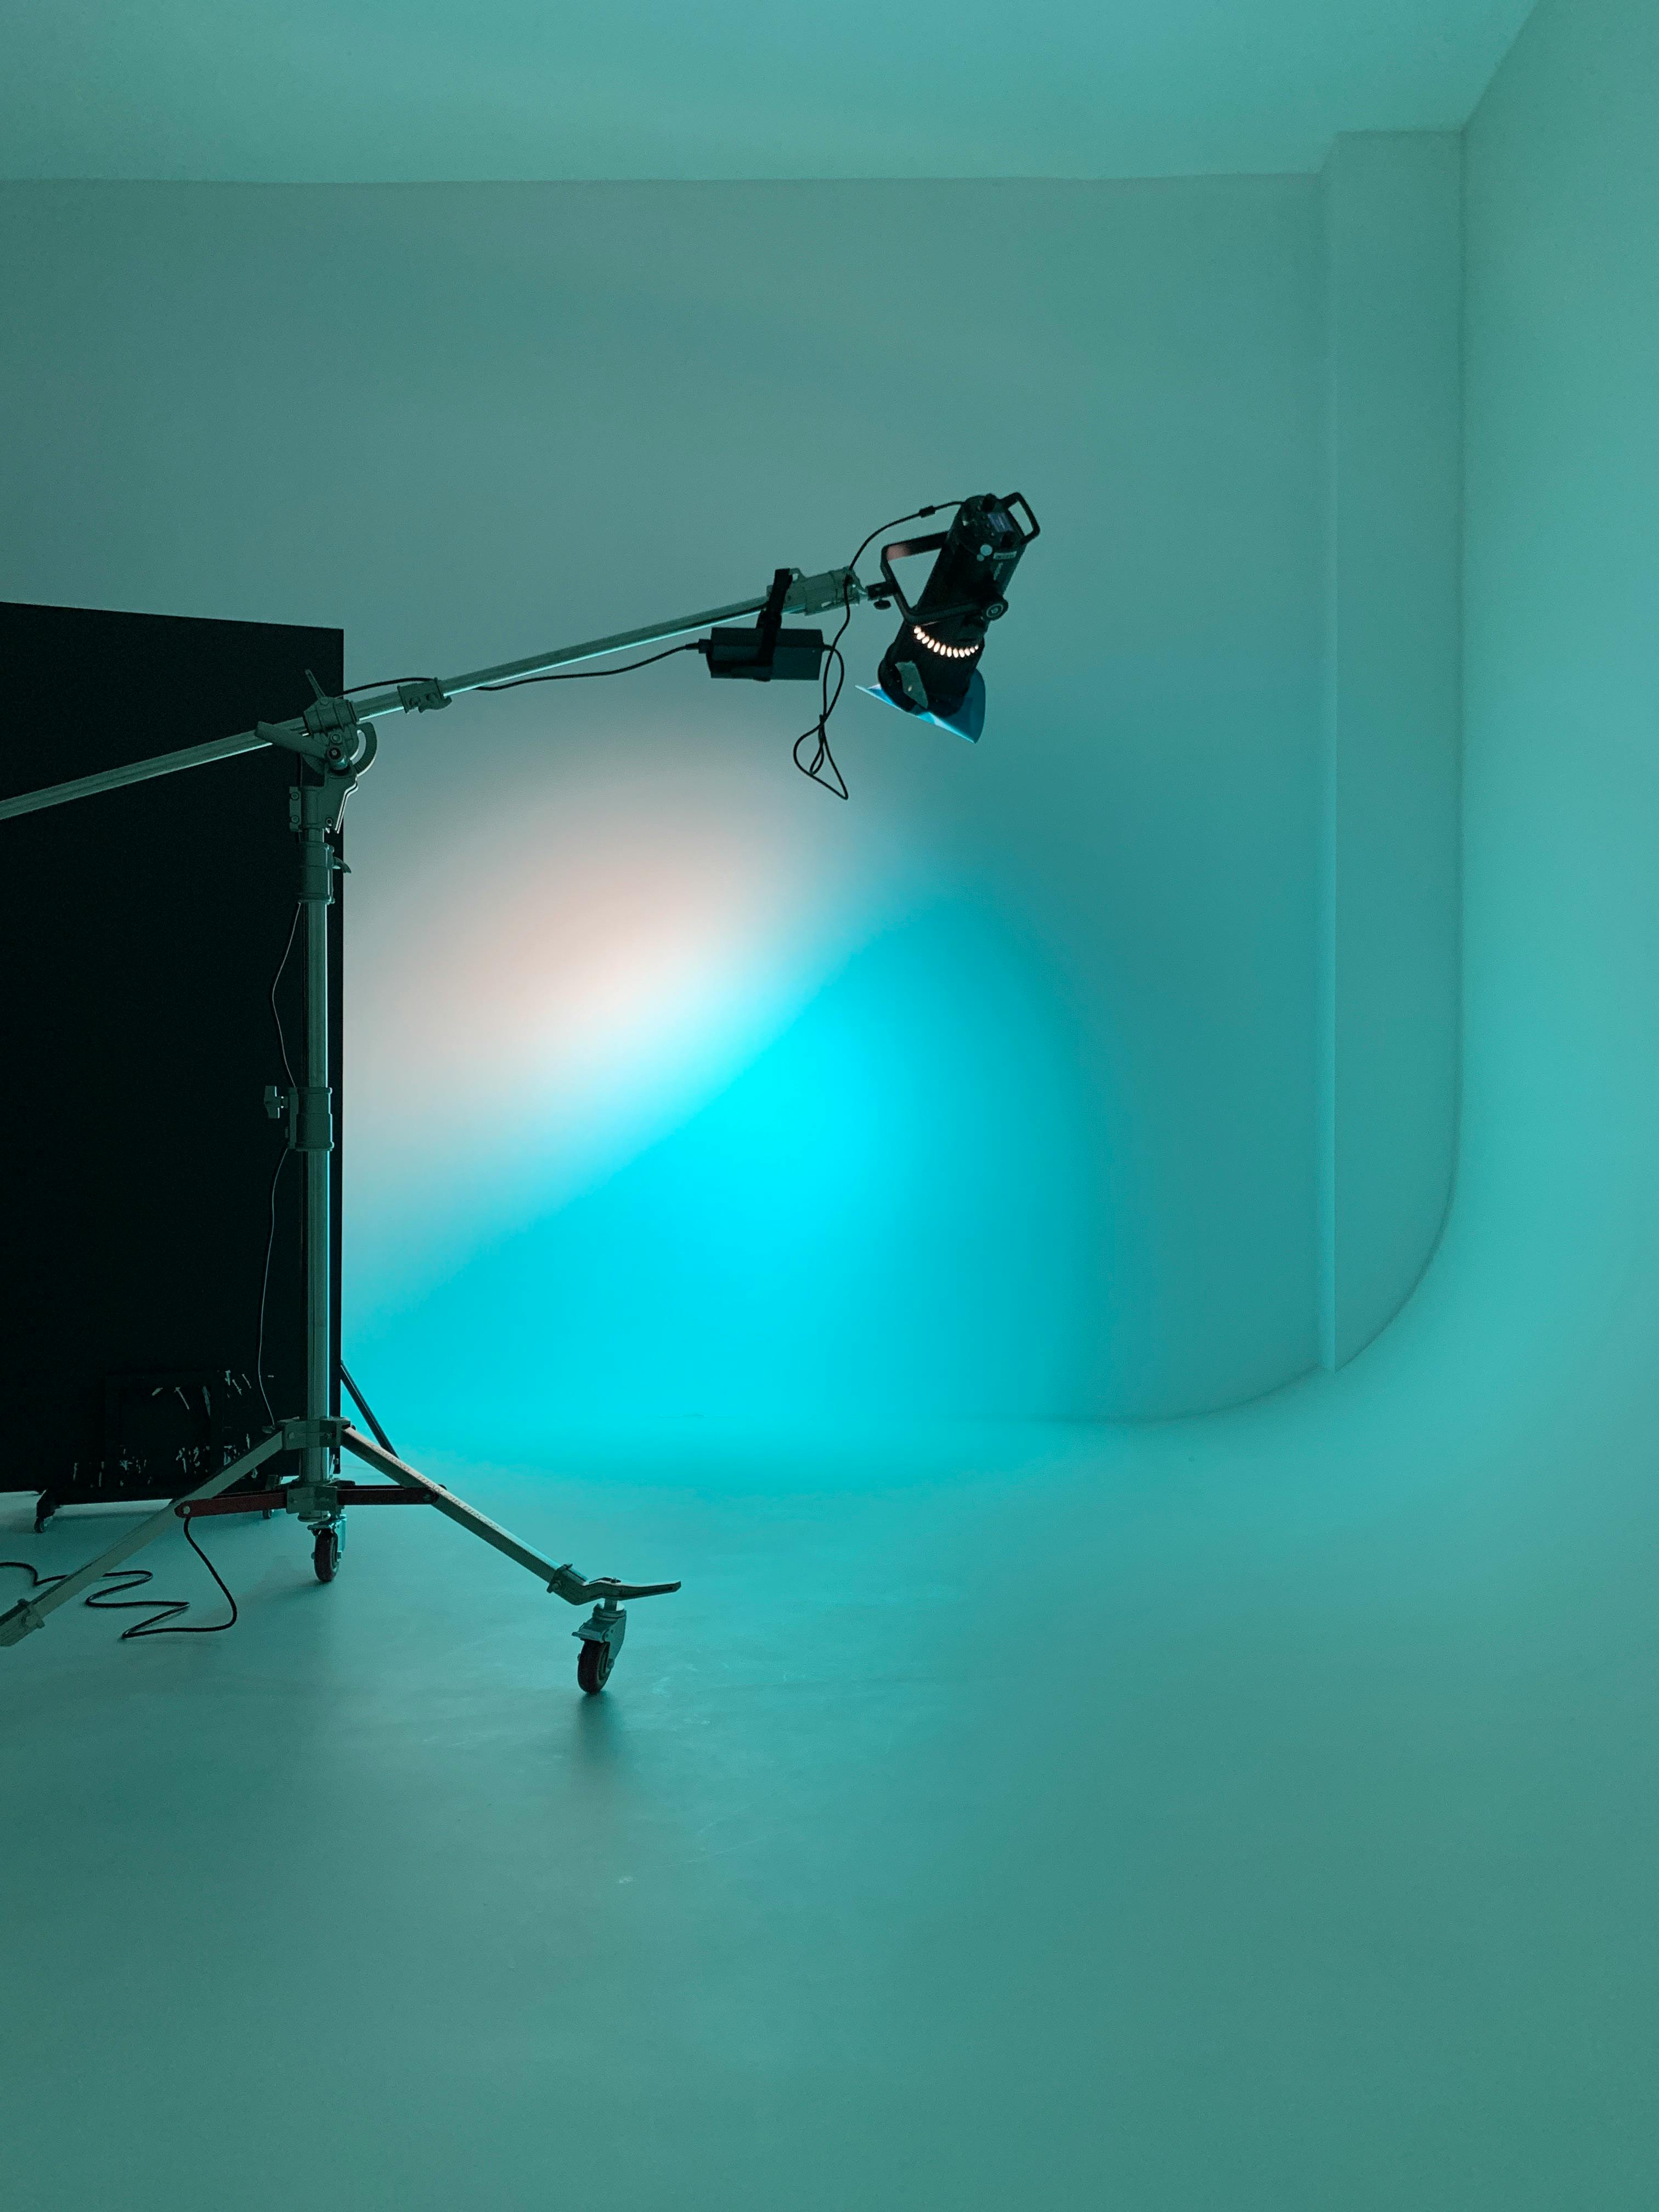
Don't Forget the Dust and Particulates
Particulates are a different breed of invisible threat; they're not gases, but tiny solid or liquid particles suspended in the air. If you've ever walked into your studio on a sunny morning and seen those golden shafts of light illuminating a shimmering dance of specks, you've witnessed particulates in action. These airborne particles vary greatly in size, with finer particles (like PM2.5, meaning anything smaller than 2.5 micrometers) being the most concerning because they can penetrate deep into your lungs, sometimes even entering your bloodstream, potentially carrying harmful chemicals with them. Understanding these microscopic invaders is crucial for effective protection against a range of health issues.
We often categorize particulates by size, which directly correlates to their danger: PM10 (particles less than 10 micrometers in diameter, like dust, pollen, and some mold spores), PM2.5 (fine particles less than 2.5 micrometers, including combustion particles, organic compounds, and metals), and then there are the truly insidious ultrafine particles (UFP), smaller than 0.1 micrometers. The smaller they are, the deeper they travel into your respiratory system, bypassing your body's natural defenses and reaching the deepest parts of your lungs, and UFPs can even cross into your bloodstream and affect other organs throughout the body. It's a terrifying thought, but understanding it is your first line of defense against these microscopic airborne threats.
- Soft Pastels and Charcoal: These mediums are, by their very nature, designed to shed fine pigment particles. Every stroke, every blending motion, every tap of the stick releases a cloud of respirable dust directly into your air. And it's not just the visible plume; even after the dust seems to settle, ultra-fine particles can remain airborne for hours, just waiting to be inhaled. The fine dust from pastels, especially, can accumulate in the lungs over time, leading to irritation or even long-term respiratory issues. Work over a tray, use a low-velocity fan to pull dust away, and definitely wear a particulate respirator (N95 or P100).
- Sanding & Grinding: Whether you're sanding a gessoed panel for painting, smoothing a wooden sculpture, finishing plasterwork, preparing a metal surface, or even just working on a dried painting, any abrasion is an incredibly effective way to generate a significant amount of airborne dust. The composition of this dust can be highly varied and often harmful. Think about sanding dried gesso, which contains gypsum or chalk; sanding wood, which releases wood fibers and resins (some of which are carcinogenic); or sanding a finished painting, which can aerosolize dried pigments and binders. Each of these creates a unique cocktail of potential irritants and toxins, demanding local exhaust and respiratory protection, especially a P100 respirator.
- Ceramics & Clay Dust: When dry, clay dust is not just irritating; it's particularly nasty. It often contains crystalline silica, which, if inhaled over time, can lead to severe and irreversible lung diseases like silicosis. This isn't just an irritant; it's a known occupational hazard, and something ceramicists, in particular, need to treat with extreme caution through rigorous wet cleaning and dust suppression. Never sweep dry clay dust; always wet mop or use a specialized HEPA vacuum.
- Dry Pigment Mixing: For artists who mix their own paints from raw pigments, the process of handling and grinding dry powdered pigments can release extremely fine, concentrated particles into the air. Many of these pigments also contain heavy metals (e.g., cadmium, lead, cobalt), amplifying the danger. The allure of mixing your own custom hues is strong, but the health risks associated with dry pigment handling are equally significant, demanding stringent controls. This is where personal protective equipment, particularly a robust respirator (P100 with a pre-filter), becomes absolutely non-negotiable, alongside a dedicated fume hood or local exhaust system.
- Woodworking & Carving: Sawing, routing, carving, or sanding wood generates fine wood dust, which can be an irritant, a sensitizer (leading to allergic reactions), and, in some cases, a carcinogen, depending on the wood type (e.g., hardwood dusts are often more hazardous). Always research the specific wood you're working with and use effective dust collection systems (e.g., shop vac with HEPA filter, dust cyclone) and a P100 respirator.
- Aerosol Residue: Even after the initial spray, fine particles from varnishes, fixatives, and spray paints can linger in the air and settle on surfaces, becoming re-aerosolized with movement. These lingering particles often contain VOCs and other chemicals, extending your exposure long after the spraying stops.
Beyond the Basics: Other Silent Studio Threats
While VOCs and particulates are the most common culprits in the studio air, a truly comprehensive approach to safety means understanding that your creative space can harbor other, less obvious, but equally insidious hazards. It's not just about the smell or the visible dust; some dangers are truly hidden, often lurking in the very materials we’ve come to depend on. My journey into understanding studio safety really opened my eyes to these nuances, pushing me to look beyond the obvious. So, before we dive into fixing the problem, let's broaden our understanding of what we're up against. It’s about being proactive, not reactive. Here’s a more comprehensive breakdown of common studio hazards, including some you might not have considered:
More on Specific Chemical Hazards
Beyond the general categories of VOCs and particulates, certain materials present unique and potent chemical hazards that demand specific precautions. Ignoring these can lead to severe and irreversible health consequences.
- Epoxy Resins & Hardener: These are particularly tricky. When mixed, they undergo a chemical reaction that can release highly irritating fumes (amines or isocyanates). Skin contact can lead to severe allergic dermatitis, and inhalation can cause asthma-like symptoms, chemical pneumonia, or even chemical sensitization, meaning future exposure, even tiny amounts, can trigger severe, life-threatening reactions. Good local exhaust ventilation and impervious gloves are absolutely critical. Never work with epoxies without appropriate PPE.
- Polyester Resins & Fiberglass: Often used in sculpture, boat building, or mold making, these materials release styrene (a known irritant and potential carcinogen) during curing. The fiberglass itself can cause severe skin, eye, and respiratory irritation. Working with these requires robust local exhaust, skin protection (long sleeves, gloves), and a respirator with organic vapor cartridges and particulate filters.
- Urethane Resins & Foams: Polyurethane products, including casting resins, varnishes, and spray foams, can release isocyanates, which are potent respiratory sensitizers. Even low-level exposure can lead to severe, chronic asthma. Dedicated local exhaust and a respirator specifically rated for isocyanates (often an organic vapor/acid gas cartridge) are essential.
- Heavy Metal Pigments (Cadmium, Lead, Cobalt, Chromium, Manganese): Many vibrant pigments derive their color from heavy metals. Cadmium (reds, yellows) is a known human carcinogen that can cause kidney damage, bone disease, and lung damage if inhaled as dust or ingested. Lead-based materials (lead white, red lead), while largely phased out, are highly toxic, causing nervous system, kidney, and reproductive damage. Cobalt (blues, violets), chromium (greens, yellows), and manganese (violets, browns) can also cause respiratory irritation, skin sensitization, and have long-term organ toxicity risks if mishandled, especially in dry pigment form or during sanding. Always treat heavy metal-containing paints with extreme respect, avoid sanding them when dry, and practice meticulous hygiene.
Exploring Physical Hazards
Beyond the chemical clouds and dust storms, your studio can pose more immediate, tangible risks that, while less insidious than chemical exposure, can be just as debilitating. These aren't always glamorous, but ignoring them can lead to painful, or even career-ending, injuries. A thoughtful layout and disciplined habits can prevent most of these.

- Slips, Trips, and Falls: A cluttered studio, spilled water, paint, or solvents on the floor, or uneven surfaces are prime candidates for accidents. Keep pathways clear, clean spills immediately, and consider anti-fatigue mats if you stand for long periods. Good lighting also helps identify hazards.
- Cuts and Punctures: Sharp tools are part of an artist's life. Knives, chisels, glass shards, wires, and even sharp edges on canvases or frames can cause nasty injuries. Always cut away from your body, use a cutting mat, store sharp tools safely in dedicated holders, and dispose of blades properly in a sharps container.
- Fire Hazards: Solvents, rags soaked with flammable liquids, paper scraps, and overloaded electrical equipment all present fire risks. Proper storage of flammables in approved cabinets, a designated self-closing oily rag container, clear egress paths, and a working fire extinguisher (rated for chemical/electrical fires, e.g., ABC or CO2) are non-negotiable. Know your exit routes!
- Electrical Safety: Overloaded outlets, frayed cords, makeshift wiring, or using electrical equipment near water are serious dangers. Ensure your studio's electrical system is up to code and use ground-fault circuit interrupters (GFCIs) in damp areas to prevent electrocution. Regularly inspect cords and tools for damage.
- Noise Pollution: While not typically thought of in art, power tools for sculpture or framing, compressors for airbrushes, loud grinding, or even consistently loud music can lead to permanent hearing damage over time. Earplugs or earmuffs are cheap and effective protection, and crucial for preserving one of your most valuable senses.
- Ergonomics: This is the silent killer of many artistic careers. Poor posture at an easel or workbench, repetitive motions with brushes, sculpting tools, or printmaking presses, and improper lifting of heavy materials can lead to chronic pain, carpal tunnel syndrome, back injuries, and tendonitis. Design your workspace to fit your body, not the other way around. Invest in adjustable chairs, standing desks, anti-fatigue mats, proper task lighting, and take frequent breaks for stretching and movement. Your body is your most important tool; protect it!
The Unseen World: Biological Hazards
It’s not just chemicals and dust; your studio can also be a thriving ecosystem of biological agents that impact your health, often triggering allergic reactions or respiratory issues. These are living, breathing threats that require different management strategies than chemical contaminants.
- Mold and Mildew: Damp, poorly ventilated spaces are breeding grounds for mold. Inhaling mold spores can trigger severe allergies, asthma attacks, respiratory infections, and other severe health problems, including systemic illness in vulnerable individuals. Control humidity (ideally 30-50%), fix leaks immediately, and clean spills promptly. If you see mold, address it with appropriate PPE and cleaners, or consult a professional for extensive infestations.
- Bacteria and Viruses: An unhygienic studio, especially one where food or drink is present, surfaces aren't regularly cleaned, or shared tools are common, can harbor bacteria and viruses. Regular cleaning and disinfection of surfaces, frequent hand washing, and strictly separating food/drink consumption areas from your workspace are crucial to prevent the spread of illness.
- Dust Mites and Allergens: Accumulated dust isn't just inert particles; it's a home for dust mites, pollen (from outside or dried flowers/plants), and pet dander (if you have furry studio assistants or your pets frequent the space). These are potent allergens that can cause sneezing, congestion, skin rashes, and severe asthma exacerbations. Regular wet cleaning (not sweeping!) and using a HEPA-filtered vacuum are your best defenses, along with controlling humidity.

The Sneaky Culprits: Aerosols, Adhesives, and Dyes
Beyond traditional paints and solvents, our studios are often filled with other products that contribute significantly to poor air quality and direct exposure risks. These are often used for convenience, but that convenience can come with a hidden health cost.
- Aerosol Sprays (Fixatives, Varnishes, Spray Paints, Adhesives): These are notorious for their fine mist of propellants, solvents, and pigment particles that linger in the air for extended periods. The small particle size makes them particularly dangerous, as they can bypass the body's natural defenses and penetrate deep into the lungs. Always use aerosols in a dedicated spray booth with robust local exhaust ventilation and wear a respirator with organic vapor cartridges and P100 particulate filters. Never spray near open flames or ignition sources.
- Strong Adhesives and Cements: Industrial adhesives, contact cements, rubber cement, and even superglues can off-gas powerful VOCs like xylene, toluene, n-hexane, and various aldehydes. These chemicals can cause immediate irritation, headaches, dizziness, and long-term nervous system damage. Ensure excellent local exhaust ventilation (e.g., a snorkel extractor) and consider using non-toxic, water-based alternatives when possible. Work quickly and in small batches to minimize exposure time.
- Dyes (Powdered and Liquid): Dyes, especially in powdered form for textiles or printmaking, can contain sensitizers or irritants that cause respiratory issues or skin reactions upon contact or inhalation. Some synthetic dyes contain heavy metals or other hazardous chemicals. Even seemingly innocent materials like certain plant-based dyes, if mishandled (e.g., heated, finely powdered), can cause problems. Always check the SDS, use appropriate PPE (gloves, P100 respirator for powders), and avoid cross-contamination with food or drink.
What This Stuff Actually Does to You (The Not-So-Fun Part)
Okay, so there's stuff in the air. So what? I was in this camp for years. I'd finish a long session feeling a bit woozy and just chalk it up to creative exhaustion. I truly believed it was just the intensity of my focus, the sheer mental effort. But it's more than that. The cumulative effect can be far more insidious, affecting not just your immediate comfort but your very capacity for sustained creative output. It's your body's alarm system, and ignoring it is a recipe for long-term trouble – not just a 'creative block,' but genuine, life-altering health issues that could prematurely end your artistic journey.

Short-Term Effects: These are the warning signs your body sends you. Think of them as little yellow flags.
Effect | Description |
|---|---|
| Headaches & Dizziness | Common first signs of inadequate oxygen or chemical exposure. |
| Nausea | Can result from inhaling strong fumes or ingesting trace amounts of chemicals. |
| Eye, Nose, Throat Irritation | Direct contact with airborne irritants, leading to stinging, burning, or dryness. |
| Fatigue & Brain Fog | Reduced mental clarity and energy, impacting focus and creative output. |
| Worsening of Asthma/Allergies | Airborne triggers can exacerbate existing respiratory conditions or induce new sensitivities. |
| Skin Irritation | Direct contact with chemicals can cause redness, itching, rashes, or dermatitis. |
Ever feel like you have a mild hangover after a productive day of painting? It's probably not a coincidence. That's your body reacting to the chemicals it's been processing, a clear signal that your exposure limits are being breached. Ignoring these subtle cues is like ignoring a check engine light in your car; eventually, something is going to break down.
Long-Term Effects: This is the scary part, the reason we really need to take this seriously. Consistently breathing in this stuff for years can lead to some frightening red flags – not just a 'creative block,' but genuine, life-altering health issues that could prematurely end your artistic journey.
Effect | Description |
|---|---|
| Chronic Respiratory Issues | Persistent coughing, bronchitis, emphysema, or even chemical pneumonia from prolonged irritation and damage to lung tissue. |
| Nervous System Damage | Solvents are notorious for this, potentially leading to memory problems, changes in coordination, neuropathy, or cognitive decline over time. |
| Organ Damage | The liver and kidneys work overtime to filter toxins. Constant exposure can lead to severe strain, dysfunction, or disease. |
| Increased Cancer Risk | Some chemicals found in art supplies, like benzene in solvents or cadmium in pigments, are known carcinogens (e.g., leukemia, lung cancer). |
| Reproductive Issues | Certain VOCs and heavy metals have been linked to fertility problems, birth defects, or developmental issues. |
| Dermatitis/Sensitization | Chronic skin irritation or developing severe allergic reactions even to minimal future exposure. |
I'm not trying to scare you into giving up your passion. It's the opposite. I'm telling you this because I want you, and me, to be able to do this for the rest of our lives, safely. Protecting your body is protecting your career as an artist. Think of it this way: your hands, your lungs, your eyes, and your brain are your most vital tools. Without them functioning optimally, your ability to create, to express, to manifest your vision, is severely hampered. Investing in safety is investing in your artistic future.
So, What Does 'Good Ventilation' Even Mean?
Once I understood the myriad unseen threats in my studio, my next burning question was, naturally, 'Okay, but what do I actually do?' The answer invariably came back to 'good ventilation.' But honestly, that phrase always felt vague to me, like being told to 'just be a better artist' without any real instructions. What did it really mean in practical terms for someone like me, who wasn't a professional engineer or an industrial hygienist? I’ve since learned that it’s not about transforming your vibrant, messy studio into a sterile, hospital-grade laboratory (unless you want to!). Instead, it's about practical, achievable steps based on two fundamental, powerful principles of industrial hygiene: Dilution Ventilation and Local Exhaust Ventilation. These aren't just fancy terms; they're your best friends in creating a safer, healthier workspace. And trust me, it's not as complex or daunting as it sounds, I promise. It's really about understanding how air moves, and then, with a little strategic effort, gently nudging it in the right direction. It's about consciously managing the air around you, rather than passively breathing whatever happens to be floating by.
Dilution Ventilation: The Broad Sweep
Dilution ventilation is the most straightforward approach, and it's something every artist can implement, regardless of budget. It's the simple act of introducing a significant volume of fresh, clean air into your studio to dilute the concentration of airborne contaminants. Think of it like adding pure water to a glass of murky water – the overall concentration of impurities goes down. The easiest way to achieve this is, unsurprisingly, by opening windows. Opening two windows on opposite sides of the room creates a cross-breeze, which is significantly more effective than just one open window. For better control, strategically placed fans can enhance this air movement, pulling fresh air in and pushing stale air out, effectively changing the air in the entire room over time. Think of it as creating an invisible current, guiding the stale, contaminated air out and inviting the crisp, clean air in. The goal is to achieve a good number of air changes per hour (ACH) – ideally 6-10 for a low-hazard studio (e.g., watercolor, drawing), and much higher (15-20+) for more intensive work (e.g., using heavy solvents or spray paints). This ensures that the concentration of any airborne pollutants is constantly reduced, rather than allowed to build up. Remember, even in winter, brief periods of aggressive dilution ventilation are better than none at all.

Local Exhaust Ventilation: Targeted Extraction
If dilution is the broad sweep, then local exhaust ventilation (LEV) is the precision strike. This is even more critical because it involves actively capturing and removing contaminated air directly from its source before it has a chance to spread throughout your workspace and into your breathing zone. This could be as simple as placing a box fan in a window, positioned to blow air outwards and draw fumes away from your easel. However, truly effective LEV often involves dedicated systems like fume hoods (enclosed workstations, ideal for high-vapor solvents or chemicals), snorkel extractors (flexible arms that can be positioned near a source, good for welding or carving), downdraft tables (pulling fumes/dust downwards through a slotted surface, perfect for sanding or working with dry pigments), or capture hoods that pull hazardous air directly from the point of emission, ducting it safely outdoors. The key here is proximity: the closer the capture hood to the source of fumes or dust, the more effective it will be, minimizing the chance for contaminants to disperse into your breathing zone. I've found investing in a small, portable LEV unit for my solvent use was a game-changer; it was a visible improvement that I could literally smell (or rather, not smell!). For tasks like spray painting, airbrushing, or using potent resins, a dedicated spray booth with an integrated exhaust system is the gold standard, ensuring contaminants are contained and expelled immediately.

General Tips for Optimizing Ventilation
- Think Airflow: Always consider where fresh air is coming from (inlet) and where contaminated air is going (outlet). The goal is to create a predictable flow that sweeps contaminants away from you, not across your face or simply recirculating them within the room. Avoid placing exhaust fans too close to air inlets, as this can short-circuit the airflow.
- Fan Power (CFM): Invest in fans with an adequate CFM (Cubic Feet per Minute) rating for your studio size and the type of work you do. A higher CFM means more air is moved, leading to better air changes per hour (ACH). Calculate your studio's volume (length x width x height) and divide by the desired ACH to get a rough CFM target.
- Negative Pressure: For hazardous work, aim to create negative pressure in your studio, meaning more air is exhausted than supplied. This ensures that any air leaks (e.g., around doors) draw air into the studio, preventing contaminants from escaping into other parts of your home or building. This is often achieved with a slightly more powerful exhaust fan than your supply fan, or simply by exhausting air and relying on natural infiltration for supply.
- Maintenance: Keep fans, filters, and ducts clean. Blockages (e.g., dust accumulation on fan blades, clogged filters) significantly reduce efficiency and can even become fire hazards. Regular cleaning and maintenance are non-negotiable for any ventilation system – it's like changing the oil in your car; neglect it, and you'll pay a higher price later. Inspect ductwork for leaks regularly.
Getting the right setup can feel like a project in itself, but I promise you, it's one of the most important investments you can make in your studio and, more importantly, in your health. I've actually put together a whole guide on this, covering various scenarios and budget levels. If you're wondering what your options are, I highly recommend checking out these artist studio ventilation setup ideas. It's also worth a deeper dive into why good ventilation is crucial for artists – a piece that really lays out the fundamental principles.

Monitoring Your Studio Environment
After setting up what I thought was decent ventilation, I started to wonder, 'Is this actually working? Am I just moving air around, or am I truly making a difference?' This is where a little bit of technology can come in handy. I've found that sometimes, you just need hard data to confirm what your nose or nagging headache is telling you. Basic air quality monitors are becoming increasingly affordable and can provide valuable insights into your studio's atmospheric health, transforming guesswork into informed action. It's less about paranoia and more about empowerment and verification.

What to Monitor: Your Studio's Environmental Report Card
To move from guesswork to informed action, consider these key environmental metrics:
- VOC Sensors: These devices can detect the presence of volatile organic compounds, giving you a general indication of chemical fume levels. While consumer-grade sensors may not be specific about which VOCs, a high reading is a clear signal to increase ventilation immediately. Some advanced models can differentiate between total VOCs and specific chemicals like formaldehyde, which is invaluable for certain art materials. Consistent monitoring can reveal patterns of exposure.
- Formaldehyde Monitors: Given formaldehyde's prevalence in many art materials (adhesives, some acrylics, particleboard), a dedicated formaldehyde monitor can provide more precise data than a general VOC sensor. These are particularly useful if you're using composite wood products or certain glues.
- Particulate Matter (PM) Sensors: These monitors measure the concentration of airborne particles (e.g., PM2.5, PM10). If you're working with pastels, charcoal, ceramics, or doing any sanding, a PM sensor can tell you if your dust control measures are effective. A significant spike means your dust suppression or capture isn't sufficient, and you need to adjust your practices or ventilation.
- Carbon Dioxide (CO2) Sensors: While not a direct measure of art material hazards, high CO2 levels often indicate poor general ventilation and air stagnation. Elevated CO2 can contribute to fatigue, reduced concentration, and headaches, signaling a clear need for more fresh air to dilute all airborne contaminants, including VOCs and particulates.
- Humidity and Temperature: While not pollutants themselves, extreme humidity can foster mold growth, and high temperatures can significantly increase the off-gassing rates of many chemicals, making them more volatile. Monitoring these can help you maintain an optimal environment that discourages biological hazards and reduces chemical release.
Monitoring isn't about paranoia; it's about empowerment. It gives you objective feedback, allowing you to adjust your practices and ventilation systems for optimal safety and comfort. Think of it as having an invisible assistant constantly checking the pulse of your studio, empowering you to make data-driven decisions about your health. It’s definitely shifted my perspective from guesswork to informed action. Remember, consistent readings over time are more valuable than single snapshots – they reveal trends and the true effectiveness of your safety protocols.
Personal Protective Equipment (PPE): Your First Line of Defense
Ventilation is paramount, but sometimes, it's simply not enough, or it needs to be supplemented. This is where Personal Protective Equipment, or PPE, comes into play. Think of PPE not as a sign of weakness, but as a commitment to longevity in your artistic practice. It's about creating a barrier between you and the hazards you work with, a sort of artistic armor. I often tell myself, 'If I can't breathe safely, I can't paint well.' And it's true! There's an undeniable romance to getting paint on your hands, but there's wisdom in protecting them, too. It's a simple, tangible way to take control of your exposure.
Essential PPE for Artists
Type of PPE | Primary Use Cases | Why It's Important | Maintenance & Limitations |
|---|---|---|---|
| Respirators (N95/P100) | Sanding, spray painting, mixing dry pigments, working with strong solvents, epoxy resins | Protects lungs from fine particulates, fumes, and vapors. N95 for dust, P100 for fumes/vapors. | Must be fit-tested annually; N95s for particulates, P100 (or other organic vapor cartridges) for chemical fumes/vapors. Replace filters/cartridges regularly per manufacturer guidelines or when odor/resistance is detected. Not for oxygen-deficient atmospheres. |
| Safety Glasses/Goggles | Spraying, sanding, working with caustic chemicals, using power tools | Prevents eye irritation, chemical splashes, and flying debris. | Should meet ANSI Z87.1 standard. Clean regularly; replace if scratched or damaged. Goggles provide better splash protection than glasses. |
| Nitrile Gloves | Handling solvents, resins, oil paints, caustic cleaners, some acrylics | Protects skin from absorption of chemicals, prevents irritation and allergic reactions. | Nitrile is generally solvent-resistant; latex/vinyl are less so. Check compatibility with specific chemicals (see SDS). Replace immediately if torn or punctured. Single-use is often best. |
| Aprons/Lab Coats | General studio work, particularly with liquids and powders | Protects clothing and skin from spills and splashes. | Choose materials resistant to likely spills (e.g., heavy cotton for paints, chemical-resistant for solvents). Wash frequently. |
| Barrier Creams | When gloves are impractical for very fine work | Provides a temporary skin barrier against irritants, though less effective than gloves. | Reapply frequently; wash hands thoroughly after use. Never a substitute for gloves when handling hazardous materials. |
| Full-face Respirators | For highly toxic fumes, heavy spraying, or specific chemical exposures | Offers comprehensive respiratory and eye protection, essential for extreme hazards. | Requires professional fit-testing. Offers superior protection but can be cumbersome and hot. Regular filter/cartridge replacement is critical. |
| Hearing Protection | Using power tools, compressors, loud machinery | Prevents irreversible noise-induced hearing loss, preserving one of your most valuable senses for perception. | Earplugs are cost-effective; earmuffs offer higher protection. Ensure proper insertion/fit for maximum effectiveness. |
Remember, PPE is always the last line of defense after implementing ventilation and safe work practices. It's there to catch what other measures miss, not to replace them. And crucially, make sure your PPE is properly fitted and regularly maintained or replaced – a compromised respirator is no protection at all. Look for certification standards like ANSI Z87.1 for eye protection and NIOSH approval for respirators (e.g., N95, P100 designations). These certifications ensure the equipment meets rigorous safety standards. Don't cheap out on your health; it's the one thing that can't be replaced.
Beyond Ventilation: Safe Material Handling and Storage
Okay, so we've talked about what's in the air, what it does to you, how to get rid of it, and how to protect yourself. But there's another crucial layer to studio safety that often gets overlooked: how you manage your materials when you're not actively using them. Even with the best ventilation and proper PPE, your studio environment can still harbor risks if you're not handling and storing your materials correctly. This is one of those areas where a little bit of foresight goes a long way. I learned this the hard way after a minor spill that could have been much worse – a vivid reminder that organization isn't just about aesthetics; it's about safety. It's about creating a holistic safe practice.
Even with the best ventilation and proper PPE, your studio environment can still harbor risks if you're not handling and storing your materials correctly. This is one of those areas where a little bit of foresight goes a long way. I learned this the hard way after a minor spill that could have been much worse – a vivid reminder that organization isn't just about aesthetics; it's about safety. It’s about creating a system that minimizes risk, allowing you to focus on your art, not on potential hazards. This holistic approach to studio safety ensures that every aspect, from the air you breathe to the materials on your shelves, contributes to a healthier and more productive creative life.
Labeling and Understanding Safety Data Sheets (SDS)
Every chemical material in your studio should be clearly labeled. This isn't just a suggestion; it's a critical safety practice, and often a legal requirement in many jurisdictions. Manufacturers provide Safety Data Sheets (SDS) (formerly Material Safety Data Sheets or MSDS) for a reason. These comprehensive, standardized documents contain vital information about a product's chemical composition, potential hazards, safe handling procedures, first-aid measures, exposure limits, and disposal instructions. Take the time to read them! Understanding what you're working with is the first step to working safely, and frankly, it's a non-negotiable part of being a responsible artist. I keep a binder (or a dedicated digital folder) of all my SDS sheets, and while it's not a thrilling read, it's a comforting safety net that can literally save your life or prevent a serious incident. If a product doesn't have an SDS readily available, or if you can't understand it, question its use – your health is worth it.

Proper Storage and Disposal: Managing Your Material Inventory
Effective storage and responsible disposal are the unsung heroes of studio safety. They prevent leaks, reduce chronic exposure, and mitigate emergency risks.
- Airtight Containers: Always store volatile liquids like solvents, mediums, and adhesives in tightly sealed, chemically resistant, airtight containers to minimize off-gassing when not in use. This not only reduces VOCs in the air but also prolongs the life of your materials. Glass or metal containers with tight-fitting, screw-on lids are often preferred over plastic, especially for strong solvents that can degrade certain plastics.
- Flammables Cabinet: If you use significant quantities of flammable solvents, investing in a dedicated, fire-rated flammables storage cabinet is non-negotiable. These cabinets are designed to protect contents from external fires and prevent internal fires from spreading. Store flammables away from heat sources, direct sunlight, open flames, and ignition sources (e.g., pilot lights, electrical sparks, motors). Even small quantities should be stored in a well-ventilated, cool, and secure area, ideally in a secondary containment tray.
- Temperature Control: Extreme temperatures can significantly affect the stability and off-gassing rates of some materials. High temperatures increase evaporation and chemical reactions. Store paints and chemicals in a cool, dry place, out of direct sunlight and away from heat vents. Freezing or excessive heat can also damage the materials themselves, making them unusable or even more hazardous.
- Segregation of Incompatibles: Never store incompatible chemicals together. For example, don't store acids near bases, or oxidizing agents near flammables. A chemical reaction between incompatible materials can lead to fire, explosion, or the release of toxic gases. Always refer to the SDS for specific incompatibility information for each product.
- Inventory Management: Don't hoard materials! Keeping a minimal, rotating inventory reduces the total quantity of hazardous materials in your studio, lowering the overall risk. Buy only what you need, when you need it, and use older stock first.
- Waste Disposal: This is critical. Never pour solvents, paint sludge, chemical waste, or contaminated water down the drain, into the trash, or onto the ground. Many art materials are classified as hazardous waste and require special disposal. Check with your local waste management facility or environmental protection agency for specific guidelines on disposing of art chemicals in your area. Use sealed, clearly labeled, chemically resistant containers for temporary waste storage. I often use old, clearly marked solvent cans for this, ensuring they're always sealed tightly when not in use and stored in a safe area until proper disposal.
- Spill Kits: For any studio using liquid chemicals, having a basic spill kit readily available can make a huge difference in managing accidental spills safely and effectively. A basic kit should include: absorbent pads or socks, granular absorbent material (like kitty litter or commercial absorbents), chemically resistant gloves, safety goggles, heavy-duty disposal bags, and a non-sparking scoop or brush. Know where it is and how to use it!
- Order and Accessibility: Keep your studio organized. A cluttered studio is a dangerous studio. Avoid creating tripping hazards or stacks of materials that could fall. Ensure emergency equipment (like a fire extinguisher and a well-stocked first-aid kit) is easily accessible, clearly marked, and that you know how to use them. A minute saved in an emergency can make all the difference, and a little preparedness goes a very long way. Always keep a clear, unobstructed path to all exits.
Remember, a tidy and well-organized studio is a safer studio. It reduces the chance of spills, accidental exposures, and keeps the air cleaner even when you're not actively working. It's an act of respect for your craft and your personal well-being. It's an act of respect for your craft and your personal well-being.
- Airtight Containers: Always store volatile liquids like solvents and mediums in tightly sealed, airtight containers to minimize off-gassing when not in use. This not only reduces VOCs in the air but also prolongs the life of your materials.
- Flammables Cabinet: If you use significant quantities of flammable solvents, consider investing in a dedicated, fire-rated flammables storage cabinet. Store them away from heat sources, direct sunlight, and ignition sources.
- Temperature Control: Extreme temperatures can affect the stability and off-gassing rates of some materials. Store paints and chemicals in a cool, dry place, out of direct sunlight.
- Segregation: Keep incompatible chemicals separated. For example, don't store acids near bases, or oxidizing agents near flammables.
- Waste Disposal: Never pour solvents or chemical waste down the drain. Many materials require special hazardous waste disposal. Check with your local waste management facility for guidelines on disposing of art chemicals. Use sealed, labeled containers for temporary waste storage. I often use old, clearly marked solvent cans for this, ensuring they're always sealed tightly when not in use.
- Order and Accessibility: Keep your studio organized. Avoid creating tripping hazards or stacks of materials that could fall. Ensure emergency equipment (like a fire extinguisher and a well-stocked first-aid kit) is easily accessible and that you know how to use them. A minute saved in an emergency can make all the difference, and a little preparedness goes a very long way.
Remember, a tidy and well-organized studio is a safer studio. It reduces the chance of spills, accidental exposures, and keeps the air cleaner even when you're not actively working.

FAQ: Clearing the Air on Common Questions
I know, this can feel like a lot. Whenever I dive deep into a topic, my head fills with a hundred 'what-if' and 'how-about' questions. So, let's tackle some of the questions that probably just popped into your head, the kind of things I spent years wondering about myself.

What are the legal requirements for studio ventilation?
This is a really important question, and the answer can be complex because it varies significantly by location and the nature of your artistic practice. If you're operating a home studio, regulations are generally less stringent than for commercial art studios or educational institutions. However, if your work involves particularly hazardous materials (e.g., large-scale welding, commercial spray painting, large quantities of toxic chemicals), even a home studio might fall under certain occupational safety and health regulations (like OSHA in the US, or similar bodies internationally). These regulations typically focus on permissible exposure limits (PELs) for specific chemicals and mandates for adequate ventilation and PPE.
My best advice? Don't guess.
- Check Local Ordinances: Start with your city or county building and health departments. They can provide information on local ventilation codes, fire codes (especially for flammable materials), and waste disposal regulations.
- Professional Consultation: For serious chemical use, consider consulting an industrial hygienist or an occupational safety expert. They can assess your specific materials and processes and recommend solutions that meet regulatory standards and best practices.
- Insurance: Your homeowner's or renter's insurance might have clauses related to hazardous materials or business operations from home. It's worth a call to ensure you're covered.
While it might seem like a bureaucratic headache, understanding and complying with legal requirements isn't just about avoiding fines; it's about establishing a baseline of safety that protects you, your community, and your creative longevity.
What is an Air Quality Index (AQI) and how does it relate to my studio?
Beyond individual sensor readings, you might encounter the term Air Quality Index (AQI). The AQI is a national standard (in many countries) that reports daily air quality, usually focusing on criteria pollutants like ozone, carbon monoxide, sulfur dioxide, and particulate matter. While it's primarily for outdoor air, understanding your local AQI can inform your decisions about opening windows for dilution ventilation – if the outdoor air is poor (e.g., due to wildfire smoke, industrial pollution, or high pollen counts), opening your windows might actually bring more harmful particulates and pollutants into your studio, making reliance on filtered indoor air or your LEV system even more critical. It's another layer of awareness for your creative environment. Always check your local forecast before throwing open those windows!
Is just opening a window enough?
It's a start, absolutely, and it's always a thousand times better than nothing at all! For very low-intensity work, like sketching with pencils or painting with pure watercolors, simply opening a window might be sufficient, especially if you have another opening for a cross-breeze. However, if you're working with oils, strong solvents, aerosols, or generating any significant dust, you really need to take it a step further. You need to create an active exhaust system by placing a fan in the window, pointing outwards. This actively pulls contaminated air out of the room, creating negative pressure that draws fresh air in from other openings. Factors like room size, the volume of materials you're using, and the duration of your work session all play a significant role in determining how much ventilation you truly need. A small window fan might be okay for occasional, light solvent use, but heavier or prolonged work demands more robust solutions like a dedicated LEV unit. My rule of thumb is this: if you can smell it, or if you start to feel any short-term symptoms like a headache or brain fog, your window-only approach isn't cutting it. It's an immediate signal to upgrade your ventilation strategy.
What about biological hazards like mold or dust mites? The Unseen Studio Ecosystem
Ah, the unseen ecosystem! While VOCs and particulates get most of the attention, your studio can also be a breeding ground for biological hazards, especially if it's damp or poorly cleaned. Mold spores, bacteria, and dust mites can trigger allergies, asthma, and other respiratory issues. The best defense here is prevention: control humidity levels (aim for 30-50% relative humidity, consistently), ensure good general ventilation to prevent moisture buildup, and practice rigorous wet cleaning. If you spot mold, address it immediately with appropriate PPE (gloves, respirator, eye protection) and cleaning agents (like diluted bleach or commercial mold removers), or consult a professional if it's extensive. Remember, biological contaminants can also come from natural materials like untreated wood, natural fibers, or even your own body (skin cells, pet dander). A clean, dry, and well-ventilated space is your best ally against these tiny invaders.

What's the difference between an air purifier and an exhaust fan?
This is a common point of confusion, and it's crucial to understand their distinct roles, as they perform two fundamentally different jobs. An exhaust fan (or a dedicated ventilation system) is designed to remove contaminated air from the room and introduce fresh air from outside. Its primary purpose is to dilute and expel hazardous substances, physically moving them out of your breathing zone. It's about getting the bad stuff OUT.
An air purifier, on the other hand, circulates the air within the room, trapping particles (like dust, pollen, pet dander, or some larger pigment particles) in various types of filters (most commonly HEPA filters). While some high-end purifiers include activated carbon filters that can absorb some VOCs, they are generally not designed to handle the high volume and concentration of chemical fumes produced by an active artist's studio. They clean the air you're currently breathing inside the room, but they don't bring in fresh air or effectively remove the source of the contamination. For hazardous fumes, you must prioritize getting the bad air out with an exhaust system, not just swirling it around with a filter, however good it is. Think of it this way: an air purifier treats the symptoms (dirty air), while an exhaust fan addresses the root cause (the source of contamination). Ideally, in a busy studio, you'd use both: robust exhaust ventilation to remove contaminants, and an air purifier with a HEPA and activated carbon filter for ambient air cleaning when not actively generating fumes, or for fine dust.

How do I handle toxic pigment disposal?
This is a highly responsible question, and it's one that every artist, especially those working with traditional pigments, needs to take seriously. Many vibrant pigments contain heavy metals (like cadmium, lead, cobalt, chromium) that are hazardous to both human health and the environment if not disposed of correctly. Never wash these down the drain or throw them in regular trash.
Here’s a general approach:
- Collect Separately: Use dedicated, clearly labeled, sealed containers for waste paint (e.g., solvent-soaked rags, paint sludge from brush cleaning, dried paint scraps). If you've used different hazardous pigments, it's often best to keep their waste separate if possible, or at least clearly identify the most hazardous components.
- Allow Solvents to Evaporate (Carefully): For solvent-heavy waste, you can sometimes allow the solvent to evaporate in a well-ventilated outdoor area away from ignition sources and out of reach of children and pets. This leaves behind a concentrated sludge that is easier to dispose of as solid hazardous waste.
- Local Hazardous Waste Facilities: The most common and safest method is to take your collected hazardous art waste to your local household hazardous waste (HHW) collection facility. These facilities are equipped to handle and dispose of chemicals safely. Check your city or county waste management website for schedules and accepted materials.
- Specialized Art Waste Services: In some larger artistic communities, there might be specialized services that pick up or accept art-related hazardous waste.
- Minimize Waste: The best strategy is to prevent waste in the first place. Buy only what you need, use all your paint, and clean brushes efficiently without excessive solvent use.
Remember, responsible disposal is a critical part of your environmental stewardship as an artist. Ignorance is not an excuse when it comes to protecting our planet and public health.
Are 'non-toxic' or 'odorless' materials completely safe?
This is perhaps one of the biggest and most dangerous misconceptions in the art world – the 'greenwash' trap. Let's tackle them separately:
- 'Non-toxic': This label, particularly the ACMI AP (Approved Product) seal or the ASTM D-4236 standard, generally means the product has been evaluated by a toxicologist and deemed to contain no materials in sufficient quantities to be toxic or harmful to humans through inhalation, ingestion, or skin contact under normal use. However, "normal use" for a crayon is very different from "normal use" for a solvent. And crucially, it often says nothing about the long-term effects of fumes or dust, especially if used improperly, in large quantities, or in poorly ventilated spaces. Always read the fine print! "Non-toxic" doesn't mean "non-irritating" or "allergy-free" either.
- 'Odorless' Mineral Spirits: This is where things get truly tricky. "Odorless" mineral spirits are often more dangerous than their smelly counterparts precisely because they lack that warning scent. The odor has been removed (typically by removing some aromatic compounds), but the harmful Volatile Organic Compounds (VOCs) are still very much present and off-gassing into your air, often at similar concentrations. Your nose is a powerful safety tool; when it's chemically muted, you can unknowingly expose yourself to dangerously high concentrations of fumes without any sensory alert. Never equate "odorless" with "safe." Always treat them as you would regular, odorous solvents and ensure robust ventilation.
Can I use essential oils or air fresheners to mask studio smells? (Please, don't!)
This is a tempting thought, especially when that 'studio smell' gets a bit overwhelming! However, it's generally a bad idea for a crucial reason. Essential oils, while natural, are themselves volatile organic compounds and can add to the existing chemical burden in your air, potentially causing irritation, allergic reactions, or even sensitizing you over time. They don't remove pollutants; they add to the mix. Air fresheners are often a cocktail of synthetic chemicals that do nothing to remove hazards; they merely mask them, often adding more pollutants to the air you're trying to clean. Your goal should always be removing contaminants, not simply covering them up. If your studio smells, it's a clear signal to improve ventilation and identify the source of the odor, not to introduce more fragrances. Think of it like this: if your car is making a strange noise, you don't just turn up the radio; you investigate the source of the problem. Masking odors is masking danger, and can even desensitize your nose to the true, harmful fumes, putting you at greater risk.
How can I minimize airborne dust from pastels/charcoal during active work?
Ah, the beautiful but challenging world of dry mediums! Pastels and charcoal are notorious for creating a fine, pervasive dust that can quickly become an inhalation hazard. While a good respirator (P100!) is non-negotiable for protection, here are some active strategies I use to keep the dust down while working:
- Work Vertically over a Tray: Position your easel so that gravity works in your favor. Work on a slightly inclined or vertical surface, with a tray or newspaper underneath to catch falling dust. This prevents dust from spreading horizontally across your workspace.
- Use a Downdraft Table: If you can invest, a downdraft table is a game-changer. It pulls air (and dust) downwards through a slotted surface, immediately capturing particles before they become airborne. This is the gold standard for dust control in fine art.
- Low-Velocity Local Exhaust: A small, quiet fan positioned behind your artwork, blowing gently away from you and towards an open window (or better, a filter box/exhaust hood), can help pull dust away from your breathing zone without disturbing your work too much.
- Tap and Brush Gently: Instead of blowing excess dust off your work (never do this!), gently tap the back of your board/paper or use a soft, dry brush to lightly sweep excess pigment into your collection tray.
- Dedicated Workspace: Try to confine your dusty work to one area of your studio. This makes cleanup easier and prevents dust from contaminating other areas or materials.
- Frequent Cleanup (Wet!): Don't let dust accumulate on surfaces. During breaks, use a damp cloth (not wet enough to drip) to wipe down your work area, capturing dust rather than stirring it up.
Remember, dust control isn't about eliminating every single particle – that's often impossible – but about significantly reducing your exposure and creating a healthier environment for your delicate lungs.
How often should I clean my studio, and how? The Artist's Cleaning Ritual
Regular cleaning is a non-negotiable part of studio safety, not just for aesthetics but for your health. I aim for a quick cleanup after every session and a deeper clean weekly, focusing on reducing accumulated dust and chemical residues. The how is critical: always prioritize wet cleaning over dry cleaning. Sweeping with a broom or using a regular vacuum cleaner (without a HEPA filter) will simply kick up settled dust and particulates back into the air, often making the problem worse and prolonging exposure. Instead, use a damp mop or cloth to wipe down all surfaces, capturing dust and preventing it from becoming airborne. For dust-heavy areas (e.g., after sanding or working with pastels), a HEPA-filtered vacuum cleaner is essential (household vacuums are generally not sufficient for fine dust and can even spread it!). And don't forget to regularly clean or replace your ventilation filters! Neglecting this vital step can turn your expensive filtration system into a source of accumulated contaminants. Remember, cleanliness isn't just aesthetic; it's a fundamental safety practice that protects your lungs and workspace.

What about pregnant artists or those with compromised immune systems?
This is a critically important consideration, and for these individuals, the precautionary principle should always apply: when in doubt, minimize or eliminate exposure. Pregnant artists, or those planning pregnancy, should be especially cautious as many chemicals can pose risks to fetal development. Similarly, individuals with compromised immune systems (e.g., due to illness, medication, or age) are more vulnerable to infections from biological hazards and adverse reactions to chemical exposures.
My strong recommendation is to:
- Consult a Medical Professional: Speak with your doctor about your specific art practices and the materials you use. Share SDS sheets with them if possible.
- Strictly Avoid Known Teratogens/Reprotoxins: Identify any materials listed as reproductive toxins or teratogens on their SDS and avoid them entirely.
- Enhance All Safety Measures: Implement the highest possible standards for ventilation (both dilution and local exhaust), meticulously use appropriate PPE (especially a full-face respirator with organic vapor/P100 cartridges for any solvent use), and practice rigorous hygiene.
- Consider Material Substitution: Explore water-based, non-toxic, or naturally derived alternatives for all materials whenever possible. This might mean temporarily shifting your artistic focus to safer mediums like drawing, pure watercolor, or low-VOC acrylics.
- Minimize Time in Studio: Reduce the duration and frequency of your work sessions, especially with hazardous materials.
- Avoid Dry Pigments: For those with respiratory sensitivities, completely avoid dry pigments, pastels, and charcoal, or any activity that generates fine dust.
This isn't about creating fear; it's about protecting yourself and your loved ones with the utmost care and informed decision-making. Your art can adapt, but your health is non-negotiable.
How can I make my studio more ergonomically friendly? Protecting Your Most Valuable Tools
This might seem a bit off-topic, but chronic pain and injury are silent threats to an artist's career, just like poor air quality. Ergonomics is the science of designing your workspace to fit your body and work style, reducing strain and preventing repetitive stress injuries. Simple steps can make a huge difference: ensure your easel or workbench is at the correct height for your posture (whether sitting or standing), use an adjustable chair with good lumbar support, take frequent breaks to stretch and move, and vary your posture and tasks throughout the day. Listen to your body's signals – persistent aches are not a 'badge of honor,' they're a warning that something needs to change. Investing in ergonomic tools (e.g., comfortable brush handles, lighter equipment) and a thoughtful setup (e.g., adjustable standing desks, anti-fatigue mats, proper lighting to reduce eye strain, ensuring frequently used tools are within easy reach) can extend your creative life by decades, allowing you to focus on your art, not your discomfort. Your body is your most precious instrument; treat it with the care it deserves, and it will serve your art for many years to come.

Can I use natural or 'eco-friendly' art supplies for safety? The Greenwash Trap
Yes, absolutely, and this is an area I'm constantly exploring! There's a growing market for safer, more environmentally conscious art materials. Think water-miscible oil paints (which clean up with soap and water, eliminating the need for harsh solvents), acrylics labeled with specific low-VOC or zero-VOC certifications, or natural pigments sourced ethically. Even turpentine alternatives derived from citrus can be less toxic than traditional solvents, though they still require ventilation and can cause allergic reactions in some individuals. The key is to be an informed consumer and to never assume a "green" or "natural" label means a complete absence of risk. Always check product safety data (the SDS!) and use proper ventilation and PPE, even with these alternatives – better safe than sorry, I always say. Many "natural" materials, like certain plant-based dyes or powdered clays, can still be irritants, sensitizers, or contain hazardous components if not handled correctly. Education is your best "eco-friendly" tool, allowing you to make truly informed choices.

I work in my bedroom. What's the most important thing I can do? Creating a Safe Sleep-Work Balance
First and foremost, if there's any way to create a physical separation between your sleeping and working space, do it. Even a temporary curtain or screen can help create a mental boundary, both physically and psychologically. If that's not possible, then ventilation becomes absolutely non-negotiable and must be rigorously maintained. Install a window fan specifically for exhaust, ensuring it pulls air out of your room, away from your bed, and creates a clear airflow path for fresh air to enter. Beyond that, be meticulous: immediately cap all solvents, paints, and other chemical containers when not in use. Move any finished paintings or projects that are off-gassing to a different, well-ventilated room (like a garage or separate utility room) to dry. Use protective coverings over your bed and furniture when working, and clean your space thoroughly (wet cleaning is key!) after every session. I know it sounds like a lot, but consider it an essential ritual for protecting your sanctuary. Your health is paramount, and your bedroom should remain a sanctuary for rest, not a reservoir of chemical fumes or fine dust. Your sleep quality, and ultimately your creativity, will thank you. A small, portable local exhaust unit (like a capture hood or snorkel) can be a game-changer for bedroom studios, targeting fumes right at the source before they can disperse.

How do I choose the right respirator cartridge?
Choosing the correct respirator cartridge is crucial for targeted protection. Different cartridges filter different types of contaminants:
- Particulate Filters (N95, P100): These are graded by their efficiency at filtering airborne particles. N95 filters at least 95% of airborne particles, but are not oil resistant. P100 filters at least 99.97% of airborne particles and are oil resistant, making them suitable for oil mists from spray paints or solvents. These protect against dusts, mists, and fumes (solid particles), but not gases or vapors.
- Organic Vapor (OV) Cartridges: These are typically labeled with black bands and are designed to absorb organic gases and vapors, such as those released from solvents (turpentine, mineral spirits, xylene, toluene), resins, and some glues. They often come combined with particulate filters (e.g., OV/P100).
- Acid Gas (AG) Cartridges: Labeled with white bands, these protect against acidic gases like chlorine, hydrogen chloride, or sulfur dioxide.
- Ammonia/Methylamine (AM/MA) Cartridges: Labeled with green bands, these protect against ammonia and certain amines, found in some acrylic mediums and cleaning agents.
Always check the SDS for your materials to identify the specific hazards and choose cartridges accordingly. Replace cartridges when you smell contaminants, feel resistance breathing, or according to the manufacturer's schedule. They have a finite life!
What about children or pets in the studio?
If children or pets are present in your home, it's absolutely paramount to prevent their access to your studio, especially when you're working or when hazardous materials are out. Their smaller size, developing bodies, and faster metabolisms make them significantly more vulnerable to chemical exposure and dust inhalation. Paints, solvents, and pigments that might be an irritant to an adult could be highly toxic or even lethal to a child or pet. Even seemingly safe materials could pose a choking hazard or be ingested, leading to a veterinary or medical emergency. My advice is unequivocal: keep your studio locked when not in direct supervision, store all hazardous materials in secured, child-proof cabinets, and ensure no accessible residues remain after your work sessions. Consider a separate, well-ventilated space for drying artworks if your primary studio is in a living area, away from curious hands or paws. It's a non-negotiable aspect of responsible pet and child ownership for an artist.
What emergency supplies should I have on hand?
Beyond a basic spill kit, a well-prepared studio should always include:
- Fire Extinguisher: A multi-purpose ABC-rated extinguisher is generally recommended for studios, capable of handling ordinary combustibles, flammable liquids, and electrical fires. Know how to use it (remember PASS: Pull, Aim, Squeeze, Sweep), and have it inspected annually. Ensure it's easily accessible and not blocked by clutter.
- Well-Stocked First-Aid Kit: Include bandages, antiseptic wipes, sterile dressings, pain relievers, allergy medication, burn cream, eye wash solution (or a dedicated eye wash station if working with corrosives), and any personal medications you might need. Ensure someone else in your household knows where it is and how to use it. Consider taking a basic first aid course.
- Emergency Contact Information: Keep a clear, visible list of emergency services (fire, ambulance, poison control), your doctor's number, and personal contacts. Laminate it and post it near a phone. In a genuine emergency, every second counts. Make sure your phone is charged and accessible, and if working alone, consider a 'check-in' system with a friend or family member.
Breathing Room for Your Creativity
Changing my approach to studio ventilation and safety wasn't about adding another tedious chore to my already overflowing artist's to-do list. It was a profound shift, born out of respect. Respect for my health, for my craft, and for the future I envision as an artist. Your body, your lungs, your brain, your hands – they are the most important, irreplaceable tools you possess. They are the vessels for all your ideas, your skills, your unique vision. Treating them well isn't some frivolous luxury; it's fundamental maintenance, just like caring for your favorite brushes or pigments. It's an investment in the longevity of your passion and your career, ensuring you can keep creating for decades to come, with a clear mind and healthy body.
So, the next time you walk into your studio, pause. Take a deep breath. What do you smell? If it's that potent, familiar "art studio" smell, perhaps it's a whisper from your future self, urging you to open a window, turn on that fan, and truly give your lungs—and by extension, your unbounded creativity—the room to breathe. Don't just take my word for it; this isn't just about avoiding a headache; it's about safeguarding your artistic future. Dive deeper into how you can transform your studio into a haven of creativity and safety with my comprehensive guide on artist studio ventilation setup ideas and explore why good ventilation is crucial for artists. Your future self, your health, and your most vibrant creations will undoubtedly thank you. For more insights into my own creative process and the art I create, feel free to explore my work or delve into my artist's timeline.