The Artist's Breath: The Ultimate Guide to Healthy Studio Ventilation
Unlock a safe, thriving art studio. This ultimate guide helps artists identify VOCs, dust, and heavy metals, implement tailored ventilation, choose safer materials, and protect long-term health and creativity.
The Artist's Breath: The Ultimate Guide to Healthy Studio Ventilation
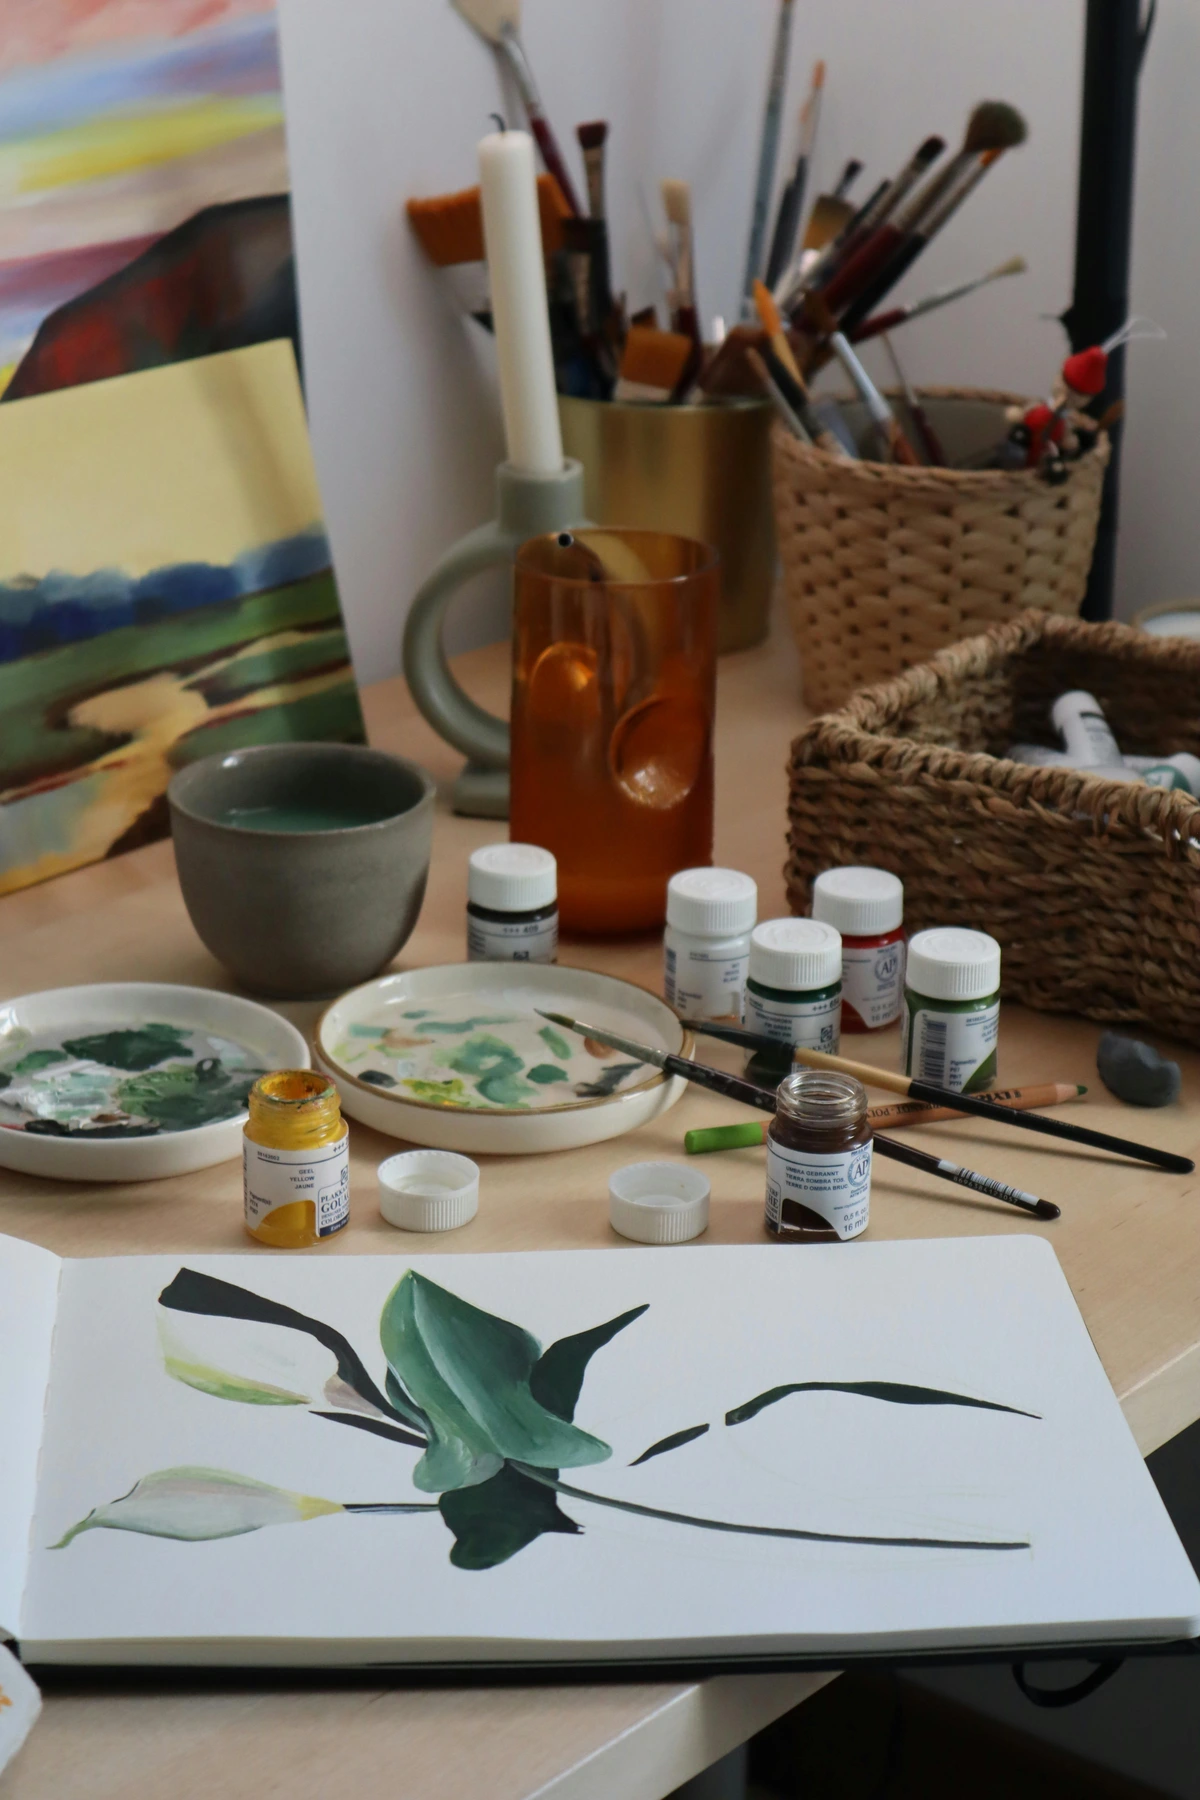
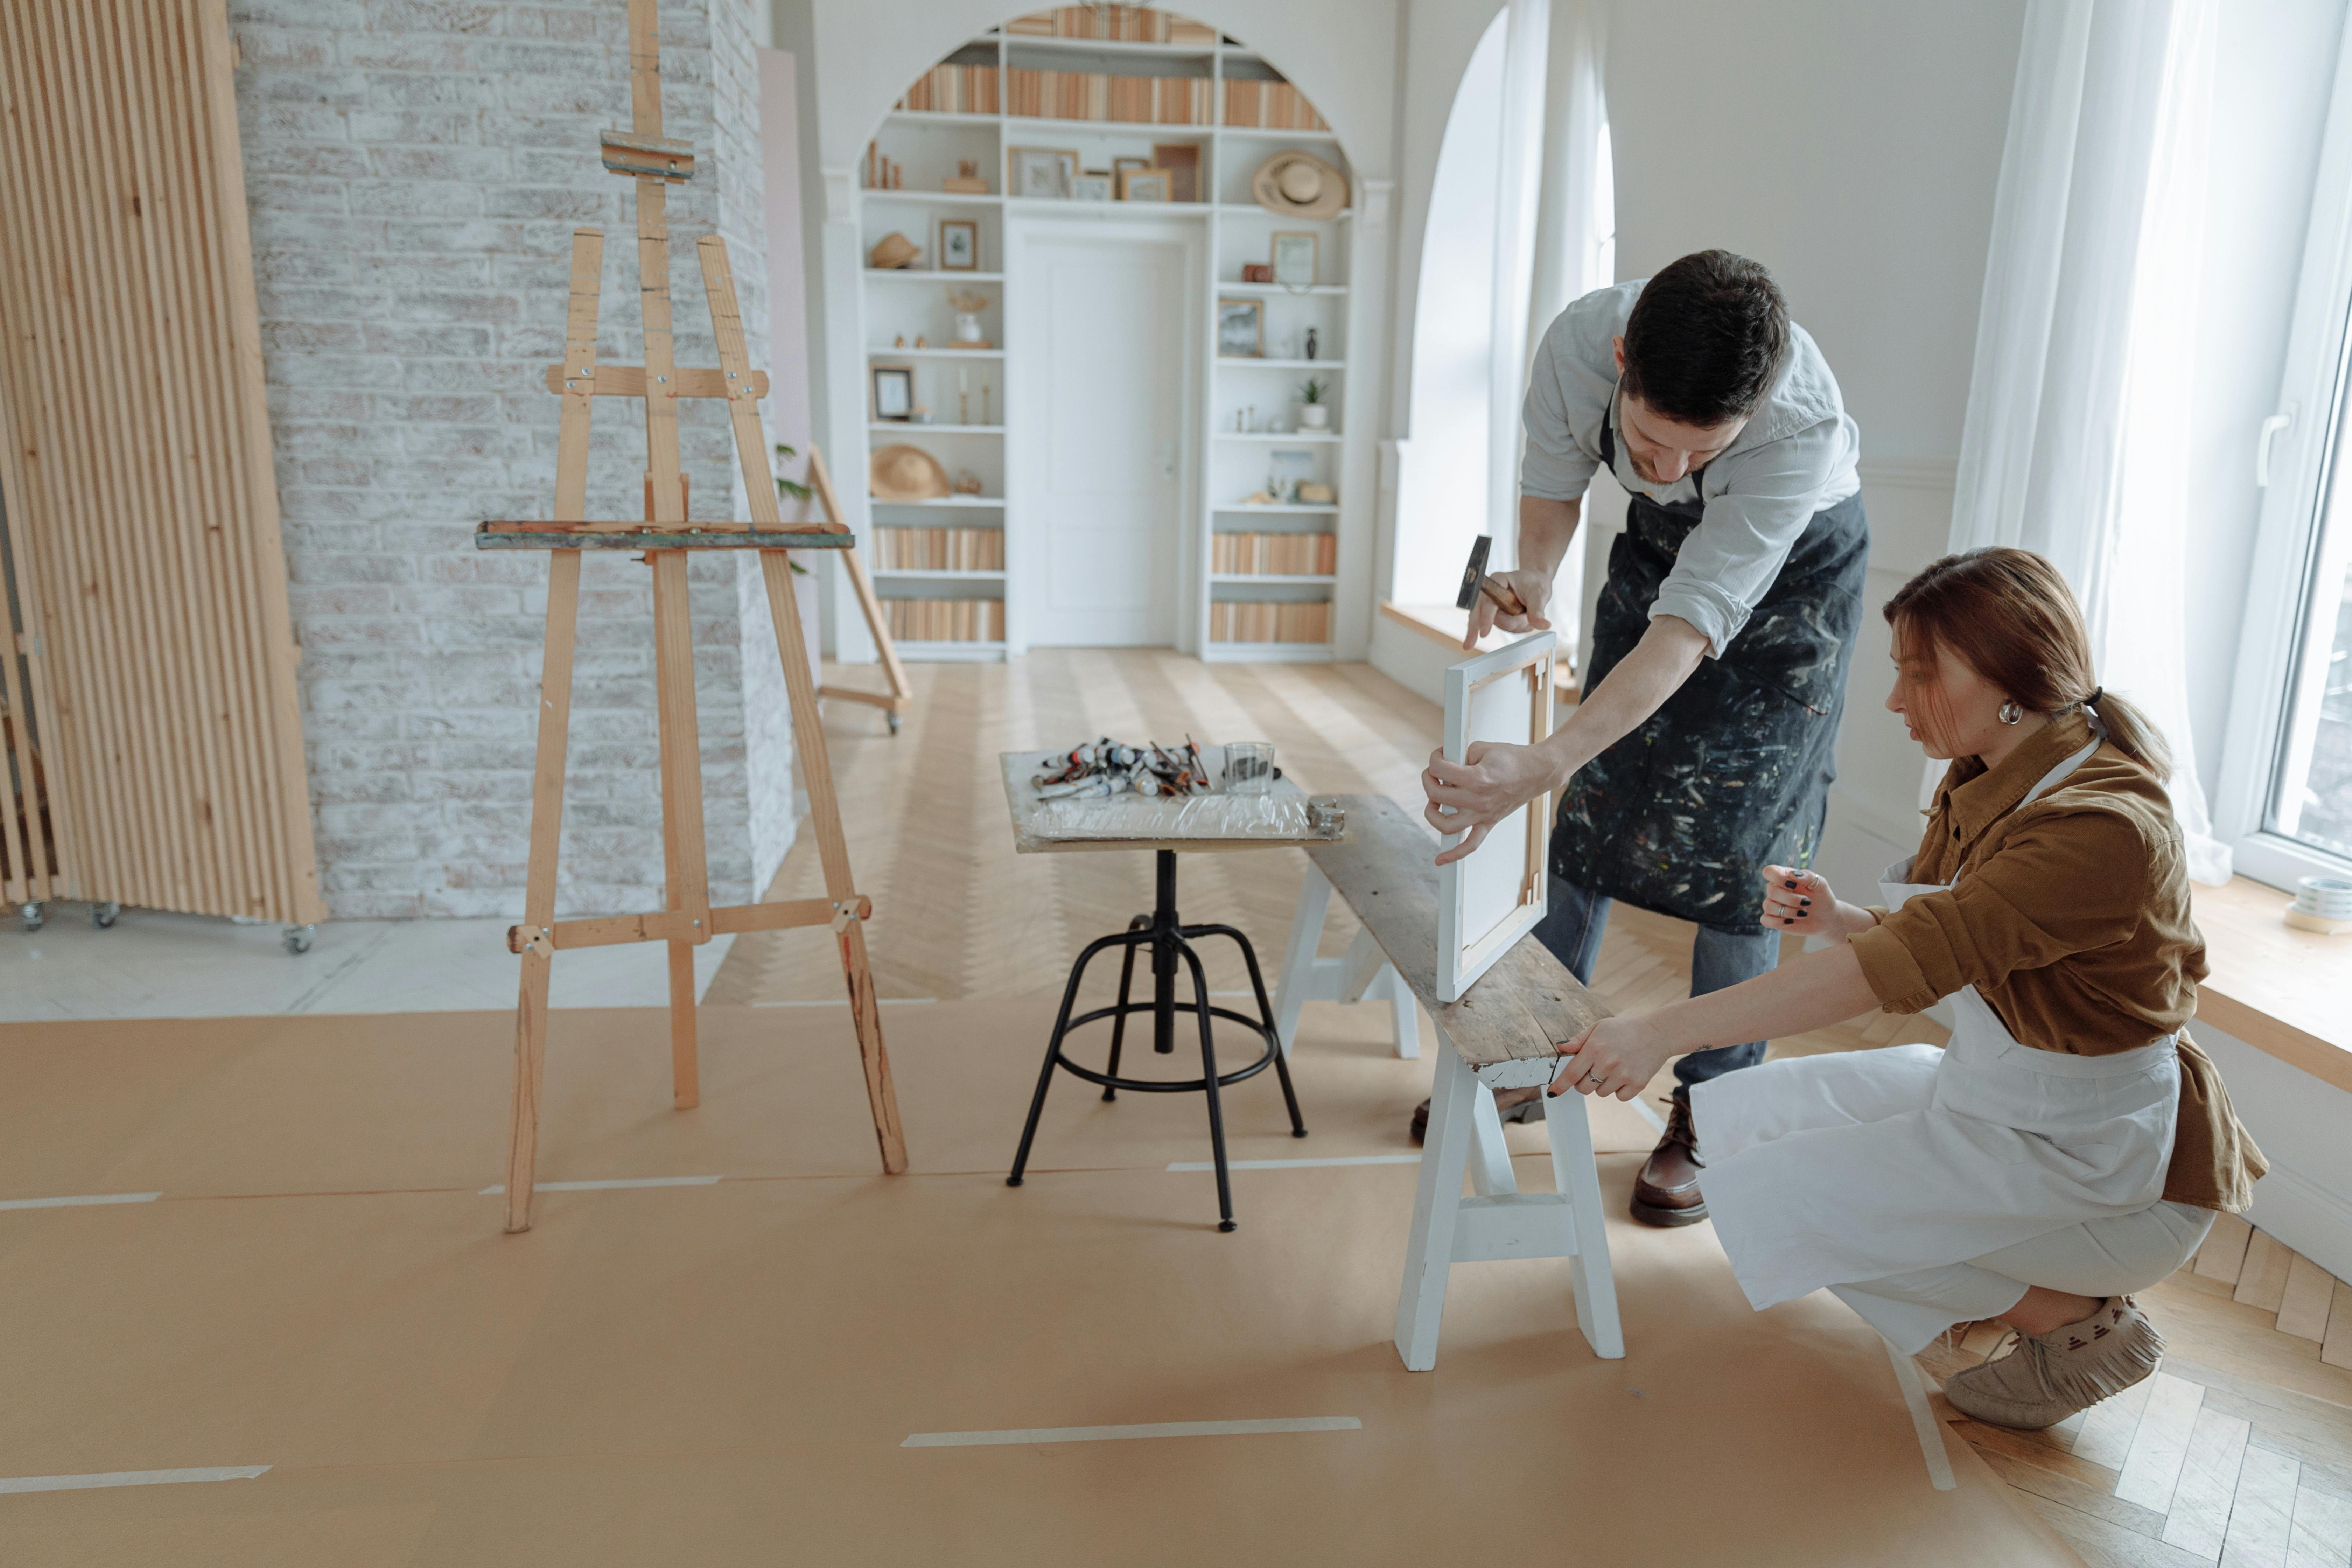
I still remember the almost intoxicating, chemical-sweet smell of turpentine from my first 'studio'—a cramped corner of a spare bedroom. It felt like the very essence of art, a heady perfume of creation. The romance of that idea lasted maybe three days, until the headaches started. I'd find myself feeling fuzzy-headed, short-tempered, and vaguely nauseous, always blaming it on bad sleep or too much coffee. It took an embarrassingly long time, and a few close calls with feeling truly woozy and creatively blocked, to connect the dots: I was, quite literally, trapping myself in a cloud of chemical fumes and visible dust motes dancing in the light, a self-imposed 'hotbox' of my own making. This 'hotbox' was more than just uncomfortable; it was a direct exposure to a dangerous cocktail of Volatile Organic Compounds (VOCs), insidious dust particles, and even potentially heavy metals, silently chipping away at my well-being. It was impacting my ability to create, making my journey unsustainable.
Historically, artists faced even greater odds, often paying a severe price for their craft. Think of the Renaissance masters, often unknowingly using pigments laced with lead or arsenic—substances that caused neurological damage and chronic illness. Mercury-based vermilion, a vibrant red, was used widely, exposing artists to tremors and kidney damage. Even earlier, the Roman Empire utilized lead in cosmetics and paints, contributing to widespread health issues among those who worked with it. Fast forward to the 19th century, and the dazzling green of Scheele's Green or Paris Green, popular in Impressionist palettes, was actually copper arsenite – a notorious poison. The cost of their craft was often their health, and sometimes even their lives. We have the knowledge now to do better, to create sustainably, and to nurture our artistic selves for the long haul. This guide will empower you to transform your studio from a potential health hazard into a sanctuary of safe creativity.
It's a classic artist problem, isn't it? We get so utterly lost in the creative flow—the color theory, the composition, the sheer joy of making marks on a surface—that the world outside our canvas fades away. But here's the unvarnished truth: the air you breathe in your studio isn't just background noise; it's as fundamental a tool as your finest brush or sharpest carving tool. And neglecting it isn't just uncomfortable or annoying; it can be genuinely dangerous, silently chipping away at your most important asset: you. So, let's talk about how to clear the air, quite literally, and make your studio a place where creativity can soar, not where your lungs get hammered, ensuring your artistic journey can continue for years to come, truly controlling your artist studio environment.
The Invisible Threat: Decoding Studio Contaminants
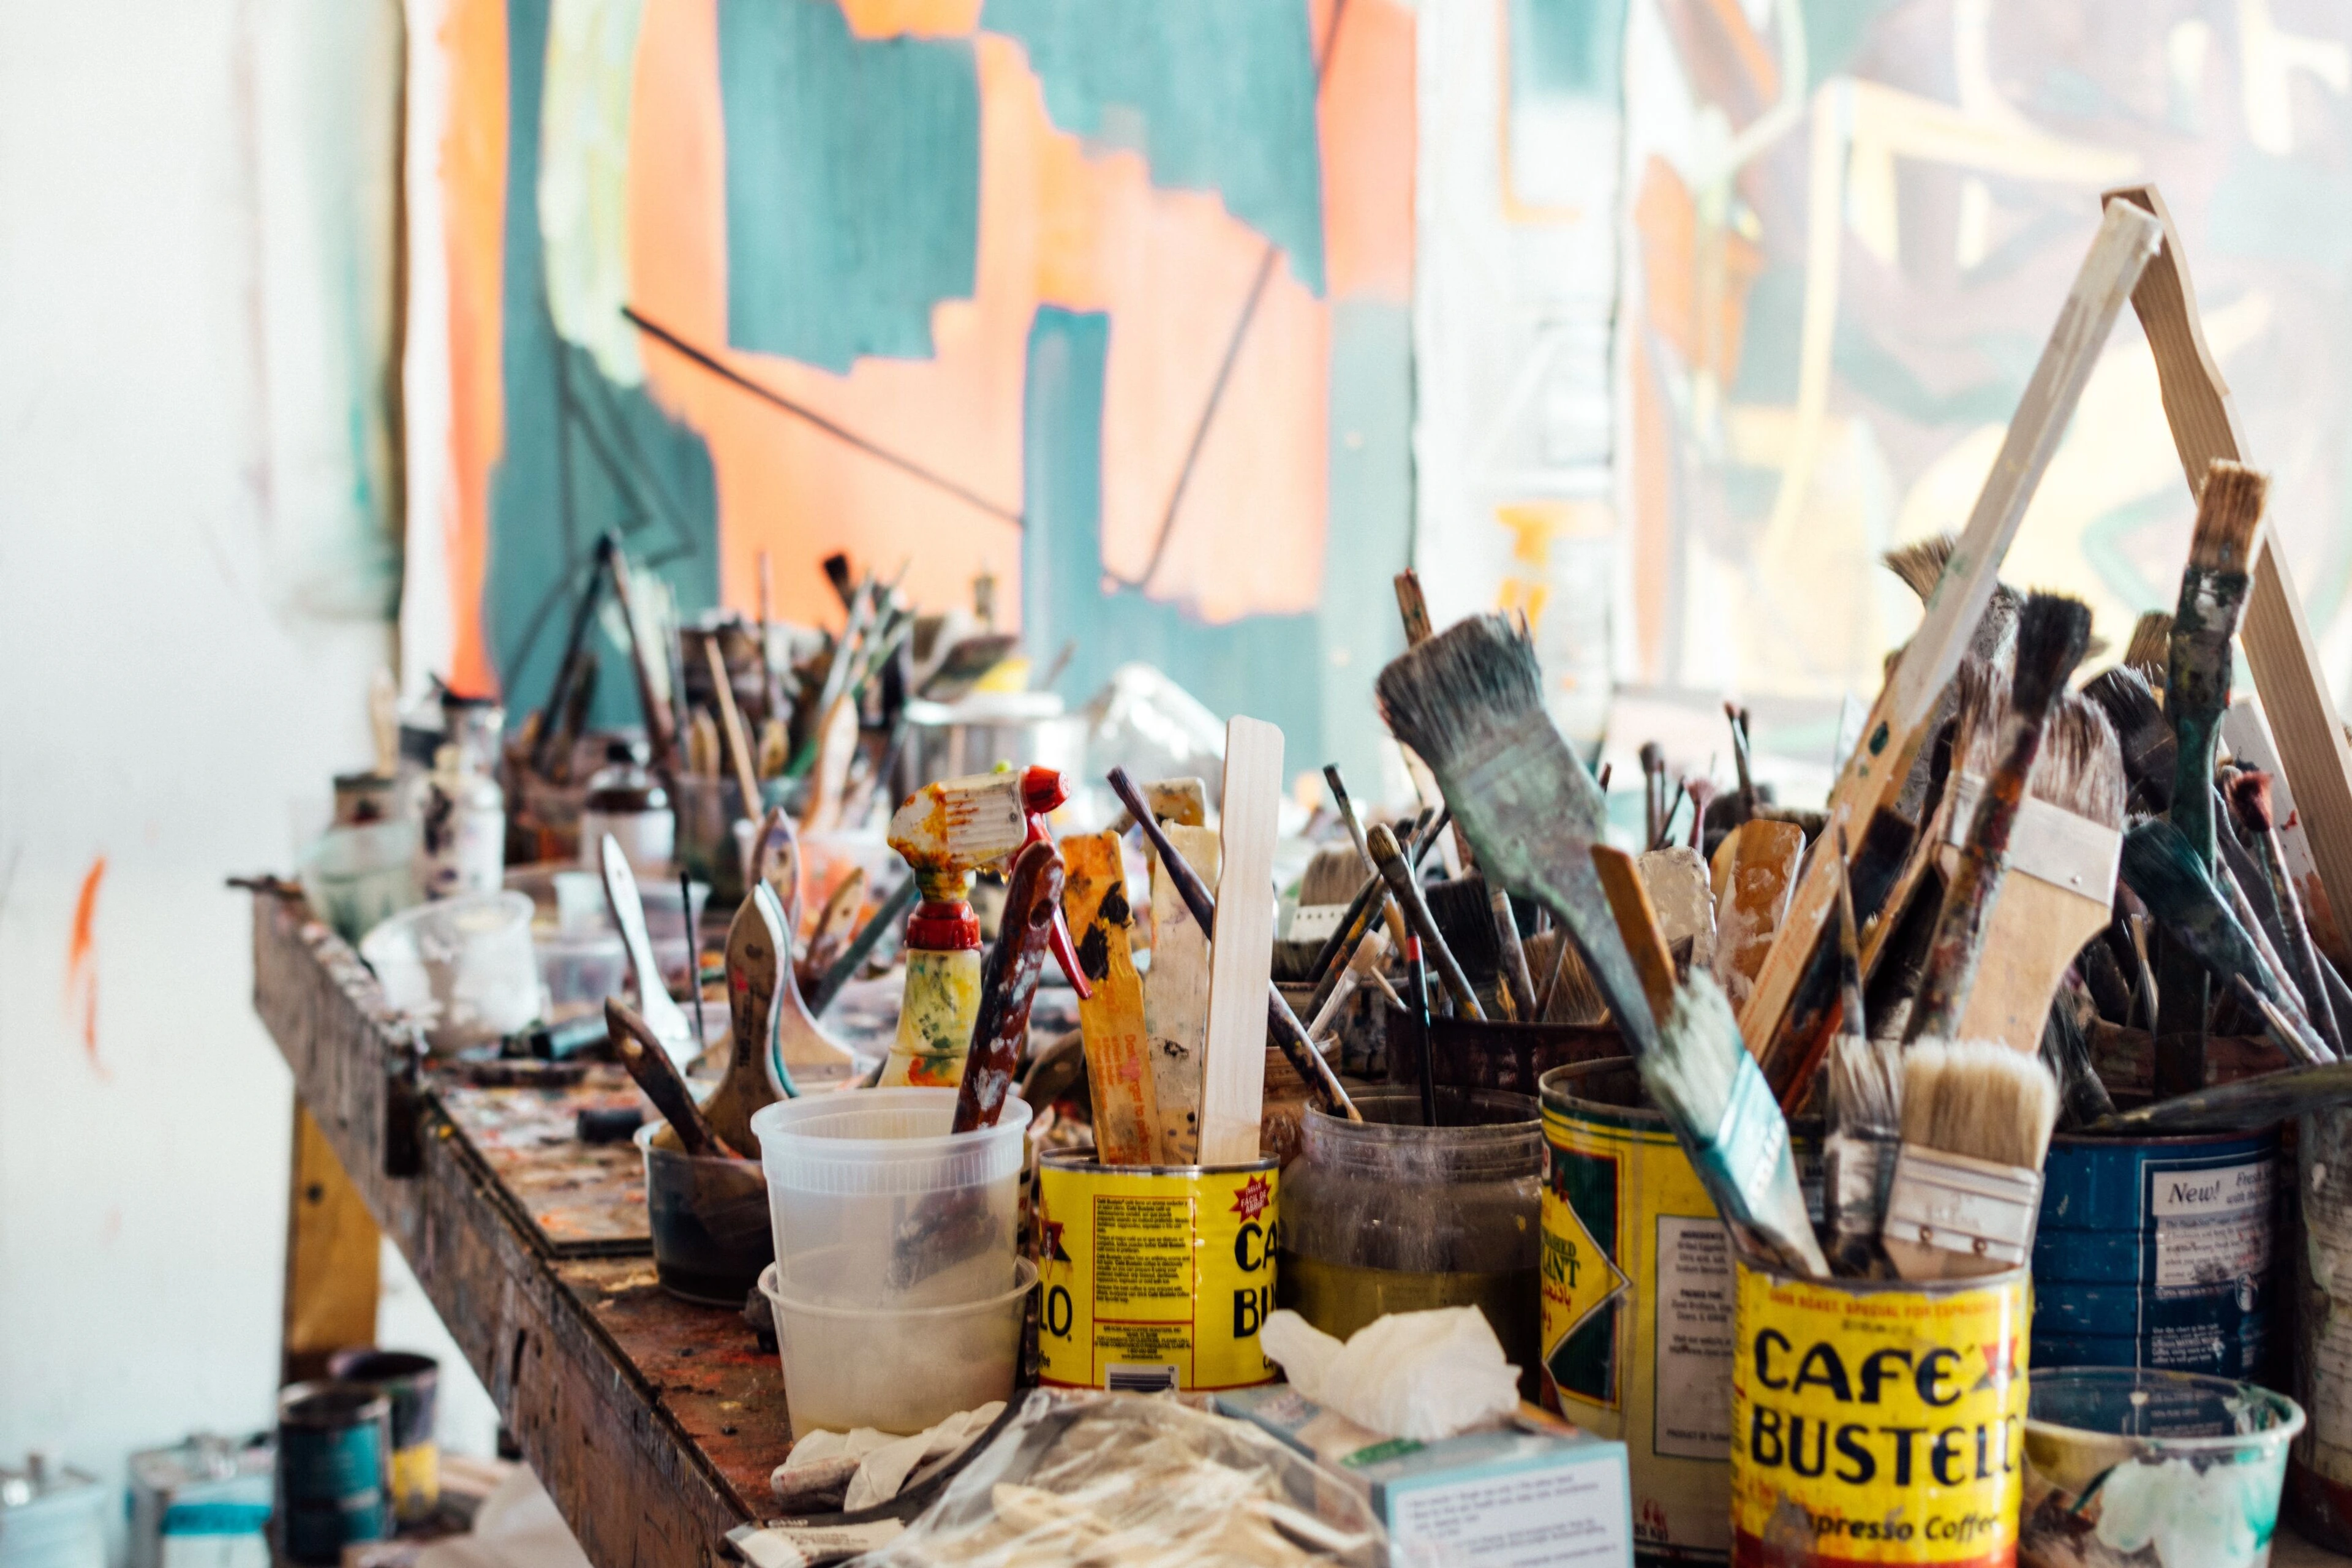
I know, I know. Health and safety isn't the sexiest topic when you're dreaming of your next masterpiece. But stick with me for a moment, because understanding the 'what' and 'why' of studio fumes and dust is crucial before we get to the 'how.' When you're using materials like oil paints, solvents, resins, spray adhesives, or even sanding down a gessoed panel, you're not just making art; you're releasing substances into the air. These aren't invisible ghosts of creativity; they're very real, potentially harmful particles and gases. Ignoring them? That’s like meticulously crafting a beautiful sculpture only to build it on a crumbling foundation. Your body, your mind, your artistic longevity – these are your foundation.
Volatile Organic Compounds (VOCs)
These are the gaseous fumes, the invisible culprits behind that 'art studio smell.' They evaporate from things like turpentine, mineral spirits, varnish, spray fixatives, and even certain types of acrylic mediums and oil paints. Think xylene, toluene, styrene (found in some resins), and formaldehyde (often found in some adhesives, resins, and primers, known as a respiratory irritant and potential carcinogen). They're what give you that light-headed feeling, headaches, and nausea. Long-term, consistent exposure? That's linked to much scarier stuff: chronic respiratory issues, asthma, allergies, and even organ damage. You won't smell them all, either; some highly toxic VOCs are odorless, which is truly unsettling, making them silent but potent threats.
"Non-Toxic" Doesn't Mean "Safe to Inhale"
This is a critical misunderstanding I see far too often. Be warned: 'Non-toxic' labels often refer only to acute ingestion toxicity, meaning it's relatively safe if you accidentally swallow a tiny bit. This does not mean it's safe to inhale its fumes or dust, especially when aerosolized or used in large volumes. So, my friend, never assume safety based solely on that label alone; an 'odorless' solvent might still be silently challenging your liver, or a water-based spray adhesive might emit significant VOCs even if it's labeled 'non-toxic' on the bottle. Always, always question the label when it comes to airborne exposure. It's a bit like saying a pillow is 'non-toxic' if you eat it, but ignoring that it might contain feathers you're severely allergic to when you sleep on it. The hazard pathway matters!
Particulate Matter (Dust)
This is a fancy word for dust, but not just any dust. We're talking about fine particles from pastel sticks, charcoal powder, sanding wood or gessoed panels, clay dust from pottery, dry pigments, and the fine mist from airbrushing. These are often categorized as PM2.5 (particles smaller than 2.5 micrometers) or PM10 (particles smaller than 10 micrometers), both easily inhalable. You definitely don't want to be breathing these in either. Think of them as incredibly fine, microscopic shards of material (be it plaster, wood, or pigment) that, when inhaled, can scratch and irritate your lungs. They can irritate your respiratory system, trigger allergies, and in the long run, lead to serious lung conditions like silicosis (from silica in clays or sands) or exacerbate existing respiratory illnesses. I once spent hours sanding down a large gessoed panel, caught up in the rhythm, only later realizing I'd created a literal cloud of fine white dust without a second thought – the kind of oversight that can have long-term consequences if it becomes a habit.
Airborne Allergens
Beyond simple irritation, some art materials can act as allergens, triggering allergic reactions in susceptible individuals. This isn't just about mold spores (though they're a big one!). Certain pigments, binders, or even components within resins can cause allergic contact dermatitis or respiratory allergies upon repeated exposure. Pay attention to how your body reacts to new materials; a persistent rash, itchy eyes, or unexpected sneezing and coughing could be your immune system sounding an alarm.
Beyond the Obvious: Other Studio Contaminants
While VOCs and dust are common offenders, a healthy studio also considers these often-overlooked dangers:

- Heavy Metals: Historically, artists sometimes worked with dangerously vibrant pigments for their unrivaled color and permanence. Think of the rich reds of vermilion (mercury sulfide), the striking yellows of lead-tin yellow, or the brilliant whites of flake white (lead carbonate). While many modern pigments are safer, certain traditional or specialized pigments can still contain heavy metals like cadmium (often found in vibrant reds, yellows, oranges in oil and acrylic ranges like 'Cadmium Red Light' or 'Cadmium Yellow Medium'), lead (in lead white or chrome yellow, though less common now), or cobalt (in deep blues and violets, e.g., 'Cobalt Blue Hue', 'Ultramarine Blue'). While less volatile than solvents, dry pigment dust or residues (especially from pastels, powdered pigments, or sanding cured paints) can be ingested or inhaled. These metals are insidiously cumulative; your body stores them over time, leading to toxicity, often impacting neurological function, kidney health, and development. Always check pigment ingredients, especially if working with historical palettes or powdered forms. This isn't just about your health; over time, these substances can even interact with and degrade your materials, impacting the longevity of your very art. A quick side note: proper disposal of art materials containing heavy metals is also crucial for environmental health, as they shouldn't just go down the drain.
- Mold and Mildew: Especially prevalent in damp basement, garage, or poorly insulated studios, mold spores can become airborne and trigger severe allergies, asthma attacks, and other respiratory problems. Certain molds, like black mold (Stachybotrys chartarum), can produce mycotoxins, leading to more serious health issues like chronic fatigue, memory problems, and even lung damage. Good ventilation helps prevent the conditions mold thrives in by controlling humidity. Beyond airflow, consider a dehumidifier in damp spaces, regularly inspect walls and materials for signs of growth, and clean with appropriate mold-killing solutions at the first sign.
- Aerosols: From spray paints, fixatives, and varnishes, aerosols create a fine mist of both liquid particles and VOCs that can travel surprisingly far and linger in the air. Their small size (often PM2.5 or smaller) makes them easily inhalable and deeply penetrating into the respiratory system. Beyond the pigment and solvent hazards, the propellants themselves (e.g., butane, propane) can be respiratory irritants and pose flammability risks. Think of resin spray sealants or aerosol gesso – these need serious respect, and you'd be surprised how quickly a fine mist can coat everything in your studio, not just your canvas.
- Isocyanates: This might sound highly technical, but these chemical compounds are found in certain two-part urethane coatings, some spray paints (especially '2K' automotive paints or industrial-grade clear coats), and specific resins, particularly those used in industrial applications but sometimes available to artists. They are potent respiratory sensitizers, meaning even small, repeated exposures can lead to severe allergic reactions, asthma, and lung damage in susceptible individuals. Once sensitized, even tiny future exposures can trigger a severe reaction. Always check the Safety Data Sheet (SDS) for products labeled 'urethane' or 'polyurethane' or '2K.' Look for specific warnings about 'diisocyanates' or 'MDI/TDI.' If isocyanates are present, professional-grade ventilation (like a dedicated spray booth with specific filtration) and respirators are absolutely non-negotiable.
Emerging Contaminants & Chemical Interactions
As art practices evolve, so do potential hazards. If you're incorporating 3D printing (especially with certain resins or filaments like ABS) or laser cutting/engraving into your studio, be aware they can generate ultra-fine particulates and VOCs that require dedicated local exhaust. Furthermore, sometimes different art chemicals can react, creating new, potentially more hazardous compounds.
Hidden Dangers: Unexpected Chemical Reactions
For example, mixing bleach with ammonia (found in some cleaners) creates toxic chloramine gases. But in the art world, similar, less obvious interactions can occur. Have you ever considered what happens when certain acidic etching fumes mix with alkaline cleaners, or if residual solvents from one medium interact with the fresh chemicals of another? Always check chemical compatibility and ventilation requirements when combining materials, even if they seem innocuous individually. A quick check of the SDS for each product can reveal incompatible materials, saving you from an unexpected and dangerous chemical cocktail.
Understanding Threshold Limit Values (TLVs)
While largely used in industrial settings, understanding Threshold Limit Values (TLVs) can provide a mental benchmark. TLVs are recommended guidelines for airborne concentrations of various substances that nearly all workers can be exposed to day after day without adverse health effects. While home studios don't have the same regulatory oversight, knowing that such limits exist emphasizes just how little of certain chemicals is considered 'safe' in the air. For artists, this underscores the importance of minimizing exposure rather than just managing discomfort. After all, your health isn't worth cutting corners on, no matter how 'unsexy' the topic might seem.
Holistic Well-being: Beyond the Air You Breathe
While air quality is paramount, remember that your well-being as an artist is holistic. A safe studio isn't just about what you inhale; it's about the entire environment that nurtures or hinders your creative spirit. If your creative process involves prolonged screen time (e.g., digital painting, 3D modeling, graphic design), ergonomic setup, regular breaks, and mindful movement are just as crucial. Similarly, managing the air also means thinking about humidity and temperature. Too much humidity can warp paper, promote mold growth on canvas, and affect drying times and paint adhesion. Too little, and materials can crack prematurely. A stable environment, supported by good airflow, helps preserve both your art and your well-being. This is all part of controlling your artist studio environment – the sum of air quality, light, temperature, and organization that impacts your health and work. Don't neglect one aspect of your health while focusing on another; a healthy body, supported by a safe studio, allows your mind to truly flourish.
Your Ventilation Arsenal: From Simple Solutions to Advanced Systems
So, how do we actually do this without turning our studios into wind tunnels or sterile labs? The good news is that setting up good ventilation isn't necessarily complicated or prohibitively expensive. It generally falls into three tiered categories, building up in effectiveness. Think of it as a ladder you climb based on your materials and comfort level. Are you ready to equip your studio?

Tier 1: Natural Ventilation (The "Open a Window" Method)
This is the simplest solution and the absolute baseline, a non-negotiable first step. If you have windows, open them! Ideally, you want to create cross-ventilation. This means opening windows on opposite sides of the room, or a window and a door, to create a clear pathway for fresh air to enter and stale, contaminated air to exit. It’s simple, free, and makes a huge difference for low-fume activities like watercolor, most acrylic painting, or drawing. Remember, the 'hotbox' feeling from the intro is exactly what you're trying to avoid here.

However, natural ventilation has its limits. It's often insufficient when working with strong solvents or large quantities of dusty materials, or if there's no natural breeze to create that cross-flow. If you're in a basement studio with only one small window, natural ventilation won't cut it. Plus, weather isn't always cooperative, meaning you can't rely on it year-round. Sometimes, for instance, in the humid summers of places like Den Bosch, you might open a window only to invite a new set of problems like dampness, which is why a nuanced approach is always best. Don't forget, even open windows don't remove contaminants at the source with the precision a fan can provide.

Tier 2: General Mechanical Ventilation (The Fan Club)
This is where you give nature a much-needed helping hand. A simple box fan can be a surprisingly powerful tool. But here's the trick that people often get wrong: don't just point a fan at your workspace. That just blows the fumes and dust around your face and stirs up the contaminated air in the rest of the room. It’s like trying to sweep a dusty floor by waving a flag at it – you're just redistributing the problem, not removing it.

Instead, you want to create an exhaust system. Place a fan securely in a window, facing out. This will actively pull the air from your studio and push it outside. Then, open another window or door elsewhere in the room to serve as the fresh air intake. You’ve just created a basic, but remarkably effective, air exchange system. For maximum efficiency, seal any gaps around the fan with cardboard or foam to prevent the exhaust fan from simply recirculating air from outside the exhaust stream or pulling unfiltered air back in through unintended gaps. This small effort makes a huge difference in directing airflow.
credit, licence
Tier 3: Local Exhaust Ventilation (LEV) (The Heavy Hitter)
This is the gold standard, the ultimate safeguard, especially if you're working with seriously smelly, highly toxic, or very dusty materials on a regular basis. Local Exhaust Ventilation (LEV) is all about capturing contaminants at the source, before they even have a chance to float around your studio and into your breathing zone. Think of the focused precision of a jeweler's bench with its integrated dust collector, or the protective bubble of a spray booth. For serious art-making, this is non-negotiable.
For artists, this can look like:
- A small, flexible fume extractor hose: Imagine a gooseneck lamp, but instead of light, it sucks fumes. You position it right next to your palette when you're working with solvents (oil painting), near your pouring area for resins (casting, jewelry), or close to your etching plate (printmaking inks, acid fumes).
- A spray booth: A small, enclosed booth with an integrated fan that vents aerosols (from spray paints, fixatives, varnishes) safely outside. This is absolutely essential for avoiding airborne fine particles and VOCs, especially crucial for airbrush artists, anyone using heavy spray sealants, or even certain screen-printing processes.
- A downdraft table: A workbench with vents that pull dust down and away from you as you sand (wood carving, gessoed panels, plaster, ceramics), carve wood, or work with dry pigments like pastels or charcoal. This is particularly vital for sculptors, ceramicists, or even framers.
- Specialized Enclosures: For highly toxic processes, like traditional darkroom chemical development or certain metalworking (e.g., soldering with lead-based solder, small-scale welding fumes), you might even consider a more contained chemical fume hood, similar to those found in science labs.
This is a more professional and often more expensive setup than simple fans. However, for artists who work daily with heavy oils, potent resins, generate significant dust, use airbrushing, or engage in printmaking with strong chemicals, it's a non-negotiable investment in your long-term health and your ability to keep creating for years to come. It also allows you to expand into more demanding techniques with greater safety. While DIY solutions for LEV can be tempting, particularly for fume extraction, be extremely cautious. Poorly designed or sealed DIY systems can be ineffective or even dangerous, recirculating fumes or failing to capture hazardous particles. When dealing with highly toxic substances or heavy dust, commercially rated and professionally installed systems are often the safer, more reliable choice. You can explore various artist studio ventilation setup ideas for inspiration. Remember, LEV is your studio's targeted exhaust system – it’s precision safety for your creative process.
Filters for LEV Systems: The Unsung Heroes
A quick note on filters for LEV systems: Most portable fume extractors or spray booths will incorporate a multi-stage filtration system. This often includes a pre-filter (for larger dust particles), a HEPA filter (for capturing very fine particulate matter like clay dust, pigment dust, and sanding dust down to 0.3 microns with 99.97% efficiency), and an activated carbon filter (specifically designed to absorb gaseous VOCs and odors). It's crucial to understand that HEPA filters are excellent for particles but do not remove gases or odors. That's where the activated carbon comes in. Some specialized systems might also include chemical specific filters or UV-C lights for biological contaminants. Always ensure your chosen system has the appropriate filters for the contaminants you're generating, and remember to replace them regularly – a clogged filter is an ineffective one. Ignoring filter maintenance is like trying to drive a car with a dirty oil filter; it just won't perform as it should, putting your health (and your engine) at risk.
A Quick Note on Air Purifiers
Air purifiers are fantastic, don't get me wrong. A good one with a HEPA filter is excellent at removing particulate matter (dust, pet dander, pollen), and one with an activated carbon filter can help reduce some VOCs and odors. However, and this is crucial, they are not a substitute for ventilation. Think of it this way: a good air purifier's job is to clean the air that's already in the room. An exhaust fan's job is to remove the contaminated air entirely and replace it with fresh air from outside. They perform different, albeit complementary, functions. Use them together for the best results, especially for managing dust and residual odors, but never rely on a purifier alone to handle heavy fumes or high concentrations of particulates. That's a recipe for health issues. I've heard too many stories of artists thinking a fancy purifier was enough for a fully enclosed resin pouring setup. Spoiler: it wasn't.
The Science of Air Exchange: Understanding CFM
When we talk about fans, you'll often see "CFM" mentioned. CFM stands for Cubic Feet per Minute, and it's a measure of how much air a fan can move. Think of it like the fan's lung capacity – how much air it can 'inhale' and 'exhale' for your studio in a minute. Understanding this is key to choosing the right fan for your specific studio and needs.
For good general ventilation in a studio, you typically want to achieve 6-10 air changes per hour (ACH). This means the entire volume of air in your room is replaced with fresh air 6 to 10 times every hour. For very fume-heavy or dusty activities, you might aim for 15-20 ACH. For a truly authoritative benchmark, even though OSHA/ASHRAE standards primarily apply to commercial settings, the American Society of Heating, Refrigerating and Air-Conditioning Engineers (ASHRAE) often recommends higher ACH rates for spaces with chemical use, offering a good aspirational target for artists. After all, your health isn't worth cutting corners on.
To calculate the approximate CFM you need, use this simple formula:
(Room Length in feet x Room Width in feet x Room Height in feet) x (Desired Air Changes per Hour) / 60 minutes = Required CFM

For example, if your studio is 10 feet long, 12 feet wide, and 8 feet high, and you want 8 air changes per hour:

- Calculate Room Volume: 10 ft * 12 ft * 8 ft = 960 cubic feet
- Multiply by Desired ACH: 960 cubic feet * 8 ACH = 7680
- Divide by 60 minutes: 7680 / 60 = 128 CFM
So, for this room, you'd look for a fan rated at least 128 CFM. Many standard box fans move 1000-2500 CFM on high, making them surprisingly effective for general mechanical ventilation, as long as they are properly set up for exhaust. A word of caution: this calculation is for ideal conditions. Factors like filters, long or convoluted ducting, and static pressure losses in the system will reduce the effective CFM. Think of static pressure loss like trying to blow air through a very long, narrow, or kinked hose – the air flow gets restricted. It's often wise to slightly overestimate your required CFM or choose a fan with a bit more power than the bare minimum to compensate for these real-world losses.
Tailored Airflow: Matching Ventilation to Your Art and Space
Not everyone has a giant, perfectly ventilated warehouse. Let's be real; most of us are making art in less-than-ideal spaces, whether it's a corner of a shared apartment or a dusty old garage. The key is to adapt your strategy to your environment and materials. Now that we've covered the fundamental types of ventilation, let's explore some strategies based on common artist setups, tailored with your materials in mind. Which one sounds like your space?
Studio Type | Primary Materials / Common Activities / Risk Level | Primary Challenge | Key Ventilation Solution | Recommended PPE | Cost |
|---|---|---|---|---|---|
| Bedroom Corner | Low-odor oils, acrylics, pastels (light use), sketching / Low-Medium | Containing fumes/dust in a living space. | Natural cross-ventilation with open windows/doors. A window fan (exhausting out) complemented by a good air purifier (HEPA + carbon filter for residual VOCs/dust) is highly recommended. Use low-odor/water-mixable solvents. | None for light use; N95 for light dust. | $ |
| Dedicated Spare Room | Standard oils, mediums, light solvents, printmaking cleanup, light sanding / Medium | More space, but still part of the home. | Create dedicated mechanical exhaust with two window fans (one in, one out) for strong cross-flow. DIY solutions are often effective here. | N95 for dust; organic vapor respirator for heavy fumes. | $-$$ |
| Garage / Basement | Resins, spray paints, heavy solvents, carving/sanding, ceramics (dry clay), printmaking (etching) / Medium-High | Often poor natural airflow, temperature/humidity control. | Install a proper wall-mounted exhaust fan or invest in a portable fume extractor (LEV). Consider a commercial LEV for high-risk activities. | N95/P100 for dust; organic vapor respirator for fumes/sprays, potentially with acid gas cartridges for certain resins/etching. | $$-$$$ |
| Professional Studio | High volume of all materials, specialized processes (e.g., large-scale resin casting, welding, dedicated spray booths, chemical etching) / High | Working with large volumes or highly toxic materials, regulatory compliance. | A professionally installed LEV system with appropriate filtration (HEPA for particulates, activated carbon for VOCs) is essential. This is an investment in your business and health. | Appropriate full respirators, gloves, eye protection, full body suits for specific tasks. | $$$$ |
| Outdoor/Mobile Studio | Spray paint, heavy solvents, large-scale resin, car painting / Varies | Weather, security, dust/debris, rapid drying. | Work under an awning or pop-up canopy for light protection. Maximize natural cross-breeze. This is often the ultimate natural ventilation solution, but be mindful of environmental factors. | Respirator for fumes/sprays; goggles. | $ |
Cost Key: $= Budget-friendly; $$= Moderate investment; $$$= Significant investment; $$$$= Professional-grade investment
Specific Artistic Practices and Their Ventilation Needs
The general guidelines are a great start, but true safety comes from understanding the unique challenges of your chosen medium. Let's delve into some common art forms:

- Oil Painting & Solvents: If you use traditional oil paints and solvents like turpentine or mineral spirits, your primary concern is VOCs. Even odorless mineral spirits (OMS) still release VOCs, albeit fewer and generally less aromatic. Ensure you have dedicated exhaust ventilation pulling fumes away from your painting area. Water-mixable oil paints significantly reduce this need, making them a fantastic alternative for smaller spaces.
- Ceramics & Sculpture: Dry clay dust, glazes (especially raw glazes containing heavy metals), and the fine particulate matter from sanding fired pieces or carving wood/stone are major respiratory hazards. A P100 particulate respirator is non-negotiable for these tasks. For larger volumes, a downdraft table or a powerful LEV system with a HEPA filter is critical to capture dust at the source. Kiln fumes during firing, especially from gas kilns or certain glazes, require dedicated outdoor venting, often through a flue.
- Printmaking: This diverse field can involve strong solvents for cleaning plates, acids for etching, and various inks that release VOCs. A flexible fume extractor hose or a small chemical fume hood positioned directly over your etching bath or cleaning station is highly recommended. For solvent-based inks, an organic vapor respirator with appropriate cartridges is essential.
- Airbrushing Lacquers or Enamels: As I mentioned before, these create an extremely fine, easily inhaled mist loaded with fast-evaporating solvents and pigments. A dedicated spray booth with a robust exhaust system that vents outdoors is absolutely vital. Never airbrush lacquers in an unventilated room; it's a direct route to significant health issues. A full organic vapor respirator (with appropriate filters for lacquers/enamels) is also mandatory.
- Resin Art & Casting: Two-part resins can produce significant VOCs during mixing and curing, and some, like urethanes, can contain dangerous isocyanates. Working in a LEV system (like a spray booth or dedicated fume extractor) is critical. Use organic vapor respirators with cartridges rated for the specific chemicals in your resin, often including acid gas cartridges for some types. Ensure the area is well-ventilated during and after curing, as resins continue to off-gas for some time.
The Smart Studio: Minimizing Contaminants at the Source
While setting up a robust system to remove contaminants is vital, the most proactive approach starts with minimizing what enters the air in the first place. Beyond setting up a robust ventilation system, one of the most proactive steps you can take is to reduce the source of fumes and dust in the first place. This isn't just about 'eco-friendly' choices; it's about minimizing your personal exposure and making your studio safer by design. Prevention, after all, is often easier than cleanup, and it truly expands your creative freedom.
Choosing Safer Art Materials
- Opt for Odorless Mineral Spirits (OMS) or Gamsol: These solvents are often highly refined petroleum distillates with fewer aromatic hydrocarbons. This means significantly reduced VOCs and less odor compared to traditional turpentine or standard mineral spirits. While 'odorless' doesn't mean 'zero VOCs,' it's a major step down in terms of immediate impact and long-term risk. They're still solvents, so proper ventilation is key, but the risk is substantially lower. Switching to these can feel like a small revolution in your oil painting practice!
- Water-Mixable Oil Paints: These use modified linseed oil that allows them to be thinned and cleaned up with water, eliminating the need for traditional solvents altogether. A game-changer for many oil painters looking to drastically reduce their fume footprint and explore new techniques.
- Acrylics and Watercolors: Generally, these are the lowest-fume options. However, be mindful of acrylic mediums, varnishes, spray products, and some primers/gessos, which can still contain VOCs and should be used with good ventilation. Even 'non-toxic' labels don't always mean 'no fumes' or 'no particulates,' especially when aerosolized or used in large volumes. For spray applications, consider refillable airbrush systems instead of aerosol cans to reduce propellant use and fine particle dispersion.
- Natural Bristle Brushes: While a minor point, some artists consider the environmental and health impact of synthetic brushes shedding microplastics over time, which can then become airborne dust. Opting for natural bristle brushes (for oil painting, for example) can be a small step in reducing synthetic particle generation in your studio, though proper cleaning is always key.
- Explore Eco-Friendly Art Supplies: Many brands are now offering non-toxic, low-VOC alternatives across various mediums, from paints to adhesives. A little research can go a long way in making your studio healthier from the ground up, not just for you but for the environment too.
The Critical Importance of Safety Data Sheets (SDS)
For any new material, especially industrial-grade resins, strong adhesives, or pigments, always look up its Safety Data Sheet (SDS) (often available on the manufacturer's website). It sounds boring, but this is your artist superhero cape for hazardous materials. This document will detail health hazards, safe handling, and required ventilation and Personal Protective Equipment (PPE). Pay attention to hazard pictograms (like the flame or skull), signal words (DANGER, WARNING), and hazard statements (e.g., "May cause respiratory irritation"). Don't skim this; it's genuinely vital. My experience is that ignoring the SDS is a shortcut to health issues, not to more art. Prioritizing your health is a radical act of self-care as an artist, ensuring you can keep creating for the long haul. Think of it as your secret map to safe creative adventures – it tells you where the dragons are and how to avoid them.
Beyond Art Materials: Hidden Sources
It's not just your paints; other elements in your studio can off-gas, too:

- New Furniture & Equipment: That shiny new desk, fresh carpet, or even a large format printer can release VOCs (a process known as "off-gassing," where chemicals evaporate into the air) for weeks or months. Ensure good ventilation when bringing new items into your studio, especially in enclosed spaces.
- Cleaning Supplies: Regular household cleaners often contain strong chemicals that can contribute to indoor air pollution. Opt for natural or low-VOC cleaning alternatives for your studio space.
A Quick Thought on Environmental Impact
While the primary goal of ventilation is your health, it's worth a quick mention that running fans consumes energy. When possible, consider energy-efficient fan models, or combine mechanical ventilation with natural airflow on pleasant days to reduce your carbon footprint. Every small choice helps in keeping both yourself and the planet a little healthier. Beyond energy, remember that hazardous art materials – solvents, pigments with heavy metals, cured resins – shouldn't just be washed down the drain or thrown in regular trash. Proper disposal often requires contacting your local waste management facility for guidance on hazardous waste collection. Responsible artistry extends to caring for the environment we all share.
Your 5-Minute Action Plan: Breathe Easier Today
Feeling overwhelmed by all this talk of cubic feet and exhaust? Don't be. Setting up better ventilation can be surprisingly quick and impactful. Here's a simple, actionable plan to get you started today. Even small steps make a big difference, and honestly, your lungs will thank you.

- Assess Your Materials & Risk: Know what you're up against. This is your mini risk assessment checklist. What are you actually using? Watercolors and most acrylics? You're probably fine with just opening a window. Using oil paints, solvents, spray cans, resins, or generating significant dust (e.g., sanding gesso, working with clay, wood carving)? You need to step up your game. Ask yourself:
- What type of material am I using (solvent, paint, powder, spray)?
- How much am I using, and how often?
- How long will I be exposed during a session?
- How small or enclosed is my studio space? The higher the hazard, quantity, or duration, the greater your need for robust ventilation. Check product labels and SDS for guidance.
- Identify Your Air Path: Direct the flow. Where is the freshest air coming from (your intake) and where do you want the bad air to go to (your exhaust)? Ideally, your workspace should be located between these two points to ensure contaminated air is pulled away from you, not across your face.
- Set Up Your Exhaust: Get that bad air out! Place a fan in your chosen exhaust window, facing out. Crucially, seal any significant gaps around it with cardboard, foam board, or even towels to maximize efficiency. This ensures the fan is pulling air from inside your studio, not just recirculating air through gaps around its own frame or pulling in outside air.
- Open Your Intake: Let fresh air in. Crack a window or door (or even another fan pulling air in) on the opposite side of the room to let the fresh air in. This creates the essential airflow, drawing clean air across your workspace and out the exhaust.
- Turn It On & Keep It Running: Make it a habit. Run your fan whenever you're working with fume-producing or dust-generating materials, and for at least 30-60 minutes after you're done. This 'purge' time helps clear any lingering contaminants. Remember: Ventilation is not a one-time setup; it's an ongoing habit. Make it part of your routine, a foundational element of your creative process. And finally, never stop learning and re-evaluating your setup as your materials or techniques evolve; your health is worth that continuous attention. A healthy artist is an artist who creates for a lifetime. Why not check out my latest original art to see what a protected creative journey can produce?
FAQ: Your Burning Ventilation Questions, Answered!
Do I need ventilation for acrylic painting?
For the most part, standard acrylic paints are water-based and have very low VOCs. For general painting, opening a window is usually sufficient. However, if you're using acrylic mediums, varnishes, spray fixatives, or solvent-based gessos or primers, they can have strong odors and higher VOCs. Always check the label, and if it smells strong, or if you feel any irritation, ventilate! Better safe than fuzzy-headed, I always say.
Is this going to be expensive?
A basic but effective setup using a simple box fan and some cardboard can cost less than a single tube of good quality paint. You don't have to break the bank. Start with what you can afford—even a slightly open window is infinitely better than a sealed room. Advanced LEV systems are an investment, but they pay dividends in long-term health and the ability to work with a wider range of materials. Think of it as investing in your career, not just your comfort.
What are the first signs of poor ventilation?
Headaches, dizziness, nausea, eye/nose/throat irritation, coughing, and general fatigue. If you feel fine when you enter your studio but start to feel crummy after working for a while, that's a massive red flag. Trust your body's signals! Persistent symptoms like these should never be ignored. My own early studio headaches were a clear message I wish I'd heeded sooner.
What about working outdoors?
Working outdoors is often the ultimate ventilation solution – literally unlimited fresh air! It's fantastic for highly fumy processes like spray painting, resin work, or large-scale solvent cleaning. However, it comes with its own set of challenges: unpredictable weather (rain, wind, extreme temperatures), dust, insects landing in wet paint, security concerns for your materials, and rapid drying times for some mediums. It's a great option for specific tasks, but rarely a full-time studio replacement.
Do I need a respirator or mask? How do I choose the right one?
For light dust (like from pastels or charcoal), a simple N95 dust mask is usually sufficient. For fine dust (sanding, clay), a P100 particulate respirator offers better protection, capturing virtually all airborne particles. Remember: Dust masks (N95/P100) protect from particles; organic vapor respirators protect from chemical fumes. If you're working with solvents, spray paints, or resins, you absolutely need an organic vapor respirator with appropriate cartridges. These are not the same as dust masks and are essential for filtering out chemical fumes. There are different cartridge types too: an OV (Organic Vapor) cartridge is common for most artist solvents and paints, while AG (Acid Gas) cartridges are needed for specific acidic fumes (e.g., some etching processes). Always ensure a proper fit (perform a seal check!) and replace cartridges regularly according to the manufacturer's guidelines, not just when you start to smell fumes. Cartridges have a limited lifespan once exposed to air, even if unused, and their effectiveness rapidly declines when saturated. Store your respirator in an airtight bag or container when not in use to prolong cartridge life.
How do I know if my ventilation system is working effectively?
You'll notice a significant reduction in odors and visible dust. More importantly, you won't experience headaches, eye irritation, or general malaise after working. A simple test: if you can still smell strong fumes after 15-20 minutes of working with your ventilation on, it's likely not strong enough or not set up correctly. For a more scientific approach, you could use a low-cost CO2 monitor to ensure fresh air is truly circulating, as high CO2 levels indicate poor air exchange. Some artists even invest in basic VOC meters for a more direct measurement.
What should I do in case of acute fume exposure?
If you suddenly feel dizzy, nauseous, or have difficulty breathing due to strong fumes, immediately stop working, move to a well-ventilated area (preferably outdoors), and take deep breaths of fresh air. If symptoms persist or worsen, seek medical attention. Never ignore acute symptoms; they can indicate serious exposure. Your well-being is paramount.
Are there any DIY ventilation solutions that are NOT recommended and why?
Yes, absolutely. Avoid using standard household fans (like oscillating pedestal fans) without directing them to an exhaust window, as they'll just stir contaminants around. Also, don't rely solely on small desktop air purifiers if you're working with heavy fumes or dust, as they typically lack the power or filtration capacity for high concentrations – they're great complements but poor substitutes. Never try to build a makeshift LEV for highly toxic chemicals without consulting safety professionals; the risk of improper sealing or insufficient airflow is too high, turning a potential solution into a dangerous false sense of security. When in doubt, a commercial solution or professional consultation is always worth it.
How do I manage ventilation in a shared studio space?
Shared studios present unique challenges! Communication is key. Establish clear rules about using strong solvents, dust-producing tools, and spray fixatives. Schedule "fume times" when everyone agrees to use LEV or maximum ventilation, and ensure everyone vacates if possible. Portable fume extractors (LEV) become even more vital here, as they target the source directly without necessarily impacting another artist's workspace. Always respect shared air – your neighbor's well-being is as important as your own.
Glossary of Studio Air Quality Terms
For an ultimate guide, understanding the terminology is key. Here are some terms you'll encounter when discussing studio ventilation and air quality:
- ACH (Air Changes per Hour): A measure of how many times the air in a room is completely replaced with fresh air in one hour. A higher ACH indicates better ventilation.
- Activated Carbon Filter: A filter containing activated carbon, effective at adsorbing (trapping) gaseous VOCs and odors from the air.
- ASHRAE (American Society of Heating, Refrigerating and Air-Conditioning Engineers): A professional organization that sets standards for indoor air quality and ventilation, often referenced for best practices even in non-commercial settings.
- CFM (Cubic Feet per Minute): A measurement of the volume of air a fan moves in one minute. Essential for calculating the right fan size for your studio.
- HEPA Filter (High-Efficiency Particulate Air Filter): A type of air filter that can trap at least 99.97% of particles that are 0.3 micrometers in size. Excellent for dust, pollen, and other fine particulates. Crucially, HEPA filters do not remove gases or odors; for those, an activated carbon filter is needed.
- Isocyanates: A group of highly reactive chemical compounds found in certain resins and coatings (e.g., some urethanes). Known to cause severe respiratory sensitization and asthma. Require specialized protection.
- LEV (Local Exhaust Ventilation): A system designed to capture contaminants (fumes, dust) at their source, before they can spread into the general workspace. Examples include fume extractors, spray booths, and downdraft tables.
- Mycotoxins: Toxic compounds produced by certain molds, capable of causing more severe health effects than typical allergic reactions.
- N95/P100 (Respirator Ratings): Ratings for particulate respirators (dust masks). N95 filters at least 95% of airborne particles. P100 filters at least 99.97% of airborne particles and is oil-proof. Crucial for dust protection.
- Off-gassing: The release of chemicals in gaseous form from materials into the air, often associated with new products like furniture, carpets, or paints.
- Organic Vapor Respirator (OV): A type of respirator designed to protect against gaseous chemical fumes, such as VOCs from solvents and paints. Uses specialized cartridges (often marked OV).
- OSHA (Occupational Safety and Health Administration): A U.S. government agency that sets and enforces workplace safety and health standards. While not directly applicable to home studios, their guidelines inform best practices for hazardous materials.
- Particulate Matter (PM): Microscopic solid or liquid particles suspended in the air. Categorized by size (e.g., PM2.5, PM10), they can irritate the respiratory system and cause long-term health issues.
- PPE (Personal Protective Equipment): Equipment worn to minimize exposure to hazards, including respirators, gloves, and eye protection.
- SDS (Safety Data Sheet): A document providing comprehensive information about a hazardous substance, including its properties, hazards, safe handling, disposal, and emergency measures. Essential for all art materials.
- Sensitization: A process where repeated exposure to a substance (like isocyanates or certain allergens) leads to an allergic reaction upon subsequent exposure, which can be triggered by even minute amounts.
- Silicosis: A serious, incurable lung disease caused by inhaling crystalline silica dust, often found in clay, sand, and some pigments. Prevention with P100 respirators and LEV is critical.
- Threshold Limit Value (TLV): A guideline for airborne concentrations of substances to which nearly all workers can be repeatedly exposed without adverse health effects.
- VOCs (Volatile Organic Compounds): Organic chemicals that have a high vapor pressure at ordinary room temperature. They evaporate easily, releasing gases into the air that can be harmful when inhaled. Common in solvents, paints, and adhesives.
Your Creative Journey, Protected.
Ultimately, a healthy studio isn't just about safety regulations or scientific jargon; it's about nurturing your ability to create, sustain your passion, and live a vibrant life as an artist. My own journey, from those early headaches in my 'hotbox' studio to a space where I can work freely and safely, taught me this invaluable lesson. It was a journey of connecting the dots, from vague discomfort to clear action. Investing in good ventilation is perhaps the most fundamental act of self-care an artist can undertake. It allows you to explore new materials, push creative boundaries, and enjoy the transformative power of art for decades to come, free from the insidious worry of what you're breathing in. So, clear the air, embrace knowledge, and let your creativity truly thrive. You and your art deserve nothing less. For more insights on balancing artistic passion with personal well-being, explore my timeline or consider visiting the Den Bosch Museum for inspiration on art that transcends its materials.