
Archival Storage for Art Prints: Keep Your Collection Vibrant
Stop your art prints from fading. Your practical, personal guide to archival storage covers acid-free materials, UV protection, temperature, humidity, and best practices for flat files, portfolios, and framing.
The Ultimate Guide to Archival Storage for Art Prints: Protect Your Collection's Legacy
Have you ever pulled an old favorite art print from a folder, only to find the colors have mysteriously faded, or the paper has a strange, brittle feel? I have. For years, I treated my own prints with a kind of benign neglect—a stack in a drawer here, a few tucked into a basic portfolio there. It wasn't until I rediscovered a 10-year-old print, one I'd stored improperly, that I had a rude awakening. The once-vibrant colors were dull, the paper felt like it might crumble, and a fine layer of something I can only describe as 'sadness' had settled into the very fibers. It wasn't just a faded print; it was a piece of my creative history that I had failed to protect. That's the day I got serious about archival storage. It’s not just about preservation; it’s about respecting the life of the artwork itself and ensuring it can be appreciated for generations, not just a few years.
There's a quiet panic that sets in when you realize an artwork you love is essentially committing slow suicide in your own home. You might think you're doing fine—a nice portfolio here, a box there—until one day the evidence is undeniable. I talk to artists all the time who assume a dark closet is enough. They're almost always wrong. The real enemies are invisible: a plastic sleeve slowly eating the ink, a cardboard backing leaching acid like a poison, a single sunbeam through a window, repeated thousands of times. This article is my attempt to save you from that same rude awakening I had. It's an invitation to shift your perspective. You’re not just storing an object; you’re curating a future experience. Every decision you make—from the $10 folder to the custom-built flat file—is a small act of optimism, a bet that this work will outlast you. For me, understanding this was the moment I moved from being a mere owner of objects to a custodian of a legacy.
Why This is The Ultimate Guide
You can find plenty of articles telling you to 'use acid-free materials.' This isn't one of them. That advice is the tip of the iceberg. My goal here is to give you the full picture—to explain the chemistry of why paper yellows, how humidity warps a print beyond repair, and why that 'protective' plastic sleeve from the office supply store could be doing more harm than good. We'll move beyond the basics and into the nuances of creating a truly stable environment for your art. Because when you understand the why, the how becomes second nature. You'll stop guessing and start making confident, informed decisions about every single piece in your collection.
I've spent years talking to conservators, haunting museum storage facilities, and—perhaps most importantly—learning from my own mistakes. The "ultimate" part of this guide isn't about being the longest or most academic; it's about being the most genuinely useful. It's the kind of guide that doesn't just lecture you to "control humidity," but shows you the $20 tool a curator would use to actually see the problem in their own space. Consider this your practical, no-nonsense, and slightly obsessive roadmap to turning your storage space into a genuine archive, not just a graveyard for art.
Now, let's get practical. I don't want to give you a rigid dogma. Preservation can sometimes feel like a religion, with an overwhelming list of "thou shalt nots." My goal is to give you the science, the tools, and the real-world choices so you can become your own expert. A perfect system is worthless if you don't actually use it. A good, actively used system is a treasure that will serve you for a lifetime.
This guide is the culmination of everything I wish I’d known back then, a deep dive into the 'why' behind the rules and a simple, actionable plan to protect your collection, whether it's a handful of precious pieces or a burgeoning professional archive.
The Science of Permanence: What "Archival" Really Means
The Battle at the Molecular Level: Acids, Lignin, and Time
The enemy isn't time itself; it's a series of slow, invisible chemical reactions. Think of a paper fiber as a long chain of molecules. Over time, exposure to acids break the links in this chain. The paper becomes weaker, more brittle, and prone to discoloration. It's a form of oxidation, not unlike a piece of metal rusting. The lignin in wood-pulp paper acts as a catalyst, speeding up this process from the inside out. When you see an old newspaper clipping that's turned brown and crumbles at a touch, you're witnessing the catastrophic failure of these cellulose chains under an acidic assault. Archival storage, in essence, is an act of chemical neutralization, creating a protective bubble where these destructive reactions are slowed to a crawl.
To give you a sense of the stakes, consider the half-life of a material. A standard wood-pulp paper stored in a typical office environment has a shelf life of a few decades at best. Its useful life is cut brutally short by its own internal chemistry. In contrast, a properly produced 100% cotton rag paper is projected to last for hundreds, if not thousands, of years without significant degradation. The difference isn't years; it's epochs. When you choose lignin-free, buffered paper, you are deliberately selecting a material that will be perfectly preserved long after your great-great-grandchildren are gone. It’s that powerful.
It all boils down to pH—the measure of acidity or alkalinity. The scale runs from 0 (battery acid) to 14 (lye), with 7 being neutral. Destructive acid hydrolysis occurs fastest in a low pH environment. The goal of archival science is to push the immediate environment of the artwork into a slightly alkaline state (a pH of 8.5 or higher is ideal). This alkaline reserve acts like a chemical firebreak, a sacrificial shield that soaks up any stray acids that try to migrate from the artwork's own materials or from the surrounding environment before they can reach the paper fibers.
This is the "buffer" you see on so many archival products—it's a calculated overdose of alkalinity, a chemical insurance policy that guarantees your art's environment will stay safe for centuries.
You’ve probably heard the term archival thrown around. It sounds professional, maybe a little intimidating. But the core idea is beautifully simple: archival materials are designed to last, without damaging the things they touch. The ultimate goal is to create a neutral environment that neither adds anything harmful to your art nor subtracts anything from its integrity. Think of it this way: your basic office folder is a ticking time bomb, slowly releasing compounds that will ultimately destroy its contents. A truly archival folder is chemically dead, inert, a perfect Zen state of non-interference. That kind of stillness is what preservation is all about.
Beyond the Buzzwords: A Guide to Archival Jargon
Before we go further, let's demystify the labels you'll see. The main culprits that destroy artwork on a chemical level are acids and lignin.
- Acids: Found in many common papers and boards (especially wood-pulp products like newspaper or standard cardboard), acids break down the cellulose fibers in your art's paper over time. This is what causes the paper to turn yellow, become brittle, and crumble. This process is sometimes called "inherent vice"—the tendency of a material to self-destruct because of its own chemical makeup.
- Lignin: A natural component of wood that gives it rigidity. In paper products, it's the primary source of acid. As lignin breaks down, it releases more acid, creating a self-destructive cycle.
To combat this, the storage industry uses a few key terms:

- Acid-Free: The material has a neutral pH of 7.0 or higher. It won't actively burn acids into your artwork. This is your minimum baseline.
- Lignin-Free: The material has had the lignin removed, stopping the source of future acid production.
- Buffered: This is the gold standard. A buffered material (like alkaline-buffered tissue paper) has an alkaline reserve (usually calcium carbonate) added to it. This reserve acts like a chemical sponge, absorbing any acid that might migrate from the environment or the artwork itself, neutralizing it before it can cause harm.
If you're feeling lost in a sea of jargon, the following table breaks down what you're actually buying.

Material Type | Acidity | Lignin Content | Best For... | Potential Risks |
|---|---|---|---|---|
| Standard Paper/Cardboard | High (Acidic) | High | Absolutely nothing. Keep it away from your art. | Rapid yellowing, embrittlement, and acid migration to your prints. It is a destroyer of worlds. |
| Acid-Free | Neutral (pH 7+) | Often High | A basic, short-term storage option if nothing else is available. May not be stable long-term. It's a temporary ceasefire. | Lignin can break down over time, releasing acids later. It's passive, often temporary, protection. |
| Lignin-Free | Neutral (pH 7+) | None | Great general-purpose archival storage, especially for colored or delicate papers (like pastels or old watercolors) where buffering might cause issues. | Without a buffer, it can't neutralize acids that migrate from elsewhere. It’s neutral, not defensive. |
| Buffered (Acid & Lignin-Free) | Alkaline (pH 8.5+) | None | The gold standard for most prints, especially black and white photography and most inkjet/giclée prints. | Can potentially interact with certain colorants (e.g., Prussian Blue) or some historic photographic processes. When in doubt, consult a conservator. |
| Museum Board / Rag Mat | Neutral/Alkaline | None | The highest quality backing and framing material, made from cotton fibers for maximum longevity. The luxury sedan of paper. | Extremely expensive. Can be overkill for short-term storage of disposable items. |

Your Art's Four Greatest Enemies: A Field Guide
Your storage battle isn't just against the container; it's a fight against the very air in the room. If you think a dark closet with some acid-free folders is enough, you're missing the invisible chemical warfare happening right now. Light, heat, humidity, and pollutants—these are the primary villains in the story of art decay. They rarely work alone. High humidity acts as a lubricant for pollutant damage, and heat cranks up the speed of every destructive chemical reaction, from fading to embrittlement. To give your art a fighting chance, you need to understand each of these enemies personally, to know their tactics and how to build a proper defense.
1. Light: The Slow, Patient Bleach
Think of light as the slowest, most patient bleach you will ever meet. It's not the dramatic spill of a chemical; it's a slow, relentless fade, molecule by molecule. Every photon of light, especially the high-energy ultraviolet (UV) part of the spectrum, carries a tiny bit of energy capable of breaking the complex chemical bonds that give your pigments their vibrant color. The most terrifying part? The damage is cumulative and irreversible. A year of living in a sunny room can do more damage than a century in a proper archive. The math is simple: exposure intensity multiplied by duration equals total destruction. If you want to preserve a print, your first and most important rule is to divorce it from light unless you are actively, intentionally looking at it.

Your Strategy: Building a Fortress of Darkness
Your primary goal is to build a fortress of darkness around your collection. Here’s your battle plan:
- Adopt a "Zero-Light" Philosophy for Storage: Your prints are vampires. They should live in darkness. That portfolio on your bookshelf? That framed print in the guest room? They are slowly, silently degrading. The only safe storage containers are those that are opaque and live inside a closet or cabinet. This is your single most effective preservation tool. Active viewing is the only exception.
- Display with Armor: When framing, the glass isn't for protection, it's for defense. You must use UV-filtering glass or acrylic. It's the sunscreen for your art. But remember, it's only a filter, not a total block. It slows the damage—it doesn't stop it. Hanging a framed print is a choice to trade a bit of its lifespan for the joy of seeing it now. Make that choice consciously. And never, for any reason, hang a piece in direct, unfiltered sunlight.
- Choose Your Light Bulbs Wisely: A surprising tip from museum curators is to use high-quality, full-spectrum LED bulbs for any display area. Why? Because you can achieve brilliant visibility at a much lower wattage. This means your art receives far fewer damaging photons for the same amount of perceived brightness, effectively giving you a "more light, less damage" setup. It's a simple change with a massive impact on your artwork's cumulative light dosage.
- Beware of the Glare: It seems counterintuitive, but sometimes indirect light is your friend. Direct spotlights, while dramatic, often concentrate damaging energy on a small area and create harsh reflections on glass that obscure the art. Diffused light from a bounced source, or well-placed ambient lamps, can be gentler and provide a more pleasing viewing experience.
It's helpful to think of light exposure in terms of intensity and duration. A print in a sunny room will fade much faster than one in a dimly lit hallway. This table gives you a rough idea of what to expect. This is where the "museum standard" of low lighting comes from—it's about extending the life of a piece for centuries, not just years. Conservationists use a concept called "lux hours" to measure the total amount of light exposure a piece receives over its lifetime. For high-value works, every minute of light is budgeted. While you don't need to go that far, the mindset is powerful: every hour in the light is a withdrawal from your art's finite life account.
| Light Exposure Level | Example Environment | Relative Rate of Fading (vs. Dark Storage) | Annual "Aging" Equivalent | |---|---|---|---|---| | Extreme | Direct, unfiltered sunlight for several hours a day | 100-500x faster | 100-500 years | | High | Brightly lit room with large windows | 20-50x faster | 20-50 years | | Moderate | Room with indirect natural light or bright artificial light | 5-10x faster | 5-10 years | | Low | Room with small windows, mostly shaded, or dim artificial light | 1-2x faster | 1-2 years | | Negligible | Inside a closed archival box in a dark closet | 1x (Baseline) | 1 year |
Why do museums use dim lighting? It's not just for atmosphere. It's a direct, mathematical application of this principle. A print in a brightly lit office is effectively aging 20 to 50 times faster than one in a box. Over a decade, the difference is not subtle; it can be the difference between a vibrant piece of art and a ghost of its former self. Museums are playing the long game, budgeting every photon their collections receive.
The Unflinching Eye: Measuring the Invisible Threat with a Light Meter
If you're serious about protecting a valuable collection, your own eyes are not a reliable source. We're biologically programmed to adapt to light levels, so you can't intuitively sense the cumulative damage. This is where a simple tool becomes revolutionary. I highly recommend getting a UV light meter. These are small, inexpensive devices that measure the intensity of the specific wavelengths of light that cause the most damage.
For less than the cost of a mid-range portfolio, a UV meter is the ultimate tool for anyone playing the long game with their collection. I keep one in my studio and walking through my supposedly "safe" storage room with it was a deeply sobering experience. The reading on a windowsill was predictably catastrophic, but the reading on a wall in the shade was still surprisingly high. It measured the ambient UV bouncing around the room, the invisible threat I had completely ignored. This data transformed my approach. It's not just a measurement tool; it's a hard-data decision-maker.
The real shocker was seeing how much UV reflected off of seemingly neutral surfaces like a white wall or a light-colored floor. You might think a print is safe because it's not in the direct path of the sun, but it's still being bombarded by reflected and ambient UV, a silent, cumulative poison. If you don't measure it, you literally cannot see it, and your art is paying the price day after day.
2. Heat: The Great Accelerator
Heat is an accelerant. Every degree you add to the environment doesn't just warm the air; it kicks the molecules in your paper and ink into a higher gear. Every chemical reaction that degrades your art—from acid hydrolysis breaking down cellulose to oxidation fading pigments—happens faster in the heat. Think of it like cranking up the speed dial on every single destructive process. A room at 77°F (25°C) might feel comfortable to you, but for your artwork, it's living life in the fast lane, aging more rapidly than it would in a cool, stable environment. An attic or non-climate-controlled unit in summer is essentially a slow-bake oven, guaranteed to shorten the lifespan of anything inside. The rate of chemical reactions roughly doubles for every 10°C (18°F) increase in temperature, a principle known as the Q10 rule.

Your Strategy: The Case for Cool Consistency
The ideal archival temperature is a stable, cool environment, generally considered to be around 65°F (18°C). Your goal isn't to replicate a museum vault, but to avoid obvious danger zones like attics, garages, or storage units that aren't climate-controlled. What's more damaging than a consistently warm temperature is a fluctuating one. Think of paper as having a memory for stress. A room that swings from 60°F at night to 80°F during the day is far more stressful for paper than a consistently stable 70°F environment. Each swing forces the paper fibers to expand and contract, to absorb and release moisture.
These cycles cause the paper and any mounted materials to expand and contract repeatedly, which can weaken fibers and cause cracking over time. It’s like taking a credit card and flexing it over and over again—eventually, it will break at the bend. It's the flexing of the paper, over a thousand daily cycles, that leads to structural failure. That smooth, flat surface will slowly develop permanent cockles and waves, and fragile media on the surface can begin to delaminate or flake off entirely. The goal is monotony. A stable, boring environment is a kind environment.
I should also mention the concept of cold storage, often practiced by major institutions for particularly sensitive materials. The idea is simple: colder temperatures slow down chemical reactions almost to a halt. While not practical for most home collections, it's a powerful illustration of the core principle. Think of your prints as perishable items; they last longer in the fridge. The extremes of an unheated garage in winter or a sweltering attic in summer are your real enemies.

Monitoring Your Environment: The Silent Witness
You can't manage what you don't measure, but your memory of what your thermostat read is not a measurement. We humans are terrible at sensing the slow, subtle drifts in our environment. Our perception is geared for immediate threats, not for noticing that the ambient temperature in the corner of the room drifts up by three degrees every afternoon. This is where technology becomes your most powerful ally.
I eventually invested in a small, unobtrusive USB data logger for less than the cost of a few archival sleeves. It was a revelation. This tiny device, no bigger than a flash drive, logs temperature and humidity data for months at a time. When I plugged it into my computer and downloaded the data, it painted a picture my senses had completely missed. I made a crucial discovery: a small but consistent temperature and humidity spike every afternoon. A sliver of sun was hitting an exterior wall from a window I hadn't considered, a "solar loading" event I never would have sensed. But every day, my prints were being subjected to a little aging cycle.
It's a silent witness that tells you the truth about your space. It's the difference between thinking you have a good environment and knowing you do. This is professional-grade practice made completely accessible. They allow you to catch problems before they cause damage, not after the fact.

That incident taught me you can't just check the conditions for a moment; you have to monitor them over time. A room can seem perfectly fine when you walk in, but harbor damaging cycles of heat and humidity that only reveal themselves over days and weeks. Without that continuous log, you are flying blind.
3. Humidity: The Shape-Shifter
This is arguably the trickiest villain to manage. Paper is hygroscopic, meaning it is constantly trying to reach an equilibrium with the moisture in the air around it. That beautiful, flat sheet of paper you own is in a constant, microscopic dance—absorbing moisture when the air is damp and releasing it when the air is dry. High humidity invites biological agents like mold and mildew, and it can cause paper to warp and cockle—developing a rippled, wavy surface. Low humidity, on the other hand, pulls the moisture right out of the cellulose fibers, making the paper desiccated, brittle, and prone to cracking. It can also cause media, like charcoal, pastels, or even certain inks, to flake off entirely.

Your Strategy: Taming the Tyranny of the Sawtooth Graph
Managing humidity isn't about the number you see on the hygrometer this second; it's about taming the jagged, sawtooth-shaped graph of its daily and seasonal fluctuations. It's this constant up-and-down that really beats up a print.
Aim for a consistent relative humidity (RH) between 40% and 50%. That 10-point range is your safe zone. Fluctuations are the real enemy here, even more so than with temperature. This daily, seasonal expansion and contraction is incredibly stressful for paper and its attached media. If you see a print with a wavy surface (a condition called cockling), you're looking at the direct result of humidity fluctuation. If your print's media is cracking, it could be from being stored in an environment that was too dry. The enemy isn't high or low humidity; it's unstable humidity.
Avoid storing art in basements (often too damp, leading to the nightmare of mold), or next to heating vents or radiators (too dry, leading to brittleness and a condition called flaking where the media literally falls off the page). Think of your storage space as a library, not a greenhouse or a desert. Here are the common danger zones:
- The Basement: Often the most humid place in a house, a perfect breeding ground for mold. The risk of water damage from flooding is also highest here.
- The Attic: The opposite problem. Typically hot and bone-dry in the winter, subjecting your art to extreme desiccation and brittleness.
- Exterior Walls: Walls that face the outside are subject to temperature swings more than interior walls. This can create a microclimate of fluctuating humidity right where your art is stored.
- Near HVAC Vents: This is a death sentence. The constant blast of hot, dry air in the winter will rapidly desiccate paper, causing it to crack and media to flake.
Avoid storing art in basements (often too damp, leading to mold) or next to heating vents (too dry, leading to brittleness).
The Seasonal Battlefront: Your Year-Round Vigilance
The biggest challenge most people face is the seasonal shift. As winter sets in and central heating kicks on, indoor humidity can plummet into the 20s or even teens, turning your home into the Sahara and your paper into a brittle cracker. This desert-dry environment literally pulls the moisture out of the paper's cellulose fibers, desiccating it. I've seen prints where the ink has become so brittle it flakes off at the slightest touch, leaving a fine dust of pigment on the bottom of the sleeve. Once that happens, the damage is irreversible.
Conversely, a hot, humid summer without air conditioning can push you into the danger zone for mold growth, a problem that can contaminate your entire collection. I think of mold as the zombie apocalypse of art storage—once it starts on one piece, its spores can spread to everything else in the vicinity. A single print with a mold outbreak can become a patient zero, necessitating a complete quarantine of your entire archive.
Your First Line of Defense: The Humble Hygrometer
If you only take away one piece of hardware advice from this entire guide, let it be this: buy a simple hygrometer. This tool measures relative humidity. For the cost of a fancy latte, you can get a small digital one that gives you an immediate, objective reading of your storage space. It’s the single most effective tool for gaining immediate control over one of the most destructive forces your art will face.

The first time I put one in my storage closet, I learned it was consistently at 35% RH—a bit too dry for comfort, likely because it shared a wall with a heater. That 15 seconds of reading prompted me to move my collection to a more centrally located interior closet, which stabilized the humidity perfectly. Knowledge, in this case, is literally preservation. Don't guess. Measure.
A single reading is just a snapshot, but the trend is the story. By checking the hygrometer at different times of day and in different seasons, I started to see a pattern. In the morning, it would read 48%. By mid-afternoon, with the sun streaming in, it would drop to 41%. Over the course of a week, I knew I wasn't just looking at a number; I was witnessing the daily cycle of stress imposed upon my paper. This is the kind of data that empowers you to make real changes.
4. Pollutants: The Invisible Enemies
The enemies you can't see. This category includes everything from the dust settling on a print to invisible gases released by materials in the same room. Dust isn't just dirt; it's a collection of abrasive, hygroscopic (moisture-attracting) particles. Acids can off-gas from wooden drawers, cheap cardboard, some paints, and even household cleaners. The oils and acids from your own hands can also leave a residue that will cause discoloration and deterioration over decades.
Your Strategy: The Three Pillars of Pollution Defense
You have to think like a conservator here, building concentric rings of defense against the invisible chemical and particulate threats in your environment.

- Handle with Care: Always handle with clean, dry hands, preferably wearing white cotton or nitrile gloves. The oils and acids on your skin can leave a residue that will discolor paper over decades. It feels a bit clinical, I know, but it's a simple habit that pays off over the long term. It's a tiny investment of effort for a massive return in longevity.
- Store in a Clean Environment: Dust isn't just unsightly; it's an abrasive, hygroscopic pollutant. Over time, dust settling on a print can become ingrained in the paper fibers. Because it absorbs moisture, it can create tiny, damp microclimates, potentially encouraging mold. A clean, closed storage system is your best defense.
- Beware of Off-Gassing: This is the silent killer. It's the process where materials release harmful vapors. Your beautiful wooden flat file could be off-gassing acetic acid. That fresh coat of paint? It's releasing VOCs. The golden rule is to use only inert, acid-free materials. If you are building new storage or painting a storage room, do it months in advance and let it air out completely before bringing your art back in. When in doubt, create a physical barrier. If you love a wooden flat file, line it with an inert material like Marvelseal or acid-free barrier board.
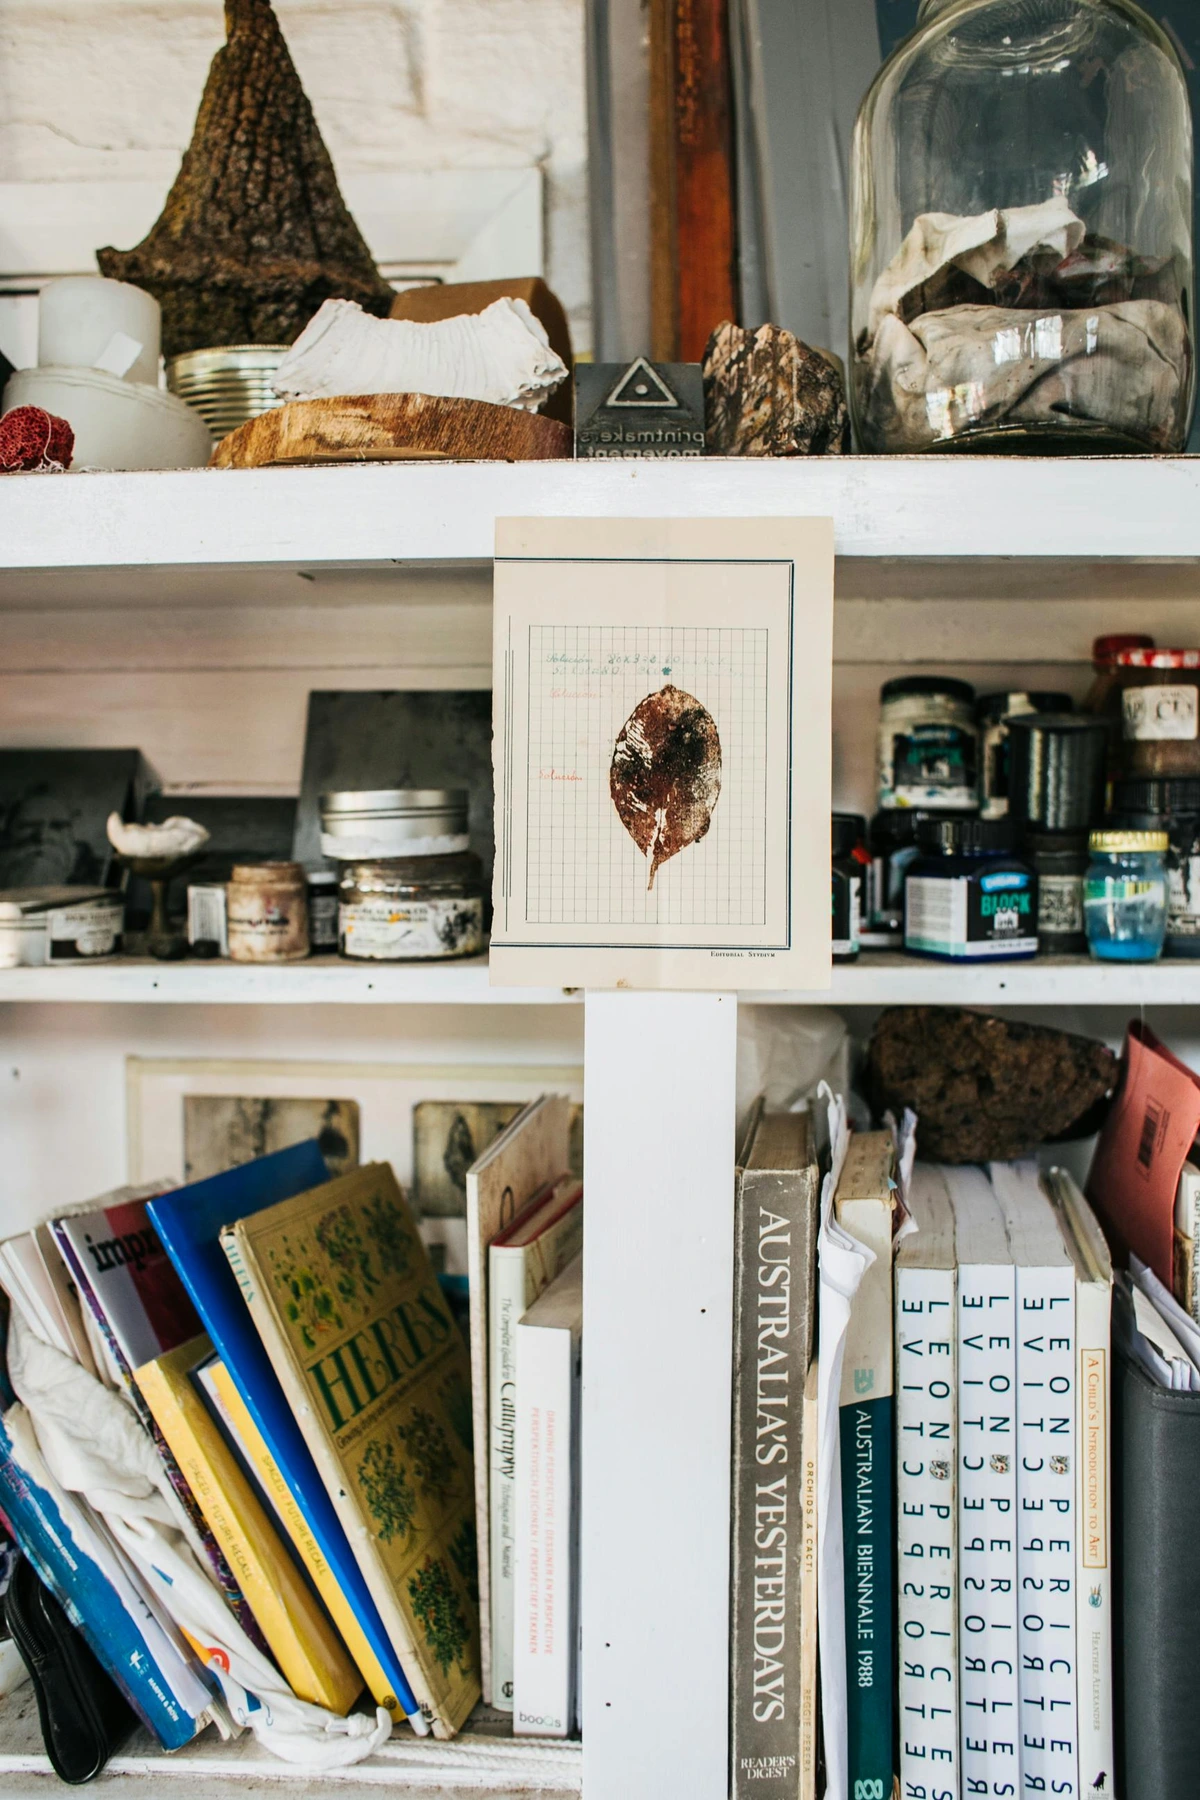
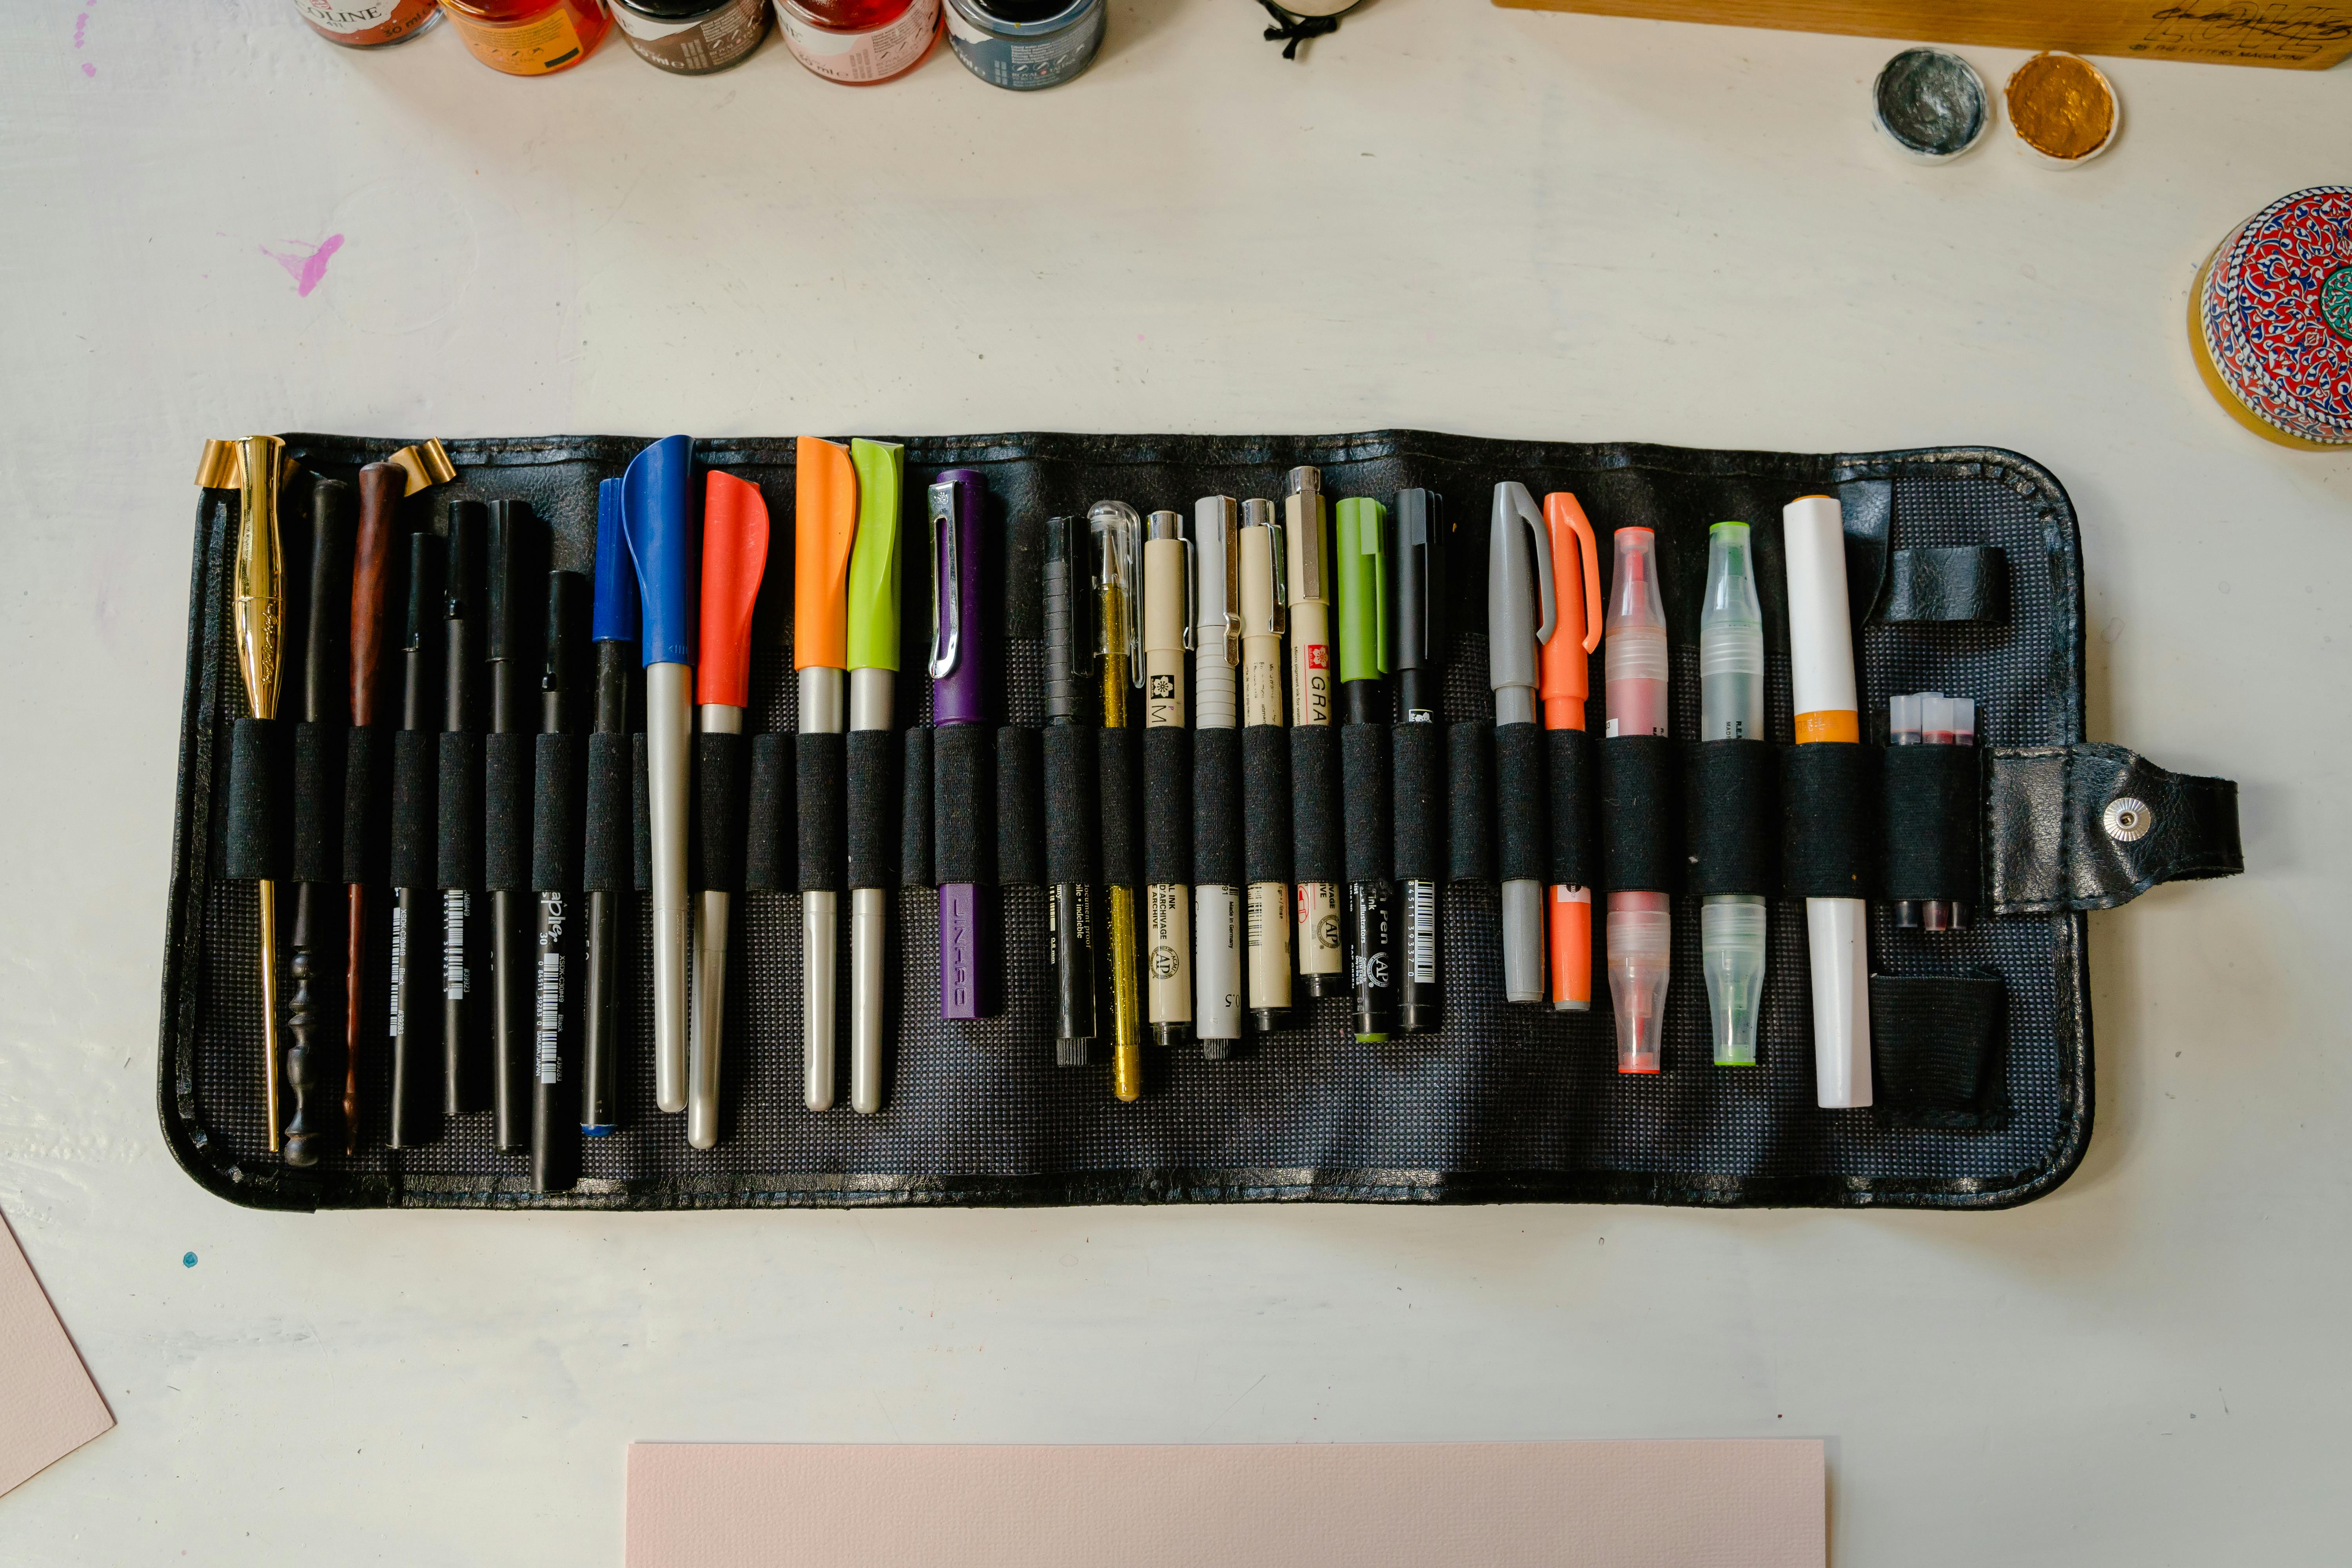
The Archival Arsenal: From Folders to Flat Files
Let's talk about the tools of the trade. I've found that there's no one-size-fits-all solution. It usually involves layering your protection. Think of it like defensive gear for a work of art: you start with a base layer that touches the skin, add padding and structure for support, and then place it all within a fortified shell to protect against the world. We'll work from the inside out, starting with the surface that touches your art.
Level 1: The Contact Layer – Interleaving and Sleeves
This is the sheet that goes directly against your print. Its job is to create a physical, chemical, and environmental barrier. It's your art's personal bodyguard, protecting it from scuffs, dust, fingerprints, and the transfer of chemicals from the outer storage materials. The choice of material here is utterly critical. The wrong "protective" sheet can be more dangerous than no sheet at all.
- Archival Tissue Paper: Soft, unbuffered, and acid-free. It's perfect for wrapping or interleaving delicate prints (like charcoal or pastel drawings) where you worry about impression marking. The "unbuffered" quality is key, as the alkaline buffer in standard archival paper can sometimes react with certain sensitive pigments. It's the most gentle, low-impact option, but the least durable.
- Glassine Sleeves: A smooth, acid-free, air-resistant paper. Beloved by printmakers for its affordability. It's a good budget option but can develop static cling over time and isn't a true chemical barrier. The static can even lift delicate media like pastel from the paper.
- Archival Polyester Sleeves: Often sold under the brand name Melinex, this is the gold standard. It's a clear, completely inert plastic film, meaning it will not react with or off-gas onto your art. It is incredibly strong and moisture-resistant, offering superior protection from the environment compared to paper-based options. It's the ultimate viewing and storage solution.
The Contact Layer Decision Matrix: Choosing Your Art's Skin
This choice often comes down to a few factors: the media on your print, how often you need to view it, and your budget. A friable media like pastel or charcoal has very different needs than a stable inkjet print. The most crucial question to ask is, "How much does my medium shed?" If the answer is "not at all," polyester is your safe bet. If the answer is "yes, it's dusty or delicate," you need to think more carefully.
What we're really talking about here is physical interaction. A smooth, cured acrylic medium has almost no interaction with its paper or a sleeve. But a soft pastel or charcoal drawing is just pigment particles sitting loosely on the paper surface, held there by friction and gravity. Adding a sleeve into that equation means you're introducing a new surface for those particles to stick to. The choice of that new surface—its hardness, its static charge, its texture—is therefore one of the most critical decisions you'll make. Let's break it down.
Material Type | Chemical Inertness | Physical Protection | Media Sensitivity | Cost & Viewability |
|---|---|---|---|---|
| Archival Tissue Paper | Excellent (if unbuffered) | Gentle, but no abrasion resistance | Ideal for delicate, friable media like pastels, charcoal, and soft pencil. | Very low cost. Opaque, so viewing requires removal. |
| Glassine Sleeves | Good (acid-free) | Better than tissue, but still paper | Good for most stable prints. Static can be an issue for dry media, potentially lifting pigment. | Low cost. Transparent. |
| Archival Polyester (Melinex) Sleeves | The Gold Standard. Completely inert. | Excellent. Scratch and moisture resistant. | Ideal for all non-friable media (inkjet, lithographs, etc.). | Higher cost. Perfectly transparent. |
For most modern prints—inkjet, giclée, lithographs, serigraphs, and most watercolors—archival polyester is the undisputed winner. The ability to see the artwork without touching it cannot be overstated, and its complete inertness offers the highest level of chemical protection. It's a permanent solution, not a temporary one.
The Static Caveat: The only time I hesitate with polyester is for extremely friable media, like a loose pastel or charcoal drawing. In these cases, the static charge generated by the plastic can be strong enough to pull pigment right off the paper. Here, glassine paper is the safer choice, as it produces less static and is gentler on the surface.
Level 2: The Middle Layer – Portfolios, Folios, and Folders
Here’s where you organize your sleeved prints. This is the middle layer of your defense, providing structure, rigidity, and a system for organization. It's the filing cabinet for your collection.

- Archival Binders with Polyester Sleeves: If you have a collection of similarly-sized prints, a binder filled with archival pocket pages is a fantastic, affordable option. They allow you to flip through a collection like a book, which is great for curation.
- Art Portfolios: These are folders with rigid covers, ideal for holding a smaller stack of sleeved prints. Look for portfolios with reinforced corners and a sturdy closure. They're a great mid-point between a simple folder and a box.
- Print Folios & Solander Boxes: These are larger, portfolio-style boxes with rigid, acid-free board covers. Perfect for larger prints or a collection of mixed sizes. The rigid sides provide excellent protection from bending and crushing. Solander boxes, often used in museums, have a drop-front spine for easy access and are considered top-tier.
- Document Cases & Clamshell Boxes: For the ultimate protection of a single, very valuable print, a custom-made clamshell box is the museum standard. These are rigid, two-piece boxes that fully enclose the work, protecting it from all sides. They are less convenient for frequent access but offer maximum protection.
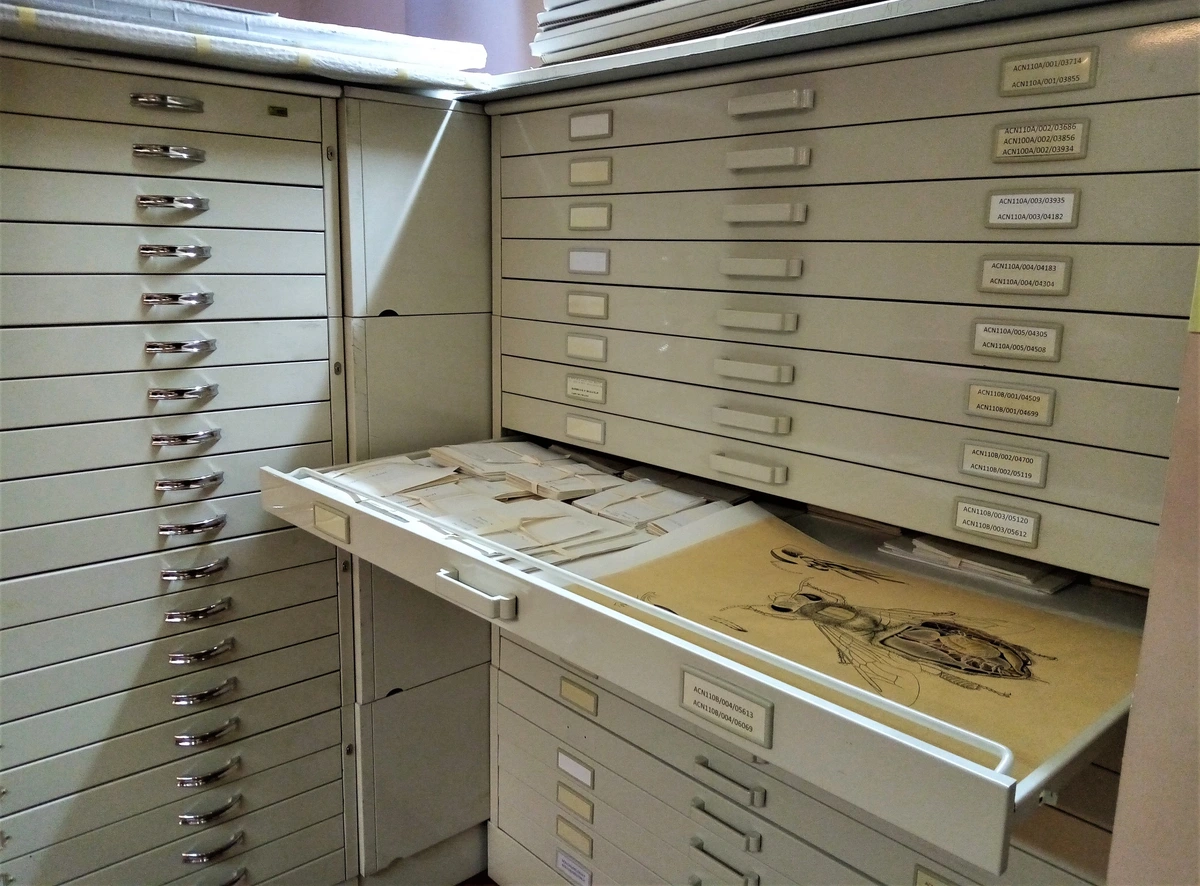
Level 3: The Fortress – The Flat File Cabinet
For a large collection of unframed works, nothing beats a flat file cabinet. These wide, shallow drawers are designed specifically for storing paper. They are the workhorses of the archival world for a reason, removing light, dust, and physical stress from the equation and allowing for perfect horizontal storage. It's the difference between stacking books haphazardly and placing them neatly on a shelf.

- Why They're Great: They eliminate the need for rolling or folding, keeping everything perfectly flat. They provide a dark, stable environment, protecting against light, dust, and physical damage from crushing or bending.
- A Note on Wooden Flat Files: This is a classic storage solution, but wooden flat files, especially those made from acidic woods like oak or standard pine plywood, present a significant risk. The wood can off-gas acetic acid, creating a miniature 'acid bath' inside the drawer. If you use a wooden flat file, your prints must be sealed in a completely non-permeable enclosure. Better yet, the drawers should be lined with an impermeable barrier like Marvelseal or acid-free barrier board.
Flat File Alternatives for Real People
Creative Solutions: Archival Storage on a Budget and in Small Spaces
Let's be real: not everyone has the space or budget for a massive piece of institutional furniture like a flat file. The good news is that the fundamental principle isn't "own a flat file," it's "store flat." With a little ingenuity, you can achieve museum-level protection in even the smallest apartment. Here are some practical, non-traditional ways to achieve that goal, all of which I've used or seen used successfully.

- The "Under-Bed Archive": A Plastic Tote FortressA heavy-duty, wide and shallow plastic storage tub with a gasket seal and latching lid is a fantastic alternative. Look for brands made from stable plastics like polypropylene or HDPE (often labeled "archival safe" or "acid-free"—be skeptical, but it's a good start). The gasket is key—it creates a better seal against dust and pests. You lay your sleeved prints flat inside, perhaps with a piece of acid-free foam board between them for extra rigidity. Stored under a bed, it keeps them flat, in the dark, and physically protected. It's not glamorous, but it's incredibly effective and completely out of sight.

- The Foam-Core Sandwich: A Modular Flat FileFor artists with limited space, a simple solution is to create a "sandwich" using two large, rigid sheets of archival foam board (also called Gatorboard). Place your sleeved prints on one board and place the other on top. Secure the edges with archival linen tape. This creates a rigid, flat packet. Stack these packets on a high shelf in a closet. This system is modular, inexpensive, and provides excellent protection for works on paper, especially if the edges are sealed against dust infiltration.
- The Portfolio Rack System: A Flexible HybridThis is a hybrid approach I've used successfully. Look for modular wire "under-bed" storage racks. Then, instead of storing prints loose, you lay them flat inside individual archival portfolios or Solander-style boxes and place these boxes on the wire racks. This gives you the organization of a flat file (using portfolios as "drawers") with the flexibility of a shelf-based system. It's a clever way to scale a flat-file-style system without the initial cost of a single, massive piece of furniture.
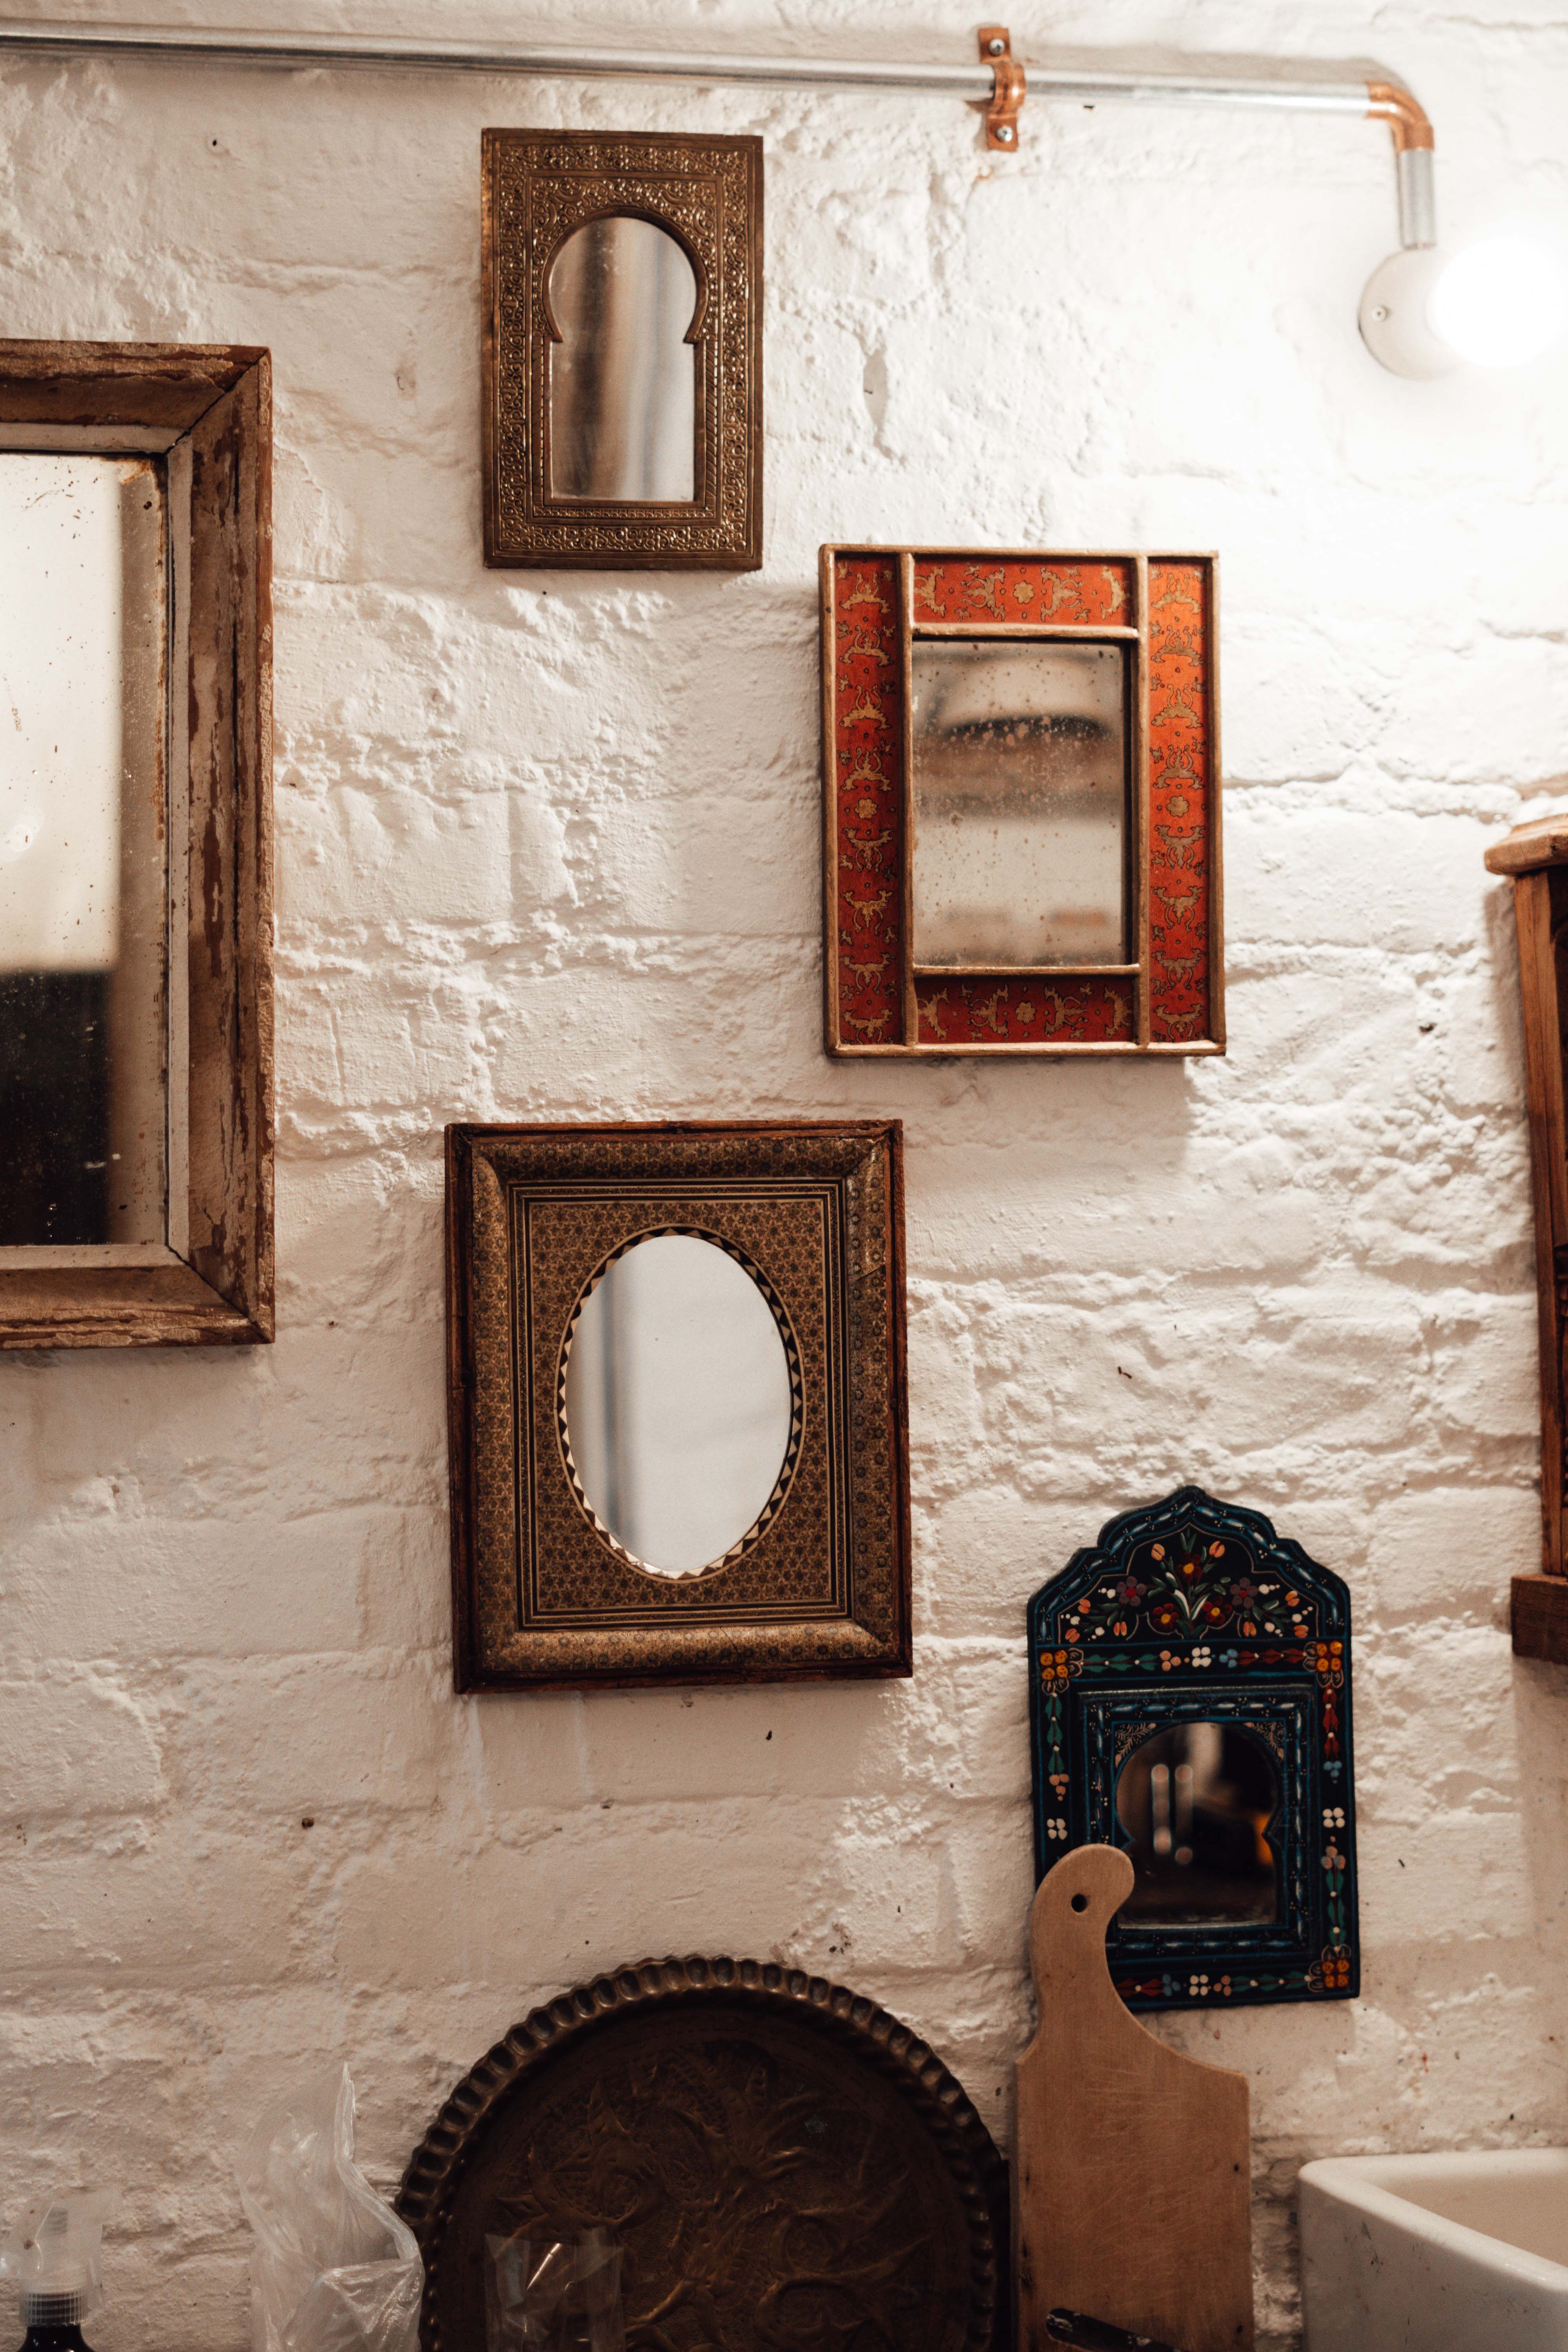
Archival Framing: When Your Print Steps into the Spotlight
Framing is display, but it's also a specific, long-term storage environment. If you've ever seen a framed print where the image has become stuck to the glass, you've witnessed a storage failure, not a display failure. Think of the frame as a miniature, sealed, climate-controlled environment that your print will live in for decades. A well-framed print can last for generations, while a poorly framed one can be destroyed in under a year. Every single component in that frame—the glass, the mat, the backing board, the tape—is a critical decision that requires the same level of care as your long-term storage strategy. You are literally building a tiny museum case. A poorly chosen frame can become a perfectly sealed time capsule of destruction, trapping moisture, acids, and pollutants right against the surface of your art.
The Golden Rule: Creating a Microclimate
The key is spacing. Your print should never, ever touch the glass. Condensation can form on the inside of the glass, leading to moisture being trapped directly against the paper, causing mold, adhesion, and the eventual transfer of ink or media to the glass itself. This is one of the most common and tragic ways prints are damaged. It's a slow-motion horror story that happens a molecule at a time. It's not an "if," it's a "when" if you get this wrong.

The industry standard is to use a mat board. Its primary job isn't decorative (though we often use it that way); its primary job is to act as a spacer, holding the glass firmly away from the artwork. For an even more invisible solution, many framers now use spacers—small plastic or wood strips that fit between the edge of the art and the frame's rabbet, lifting the glass and creating that essential air gap without the need for a mat.
- The Mat: A good quality mat board made from 100% rag board or alpha-cellulose (both are lignin-free and acid-free) creates that essential physical space. The window opening in the mat should be cut slightly larger than the image to keep the edges secure. It's not just a picture frame; it's a load-bearing wall holding the glass away from your art.
- The Frame: Choose a high-quality wood or metal frame to keep the whole package stable and protected. The rabbet (the inner lip that holds everything) should be deep enough to accommodate all your layers (glass, mat, art, backing board) without squeezing them.
- The Backing Board: The back of the print needs just as much protection as the front. Use another piece of acid-free foam board or rag board behind the print, inside the frame. This layer is the final defense against dust and pollutants entering from the back.
- The Glass: Use UV-filtering acrylic (lighter, shatter-resistant, and a must for large pieces) or UV-filtering glass. It costs more, but it's the only thing that will protect your print's colors from fading while on display. This is your art's sunscreen, and it's non-negotiable.
- The Hanging: Use d-rings and braided wire for secure hanging, and consider adding bumpers to the bottom corners of the frame. These little felt pads keep the frame tilted slightly away from the wall, allowing for better air circulation and preventing moisture from getting trapped behind the frame.
Advanced Framing Considerations (When "Good" Isn't Good Enough)
Advanced Framing Considerations: Where "Good" Becomes "Heirloom"
Once you've mastered the basics, there are additional layers of protection—and expense—to consider. These are for your most valuable pieces, the ones you intend to pass down. This is where you stop thinking like someone hanging a poster and start thinking like a conservator.
- Museum Glass & Anti-Reflective Coatings: This is the first upgrade beyond standard UV-filtering glass. Museum glass, made by companies like Tru Vue, not only blocks 99% of UV rays but also has an anti-reflective (AR) coating. The magic of AR glass is that it virtually disappears, eliminating the distracting glare and reflections that can obscure a piece. It makes the art look like it's floating in the frame and is a stunning choice for any room with a light source that creates difficult reflections. It costs roughly double what standard UV glass costs, but the optical improvement is immediate and profound.
- Museum Mounting/Hinging: This is about how the art is secured inside the frame. A professional framer or conservator will use reversible methods. The gold standard is Japanese tissue hinges with starch paste. The art is held in place by thin strips of strong, stable paper. The adhesive is water-soluble, meaning, decades from now, the print can be safely removed by carefully applying a little moisture, without damaging the paper. This is the opposite of "dry mounting," which permanently glues the print to a board, destroying its archival value and resale value.
- Using Spacers for a Floated Look: As mentioned earlier, for a "floated" or more contemporary aesthetic, you can forgo the mat and use clear acrylic spacers between the glass and the artwork. This achieves the same goal of creating an air gap but with a more minimal look. This is essential when you want to show the entire sheet of paper or the deckled edges of a fine art print.
- Acrylic ("Plexiglass") vs. Glass: The choice is nuanced. Acrylic (e.g., Plexiglass, Lucite) is far lighter and much safer for large sizes, as it doesn't shatter. However, it scratches easily and can build up a static charge that attracts dust. It is also permeable to some gases and VOCs, making it slightly less of a seal than glass. Glass is heavier, can shatter, but is harder to scratch and completely impermeable. For most framed prints up to a certain size (say, 24x36 inches), UV-filtering glass is an excellent choice. For anything larger, or for artworks that will be shipped or moved frequently, UV-filtering acrylic is the standard.
- The Back is Not an Afterthought: It's not enough to just have an acid-free backing board. You need to seal the back of the frame to prevent dust and pests from getting in. I use a simple kraft paper dust cover, attached to the back of the frame with archival-quality framer's tape. It's a cheap final step that makes a huge difference in your frame's internal environment.
- The Tape Test: When your framer is finished, ask them what kind of tape they used. If the answer is just "framing tape," that's a red flag. Archival framers use specific, acid-free, conservation-approved tapes like Filmoplast P or linen tape. The wrong tape can bleed acids right into the edge of your mat and artwork, creating a permanent brown line. It's a tiny detail, but it shows you who you're working with.

- For the Budget-Conscious Beginner (5-10 prints):
- Buy: A pack of archival polyester sleeves sized to fit your largest prints.
- Buy: A simple, acid-free portfolio with rigid covers. It should be just slightly larger than your sleeved prints.
- Buy: A small, inexpensive hygrometer.
- Do: Place each print in a sleeve. Lay them flat inside the portfolio, ideally with a piece of acid-free tissue paper between each one to prevent scuffing. Place the hygrometer nearby. Store the portfolio flat in a cool, dark closet, under a bed, or on a high shelf, away from vents and exterior walls.
- Prints in Sleeves, Awaiting Organization:
- Buy: A pack of archival polyester sleeves sized to fit your largest prints.
- Buy: An archival print portfolio or a Solander box with rigid sides. Make sure it's large enough to hold your sleeved prints without them bending.
- Do: Place each print in a sleeve and then lay them flat in the portfolio. Store the portfolio in a cool, dark, dry place.
- A Growing Collection Needing a Home:
- Buy: A used, second-hand flat file (map chest) of either steel or a properly sealed wood. Search online marketplaces, university surplus auctions, or classified ads. An old library or architectural firm often sells them. It’s the single best investment I ever made for my work.
- Buy: Pads of buffered archival tissue paper and/or archival museum mounting board to create folders and dividers within the drawers.
- Do: Carefully place sleeved prints into labeled folders within the drawers. Use acid-free foam blocks or custom-cut folder stock to create vertical dividers that keep folders upright and organized by series, size, or year. This turns a simple cabinet into a professional-grade storage system.
- For Your Favorite Print, Destined for the Wall: This is your chance to do it right. A storefront framer might push "dry mounting" to get a perfectly flat appearance. This is a bad idea for anything of value. Here's how to push back.
- Go to a professional framer. Look for one recommended by a museum or gallery, if possible.
- Specify: "I want this framed for maximum longevity. I'd like a 100% rag mat (or a 'floated' look with spacers), a UV-filtering glass or acrylic front, and an acid-free foam core backing board. And please, use reversible mounting like Japanese paper hinges or archival linen tape."
- This wording will tell them you're not buying the "it'll look flatter" line and are serious about preservation.
- For the Large Original Works on Paper (Watercolor, Ink, etc.): This scenario requires the highest level of care. Original media can be fragile and reactive. The priority here is gentle support and a buffer against the environment.
- Buy: Unbuffered 100% rag mat board, cut to size. The word "unbuffered" is key here, as the alkaline buffer in standard archival board can sometimes interact with and damage certain watercolor pigments, especially older or more fugitive ones.
- Buy: Archival polyester sheeting (Melinex), cut larger than the artwork, or unbuffered glassine if you prefer a paper interleaving.
- Buy: Two large, flat sheets of archival acid-free foam board or a large, shallow, wide clam-shell archival document case (Solander box).
- Do: Create a protective sandwich. Place one sheet of foam board down. Lay your print on top of it. Gently place a sheet of the polyester or glassine over the print as the contact layer. Top with the second sheet of foam board. If using a document case, place the entire sandwich inside. Store completely flat in a dark, climate-controlled space. Handle the print itself only with clean, cotton gloves to prevent oil transfer, which can cause discoloration over time in damp environments.
For the Professional Artist or Serious Collector (Large Volume)
This is about building a professional-grade system for long-term preservation and easy access. This is my preferred system.
- Buy: A full-size steel flat file cabinet (map chest). Steel is ideal as it won't off-gas like wood. Shop used industrial or library surplus sites. The peace of mind of knowing the container is chemically inert is worth the hunt.
- Buy: A bulk pack of archival polyester sleeves in the most common size for your work.
- Buy: Large sheets of acid-free folder stock to make custom-sized folders and vertical spacers for the drawers.
- Buy: An environmental data logger. This is non-negotiable at this level.
- Do: Place the data logger in the room with the flat file to monitor conditions. Create labeled folders from the folder stock. Place each artwork in a sleeve, then file it in the appropriate folder. Use the drawers to organize by series, size, or year. This system provides unparalleled protection from light, dust, physical damage, and environmental fluctuations while making your collection easily accessible for curation and viewing. This is no longer just storage; it's curation.
Frequently Asked Questions (FAQ)
Here are some of the most common questions I get about storing art. If you have a question that isn't answered here, the principles we've covered should give you a strong foundation to make a good decision. When in doubt, the most conservative choice—the one that causes the least interaction with the art—is usually the right one.
What's the real difference between "acid-free" and "archival"?
This is a great question, as the terms are often used interchangeably, but they really shouldn't be. "Acid-free" is a technical term meaning the material has a neutral pH of 7.0 or higher. However, an acid-free material can still contain lignin, which will eventually break down and produce acids. "Archival" is more of a conceptual term, suggesting a material is chemically stable for long-term preservation. An archival material is almost always both lignin-free and buffered. Think of them as levels of protection: "acid-free" is the baseline; "archival" is the gold standard. When in doubt, look for specific certifications like "PAT (Photographic Activity Test) Passed" which indicate a material has been tested for long-term inertness.
Can I store prints in a plastic sleeve from an office supply store?
Please don't. This is one of the easiest mistakes to make. Many common plastics, especially PVC (often sold as "vinyl" or "page protectors"), contain plasticizers that can leach out over a few years. This creates a sticky, greasy film on your print that is, for all intents and purposes, permanent. It's heartbreaking. You are far better off storing a print in a simple 100% cotton rag folder than in a cheap PVC sleeve. Always look for sleeves specifically labeled as being made from archival polyester (Melinex) or polypropylene. These are engineered to be chemically inert for centuries. Don't be fooled by the word 'clear'—the chemistry matters.
How often should I check on my stored prints?
This is about trust. I trust my storage systems, but I don't trust my environment to stay static forever. For prints in a stable, climate-controlled environment inside a good portfolio or flat file, I do a quick check once a year. And "check" doesn't mean rifling through them. It means opening the closet door, glancing at the hygrometer, and confirming that the general conditions are still what you intended. Has a pipe leaked? Is a new heater now right below the shelf? It's more about ensuring the room is still stable than about handling the art itself. The less you touch them, the better. They aren't pets; they don't need attention.
Is it okay to roll prints for long-term storage?
I try to avoid it if at all possible. Here's why: paper has a memory. When you roll it, you are putting immense stress on the paper fibers and the ink or media layer. A print rolled tightly for a long time can become extremely difficult, if not impossible, to flatten again without cracking the media. What you're doing is creating a powerful, persistent "spring" in the paper that fights being flat. The only time I might consider it is for a short-term transportation need, and even then, I’d roll it around a very large-diameter acid-free tube (at least 4 inches) to minimize the bend radius and reduce stress, and I would unroll it and flatten it again as soon as humanly possible. Rolling is for transport, not for preservation.
Can I make my own storage portfolio?
Absolutely. You can get quite far with some ingenuity, but you have to be a stickler for materials. The most important thing is to use only acid-free materials. You could use two pieces of archival acid-free foam board as covers, bind them with archival linen tape to create a hinge, and store your sleeved prints inside. It’s not as robust as a commercial portfolio with a rigid, wrapped cover, but it's a million times better than a pile in a drawer and perfect for short to medium-term storage. Homemade portfolios like this are great for project-based organization—keeping all the work from a specific series together in one place, for instance.
What's the deal with the "PAT" test I see sometimes?
PAT stands for the Photographic Activity Test, an international standard (ISO 18916). It's the real deal—a laboratory test where a material is aged under stress conditions to see if it will damage photographic emulsions. For our purposes, it signifies the absolute highest tier of inertness. If a paper, board, or plastic passes the PAT, you can be virtually certain it is completely safe to store in direct contact with your most sensitive photographs and prints. It's the highest level of certification you can get, and it's what museums demand. If you're buying a high-end material and you see "PAT Passed," that's your green light.
Should I be worried about insects or pests?
It's a consideration, especially for organic materials. Silverfish and certain beetles can eat paper and adhesives. The best defense is a clean, dry, and sealed environment. Keeping your prints in portfolios or flat files, rather than open on shelves, is the most effective deterrent. In extreme cases, archival storage facilities use controlled freezing to eliminate pests, but this is a last resort and not a DIY project.
What is "museum mounting"?
This is the most important concept in framing. Museum mounting, or conservation mounting, refers to using completely reversible methods to secure the artwork. The gold standard is Japanese tissue hinges with starch paste. Small strips of thin, strong paper are adhered to the back of the print with a water-soluble paste, and the other end is adhered to the backing board. The print is held securely in place and can be removed decades later by carefully applying a little moisture to the tissue, dissolving the paste without damaging the artwork. It is the absolute opposite of "dry mounting," which uses heat-activated adhesives to permanently glue the print to a board, effectively destroying its archival integrity, collectible value, and any hope of future restoration.

My print arrived rolled in a tube. How do I flatten it safely?
The key is patience and gentle persuasion, not force. Unroll it gently and place it on a clean, flat surface. If it won't lay flat, place it between two clean sheets of acid-free paper or glassine to protect it. Then, put a light, flat weight (like a few large, clean books) on top. Leave it for several days or even weeks, checking periodically. The goal is to let the paper's memory slowly relax. Never force it flat, as this will crack the media or permanently crease the paper. For a valuable work, it's worth the cost to consult a paper conservator, who can use specialized humidification chambers and presses to safely achieve a perfectly flat result without risking damage. It's one of those tasks where the right tool—in this case, a professional press—makes all the difference between a perfect result and a disaster.
I learned this the hard way years ago with a limited-edition lithograph I was too impatient to flatten properly. I ended up with a permanent "memory crease" running diagonally across the print. It's still a beautiful piece, but every time I see it, I'm reminded of my own hubris.
Wrapping It Up: It's About Patience
Archival storage isn’t a glamorous topic. It doesn't have the immediate payoff of creating new work or even framing a finished piece. But investing a little time and thought into how you store your collection is an act of profound respect—for the art, for the effort you put into making it, and for the future admirers who might one day get to see it. It's the quiet, humble work of stewardship. Start small if you need to. Protect one print properly. That single act will teach you more about the "why" than any article ever could. It's about borrowing an object from the future and making sure you have something intact to give back.
Think of it this way: a print in a drawer is just an object. But a print carefully preserved, stored with knowledge and intention, becomes a piece of history. It's a message in a bottle sent to your future self, or to someone you may never meet. You are giving the work the potential to outlive you, to have a life beyond your own. That’s the real goal. That's what makes a collector, and an artist, a true custodian of culture. It's not paranoia; it's legacy-building.
This isn't just about old masterpieces in a vault. It's about your vibrant abstract prints, your delicate watercolors, and the unique vision you're creating today. The techniques are the same whether you're preserving a 16th-century map or protecting a contemporary work of art you just brought home. This guide is about democratizing that knowledge, giving you the tools to extend the life of your collection by an order of magnitude.
There's a simple, quiet pleasure in knowing you've done it right. To know that the piece you're creating today, whether it's an abstract print destined for a museum or a simple drawing for your own joy, has a fighting chance to be seen decades from now, as vibrant and alive as the moment it left your hands. That's the final reward.
Your First 5 Steps: A Quick-Start Action Plan
- Buy a Hygrometer: For under $20, this little device gives you the single most important piece of data about your storage space: the relative humidity. Knowing your enemy is the first step to defeating it. Place it near your art and check it weekly.
- Choose One Print: Don't try to fix your entire collection at once. Pick one print you truly love. This is your test subject. The emotional connection is a powerful motivator.
- Get the Right Sleeve: Match that print with a correctly sized, acid-free, lignin-free, and ideally buffered polyester or polypropylene sleeve. Don't buy bulk yet; just buy one to see what quality feels like.
- Create a Safe Harbor: Find a spot that's consistently dark (the back of a closet is perfect, especially one on an interior wall where temperature and humidity won't swing as dramatically). Store your protected print there.
- Step Back, Observe, and Repeat: Check on your test print after a week, then a month. Is the environment stable? Is the sleeve protecting it? If this simple system works for one, you now have a template you can confidently scale to your entire collection. Success is found in small, deliberate acts.
And while you're starting, here's a simple table to keep in mind, a summary of the core principles we've covered. Print this out, stick it on your fridge, or keep it in your studio. It's the cheat sheet for a long-lived collection.
| The Enemy | Your Goal | Your Tools & Strategy | |---|---|---| | | Light (The Fader) | Total Darkness in Storage | UV-filtering glass for display, opaque, light-proof storage containers. | | Heat (The Accelerator) | Cool Consistency (around 65°F / 18°C) | Climate-controlled interior spaces, data loggers to monitor fluctuations. | | Humidity (The Shape-Shifter) | Stable RH (40-50%) | Hygrometer to monitor, avoid attics and basements, use HVAC/dehumidifiers. | | Pollutants (The Invisible Eaters) | A Clean, Inert Environment | Wear gloves, use acid-free lignin-free buffered materials, seal the backs of frames, beware of off-gassing from wood or paint. |
That's it. The beginning of a better relationship with your art. It's not about having a perfect, museum-grade vault on day one; it's about committing to a more thoughtful process for the things you care about. The rest is just details.