
Impasto Painting Guide: Master Texture, Tools & Expressive Art
Dive into my personal guide to impasto painting. Explore essential tools, diverse mediums, and creative techniques to sculpt raw emotion, craft rich tactile art, and master expressive texture for enduring pieces. From historical context to practical tips, unlock the magic and protect your textured art.
Sculpting Stories with Paint: My Deep Dive into Impasto Texture
You know that feeling, don't you? That irresistible urge to reach out and explore a surface, to run your fingers over something just to feel it? For me, that's the profound magic of texture, a silent language that speaks volumes. My studio still hasn't quite recovered from the glorious mess, but my art certainly has! And in my world of abstract art, nothing brings that tactile dimension to life quite like impasto painting. It's not just about applying color; it's about building miniature landscapes, sculpting raw emotions, and creating a surface that practically begs for a closer look, inviting your engagement. The paint itself seems to sigh, then breathe, transforming a flat canvas into a living, tactile entity. I remember the exact moment impasto shifted from being just a word in a textbook to a revelation in my own studio. I was struggling with a flat, muted piece, feeling like the emotion I wanted to convey was trapped behind a glass pane. Frustrated, I scooped a dollop of thick paint onto a palette knife, applied it with an almost primal force, and watched as the canvas seemed to sigh, then breathe. The paint leaped off, creating a tangible history of that moment. It was gloriously messy, utterly exhilarating, and it completely transformed my approach to abstract art. Before that, my work felt a little too contained, too polite; impasto ripped open the canvas and let chaos, beauty, and emotion spill out in a torrent. In this article, I want to walk you through my very personal journey with this incredible technique, sharing practical insights, hard-won lessons, and the deep connection I feel to creating art you can almost reach out and touch. Together, we'll dive into the 'what,' 'why,' and 'how' of creating art with a truly palpable presence, ensuring you leave with a clear roadmap to infuse your own work with this incredible tactile power and create truly lasting, expressive pieces.
What Exactly Is Impasto? (And Why It Captured My Heart)
Let's kick things off by really understanding what impasto is – beyond just a fancy art term. This section will explore its definition, historical significance, and why it became such a personal revelation for me.
The Definition: Paint That Demands Attention
At its core, impasto is a painting technique where paint is applied so thickly that it stands off the surface, retaining visible brushstrokes or palette knife marks. This isn't just a gentle rise; we're talking about a genuine three-dimensional effect. This is often what people envision as pure paint impasto, where the paint itself, unadulterated by significant mediums, creates the relief. But impasto can also encompass textural impasto, where mediums are intentionally mixed in to amplify the physical surface without necessarily requiring massive amounts of pure paint. This is distinct from subtle textural techniques like scumbling (a thin layer of opaque paint applied lightly over a dry layer to soften or modify a color) or glazing (thin, transparent layers used to deepen or alter underlying colors), where the emphasis is on optical blending rather than physical build-up. Impasto is about making the surface itself a protagonist, demanding attention.
By the way, the word 'impasto' itself comes from the Italian word for 'dough' or 'paste' – which, when you think about it, is just perfect, isn't it? It’s all about that thick, malleable quality. In essence, impasto can even be seen as a form of relief sculpture, where the paint itself becomes a physical, raised form, rather than merely an illusion on a flat surface.
It's typically achieved with naturally robust paints like traditional oils or modern heavy body acrylics. Their unique chemistry is what makes this magic happen: oils, with their viscous, buttery binders like linseed oil, hold sculptural forms as they slowly oxidize and cure. Acrylics, on the other hand, rely on robust polymer emulsions that create a flexible, stable film as they dry, preventing thick applications from collapsing. Both are formulated to retain those luscious peaks and valleys with remarkable integrity. The choice of pigments also plays a subtle but significant role; finely ground pigments can contribute to a smoother, denser impasto, while coarser pigments might yield a more granular, earthy texture. Imagine the swirling, almost topographical skies of a Van Gogh, or a decadently frosted cake – though I must warn you, my creations are significantly less edible, no matter how tempting they might look! Beyond just creating physical texture, impasto can also serve as a foundational layer, over which delicate glazes can be applied. This allows for an incredible interplay between the physical form of the impasto and the translucent luminosity of the glaze, adding further depth and complexity to the work.
The Enduring Power of History
Historically, impasto has been a potent tool for artists seeking to imbue their work with depth and drama. While oils and acrylics are my go-to, it's fascinating to note how ancient civilizations sometimes used thick applications of natural pigments mixed with binders like wax or plaster to achieve similar raised, tactile effects in murals and decorative arts, proving that the urge for textured surfaces is timeless. Think of Rembrandt, whose portraits gained an almost sculptural quality, his thick impasto building up the texture of skin and fabric to masterfully capture the play of light and shadow and convey the sitter's inner life, adding a psychological depth that flat paint couldn't achieve. Later, artists like Titian also embraced textural brushwork, using pronounced strokes to convey movement and emotion, making drapery seem to ripple and figures pulsate with life, almost breathing on the canvas. Beyond the Old Masters, think of the bold, deliberate strokes of Post-Impressionists like Paul Cézanne, whose landscape brushwork built up forms with visible, almost sculpted patches of color, or Paul Gauguin, who often used flatter but distinctly tactile applications to convey emotion. I remember seeing a particularly thick Rembrandt in person once, and it wasn't just a painting; it felt like a living document, a piece of time you could almost trace with your eyes, feeling the weight of history and emotion embedded in those layers. It was a visceral experience that truly solidified my understanding of impasto's power. Fast forward to the 20th century, and the Abstract Expressionists, like Willem de Kooning, pushed impasto even further, using it to convey raw emotion, dynamic energy, and a palpable sense of struggle or joy. Even contemporary artists like Anselm Kiefer employ thick, often gritty textures to create powerful, layered narratives.
While we're talking definitions, it's worth noting that while impasto is most famously associated with oils and heavy body acrylics, the concept of thick application can playfully extend to other mediums, though with different results. Think of plaster, clay, or even heavily applied gouache. However, for true, durable sculptural effects that retain their form, oils and heavy acrylics are definitely my go-to partners in crime. (For a deeper dive into the technical definition, if you're into that sort of thing, I actually wrote a whole other piece on what exactly impasto painting is.)
My Personal Revelation: The "Why"
But beyond the textbook definitions, for me, impasto became a deeply personal revelation. I've always been drawn to art that engages more than just the eyes. I want to feel a connection, to sense the artist's hand, to almost touch the story being told. Impasto does exactly that for me. It transforms a sterile, flat surface into something tactile, something almost sculptural. It adds a physical layer to the narrative, making you want to lean in, to explore, to feel the story not just intellectually, but physically. It's a secret language spoken through touch, and once I understood it, I was completely captivated. I remember that "flat, muted piece" I mentioned earlier, a landscape where I was trying to capture the quiet weight of a misty morning over the Dutch fields near my studio. It felt lifeless, the emotion of that serene, damp chill was trapped, until that thick dollop of paint landed, making the mist tangible, allowing the viewer to physically feel the damp chill.

This tactile language, for me, is the heart of why impasto isn't just a technique; it's a profound way to communicate. It's the moment a flat surface takes a breath and offers a physical connection to the artist's soul.
My Tools, My Co-Conspirators: Making Texture Happen
So, if impasto is about creating tangible presence, what implements help us achieve that? Once you understand the profound 'why' behind impasto, the next logical step is to explore the 'how' – and that meant diving deep into the tools that will help you bring this tactile vision to life. This section will dive into the essential (and wonderfully unconventional) tools I rely on to build captivating textures.
When it comes to building up those luscious peaks and seductive valleys of paint, the right tools are, well, not always what you'd expect. Yes, palette knives are certainly my absolute heroes for this adventure – they allow for broad, sweeping gestures, surprisingly sharp edges, and an incredible build-up of material. Different shapes, like the trowel-shaped knife for large, expressive swathes or the diamond-shaped for precise, almost surgical details, offer a vast spectrum of unique textural possibilities. And it's not just the shape; the edge itself matters. A smooth palette knife gives clean, flowing textures, while a serrated edge can create wonderful striations or drag marks, almost like raking a miniature garden. Then there are also specialized sculpting tools, usually for clay, that I've found can create incredible ridges, grooves, and divots when applied to thick paint – but be warned, cleaning them can be a nightmare if you let the acrylic dry! They feel less like tools and more like direct extensions of my hand, allowing me to sculpt paint with immediate feedback. And it's not just about the type of tool, but sometimes, honestly, the quality of it. A well-balanced palette knife, one that feels like an extension of your hand, can make a huge difference in control and the subtlety of your marks, versus a flimsy one that fights you every step of the way. It's truly an investment in your artistic conversation.
You might also wonder about traditional brushes. While perhaps not the first tool that comes to mind for thick application, stiff-bristled brushes, particularly hog-hair or synthetic equivalents, are surprisingly effective for impasto. By loading them heavily and using their sides, or by dabbing and pushing, you can create wonderful stippled textures or pronounced, energetic strokes that are distinctly different from what a knife would produce. It’s all about leveraging the tool's unique properties, rather than fighting them.
But honestly, my studio often looks like a recycling bin has exploded, full of everything from old credit cards to the blunt end of a paintbrush, even my own messy fingers. (Once, I even used a piece of dried-out pasta to get a very specific, brittle line – it worked, but then it broke, adding to the delightful chaos!) Why? Because sometimes, the most exciting and unexpected textures emerge when you surrender a bit of rigid control, creating marks that no 'proper' tool ever could. A credit card, for instance, can create incredibly sharp, clean lines or broad, smooth scrapes that a palette knife might struggle to replicate. And my fingers, while undeniably messy, offer the most direct, primal connection to the paint, allowing for organic, unpredictable marks that convey raw emotion – much like the delightful chaos of my studio itself, which has, on occasion, been affectionately dubbed my 'museum' in ’s-Hertogenbosch. I recall one time, desperately trying to get a particular jagged edge for a piece, I spontaneously grabbed a plastic ruler from my desk, and boom – the perfect sharp, broken line appeared. Another time, I needed a series of tiny, perfect bumps, and a discarded bottle cap did the trick, leaving a surprisingly regular pattern. It's about being open to the unexpected and letting unconventional approaches unlock new textural possibilities, often yielding textures that are more unique and personal than anything a standard tool might produce. And sometimes, let's be honest, it's just about using whatever is handy, because when inspiration strikes, you don't want to break the flow hunting for the 'right' thing.

And a quick thought about your canvas itself – the support you choose is a silent partner in this whole endeavor. A rigid support like a wooden panel will react differently to thick paint than a flexible stretched canvas. I often opt for sturdy, primed panels when I know I'm going for extreme texture, as they resist sagging and provide a stable foundation for the sculptural weight I'm about to apply. Ultimately, the right tool is the one that helps you translate your tactile vision onto the canvas. But even the most inspired tools are only as effective as the material they manipulate, which brings us to the very heart of impasto: the paint itself.
Oh, and a quick but crucial note about tool care: if you're working with acrylics, clean your tools immediately after use with warm water and soap. Seriously, dried acrylic on palette knives or brushes (especially if it soaks into porous wood handles) is nearly impossible to remove! For oils, mineral spirits or artist's brush cleaner followed by soap and water will do the trick. Don't let paint dry – it’s a battle you won't win easily! If you're curious about venturing beyond the brushstroke: my favorite tools and techniques for creating dynamic abstract textures, or truly mastering the palette knife: advanced techniques for abstract texture, I've got plenty more thoughts on those. So whether it's a classic palette knife or a repurposed credit card, remember that the right tool for impasto is often the one you're brave enough to experiment with.
The Paint Itself: More Than Just Color
Once we have our tools, the next crucial element is the paint itself – a dynamic material that, when chosen wisely and mixed thoughtfully, becomes a co-conspirator in our textural narratives. This section explores how to pick and modify your paints to achieve specific impasto effects.
But even the most masterful tools are only as good as the material they manipulate. And when it comes to impasto, the paint itself is a character in its own right – a crucial co-conspirator in the creation of texture. While oil paints are traditionally revered for their buttery texture and generous drying times, making them superb for blending thick layers, I primarily work with acrylics. Modern acrylics, especially heavy body varieties, offer incredible versatility. They hold their shape beautifully, dry much faster (a true blessing for an impatient soul like me!), and can be mixed with various impasto mediums – gels and pastes – to really bulk them up without sacrificing an ounce of vibrancy. Oh, and if you're like me and love acrylics but wish they'd stay wet just a little longer for blending, you might want to look into open acrylics. They're formulated with a slower drying time, giving you a generous window to manipulate those luscious textures without feeling rushed, allowing for more nuanced blending and building without the stress of premature tackiness. These mediums, essentially acrylic polymers, are cleverly designed to bulk up paint. They allow you to build incredible depth and retain sculpted form without losing structural integrity, and critically, without cracking as the layers dry and shrink. They maintain the paint's flexibility, making your sculptural additions durable over time. It's like turning your paint into a glorious, thick pudding, ready to be molded!
Different impasto mediums offer distinctly unique textural possibilities: a heavy gel might create smooth, voluminous peaks that catch the light like molten glass and often adds transparency, while a modeling paste, typically opaque, adds a dense, sculptural quality perfect for extreme thickness, giving the impression of carved stone or ancient rock. And then there are specialty gels: pumice gels, which provide a wonderfully gritty, sand-like texture that grounds the piece, or glass bead gels that add a subtle, shimmering reflectivity and an almost jewel-like sparkle. It’s all about finding that sweet spot where the paint, often thickened by these incredible additions, is robust enough to stand up dramatically, yet fluid enough to perfectly capture your gestures. This also ties into the concept of 'paint load' – how much paint you have on your tool at any given moment significantly impacts the thickness, texture, and character of the stroke, offering another layer of control (or delightful chaos!). Beyond just physical volume, pigment load – the concentration of actual pigment in the paint – plays a crucial role too. Paints with a high pigment load will retain their vibrant intensity even when heavily diluted with mediums, ensuring your thick textures don't lose their punch. Sometimes, if I'm feeling particularly adventurous, I’ll even mix in a little sand or marble dust for an extra gritty feel – a subtle nod to mixed media techniques, something I explore further in the definitive guide to mixed media in abstract art: techniques, materials, and contemporary masters. And yes, for true mixed media adventurers, thick impasto layers can even become the perfect embedding ground for small collage elements, transforming the surface into a tactile narrative. The interplay of materials and their impact on texture is a passion of mine, a journey I delve into more deeply in my guide on the definitive guide to texture in abstract art: a sensory exploration.

This mastery of material is what truly allows your artistic vision to take tangible form. With the right materials in hand, the next step is to explore the myriad ways we can actually apply them to the canvas.
My Go-To Techniques: The "How I Do It" Part
Now for the exhilarating part: bringing paint to surface. This is where the real fun begins, and honestly, it’s less about rigidly following a recipe and more about embracing intuition, play, and a healthy dose of happy accidents – very much aligned with my general philosophy for my creative flow: embracing intuition in abstract painting. Here's how I translate thick paint into expressive, tactile narratives:
- Direct Application & Layering: This is my absolute favorite, my direct conversation with the canvas. I simply scoop a generous dollop of paint onto my palette knife and lay it onto the canvas, pushing and pulling, letting the natural movement of my hand create expressive ridges, peaks, and valleys. The angle at which you hold your tool is crucial here; a shallow angle might drag paint for softer transitions, while a steeper angle can create sharper, more pronounced edges and taller peaks. The direction of these strokes can be incredibly powerful, too – a sweeping diagonal suggests movement and energy, while horizontal marks might evoke calm or horizon lines. Paint consistency is paramount here: a very thick, buttery mix (straight from the tube or with heavy body medium) allows for true sculptural freedom, holding its form beautifully for crisp peaks and defined edges. A slightly softer consistency, perhaps with a small amount of water or fluid medium, creates smoother, more organic undulations and spreads more easily, perfect for subtle transitions and flowing forms. Sometimes, I’ll let a layer dry just enough to be tacky – or even completely dry for oil paints, given their longer cure times – then add another, building up a visible history of strokes. This layering creates an archaeological narrative, revealing previous decisions, hidden colors, and the evolving story of the piece. It’s truly like sculpting with color, where the passage of time is embedded in the very surface.
- Stippling & Dabbing: For a different kind of texture – one that feels more deliberate, granular, or ethereal – I might use the tip of a brush or knife to repeatedly dab paint. This creates a textured field of dots or small mounds, forming a shimmering, almost pixelated surface. It works wonderfully for suggesting distant, hazy mountains in a landscape, creating the shimmering effects of light on water, or even hinting at a galaxy of tiny, luminous stars. It’s a patient way to build up a tactile landscape, one deliberate touch at a time.

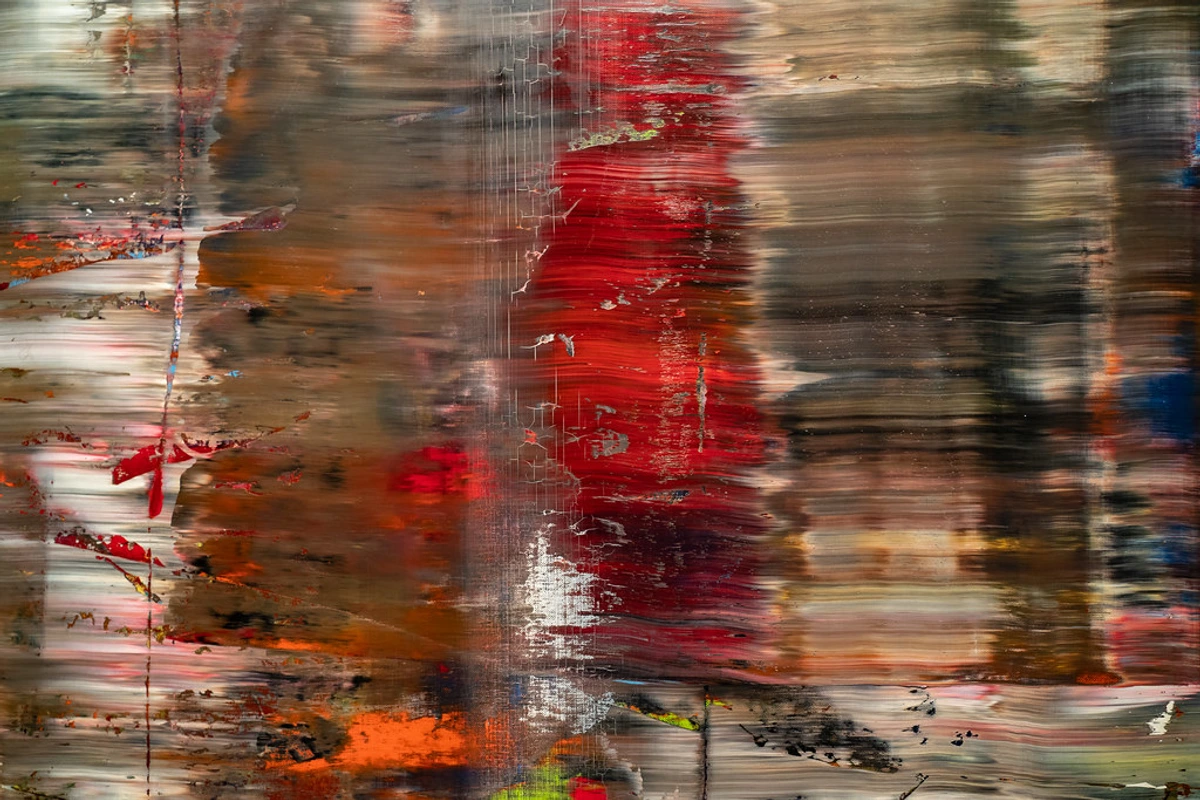
- Scraping Back (The Art of Subtraction): Don't be afraid to take paint off! Seriously, sometimes the most compelling textures emerge from subtraction. I'll apply a wonderfully thick layer, then use a stiff palette knife, an old credit card, a rubber shaper, a squeegee, or even specialized sculpting tools to scrape parts of it away. This process can reveal underlying colors, the pristine canvas itself, or create sharp linear breaks and distressed, weathered surfaces. It's also a fantastic way to create deliberate negative space or voids, sculpting an absence that frames the presence of the remaining texture, adding a powerful compositional dimension. It’s like unearthing something, allowing hidden narratives and forgotten colors to surface, adding a raw, archaeological feel to the finished work. This technique, for me, is a powerful embrace of the 'happy accident' and the inherent beauty of imperfection, a philosophy I explore more deeply in the power of imperfection: embracing accidents and evolution in my abstract art. Artists like Gerhard Richter, for instance, demonstrate a masterful command of this technique in his abstract works, creating incredible depth and history through layers of paint that are then deliberately scraped back, revealing glimpses of what lies beneath and adding complex narratives to the surface. Finding beauty in what's removed is a concept I deeply embrace, much like the power of imperfection in my work.
Each approach crafts a unique visual and tactile language, opening up a vast spectrum of expressive possibilities. It's all about endless experimentation, which is a topic I love diving into, particularly in my thoughts on exploring texture: my favorite techniques for adding depth to abstract paintings. Don't be afraid to mix and match these techniques, letting them interplay on your canvas to create truly complex and dynamic surfaces. Ultimately, these techniques are your vocabulary for speaking through texture, so don't be afraid to develop your own dialect and just start experimenting. Seriously, grab some paint and give it a try! These varied techniques allow you to truly sculpt your narrative, giving it a tangible presence that resonates with the viewer.
Beyond the Physical: The Emotion of Impasto
More than just a technique, impasto is a powerful language for emotion. This section delves into how these sculpted surfaces don't just sit on a canvas, but actively convey feeling, from raw intensity to serene contemplation, and even simulate the very essence of tangible sensations. So, once you've mastered the physical act of applying thick paint, what truly elevates impasto is its ability to speak to the soul.
This is truly where impasto shines for me – beyond aesthetics, into the realm of pure feeling. It's not just about how the paint looks; it's about how it feels, how it viscerally evokes emotion, or even simulates tangible sensations. Those thick ridges and sculpted peaks catch the light in ways a flat painting never could, creating dynamic shadows and highlights that shift and dance as you move around the piece, almost like the artwork is breathing with you. I recall a specific series where I used aggressive, sharp strokes and deeply layered reds to convey a raw, almost vibrating anger – an emotion that became physically palpable on the canvas, a visceral expression of fury. In another piece, I used chaotic, jagged textures, almost like broken shards, to express a deep sense of anxiety and fragmented thought – emotions that a flat surface simply couldn't capture with the same intensity. Or, perhaps, I might use sharp, erupting textures to capture the vibrant, jarring rhythm of a jazz improvisation, or long, undulating forms to express the flowing grace of a dancer. Impasto offers a unique way to translate these ephemeral experiences into solid, tangible forms. It can also infuse abstract forms with a profound sense of physicality and weight, grounding them or making them appear to press forward from the canvas with substantial presence, a powerful illusion in purely abstract compositions.

Conversely, in another piece, soft, undulating textures of blues and greens, built up with gentle dabs, evoked a profound sense of peace, almost a quiet contemplation you could physically feel. Sometimes, it's not the shout, but the whisper of texture that truly resonates – a delicate, almost ethereal impasto can convey vulnerability, quiet joy, or even gentle melancholy, inviting a viewer to lean in and discover the subtle narratives hidden within. Beyond abstract emotions, impasto can also brilliantly capture the roughness of tree bark, the cool ripple of water, or the intense heat of fire. And in abstract art, this physical build-up isn't just about literal texture; it can powerfully manipulate depth perception, creating an illusionistic space where certain elements appear to recede or leap forward, drawing the viewer deeper into the artwork's emotional landscape. For instance, a heavily textured, bright foreground element might feel like it's pushing into your space, while smoother, darker background forms recede, creating a dynamic push-and-pull. It can even simulate the smooth, cool feel of polished stone, the sharp, almost prickly sensation of broken glass, the yielding cushion of moss, or the inviting softness of velvet. By carefully manipulating paint density and application, impasto can mimic these natural textures with a surprising physical presence. It adds a raw, visceral quality, making the painting feel alive, almost as if a piece of the artist's own energy is embedded directly into the surface.

For abstract art, this is particularly powerful, as the texture itself can become a silent narrative – a scream, a sigh, or a gentle whisper, directly translating emotion into abstract art: my process of visual expression. This sensory exploration is precisely why I consider the role of texture in abstract art: a sensory exploration so incredibly important. It’s not just paint; it’s a palpable presence, a whisper in the physical realm, echoing the deepest whispers of the soul, inviting you to connect on a deeper, more profound level. In essence, impasto lets the art feel as much as it looks, creating an immersive experience for the viewer.
A Few Little Warnings (Because I've Made the Mistakes So You Don't Have To)
So, while the allure of impasto is undeniable, and the expressive possibilities are endless and exhilarating, it's also wise to be aware of some of the practical considerations and potential pitfalls that come with working with such a dynamic, material-heavy medium. Before you dive headfirst into a mountain of paint, let's talk about a few things I've learned the hard way (so you don't have to!). The thrill of creation is undeniable, but trust me, a little foresight can save you a lot of frustration down the line.
Here are a few things I've learned the hard way, so you don't have to:
- Paint Consumption: Oh, you're going to use a lot of paint. Like, significantly more than you might be used to with flatter techniques. Your palette knife won't just be a hungry beast; it'll be a ravenous monster, devouring tubes at an alarming rate. Budget accordingly, or start hoarding those tubes now! (I'm only half-joking, really.)
- Drying Time: If you're using oils, be prepared to wait. Seriously, I mean wait. Thick layers can take weeks, even months, to fully cure. Acrylics are thankfully much faster, but even they need adequate time to dry completely between layers if you're building up serious depth. Patience, my friend, is a virtue here.
- Cracking: Sometimes, if layers dry unevenly, or if you apply paint too thickly without an appropriate medium, you might get some cracking. This happens because the outer layer dries and shrinks faster than the inner, still-wet paint, creating tension the paint can't always withstand. For oil painting, this is famously addressed by the "fat over lean" principle: each subsequent layer should contain more oil ("fatter") than the one beneath it, ensuring consistent drying and flexibility. For acrylics, while 'fat over lean' isn't directly applicable chemically, the principle of consistent drying and flexibility holds; using appropriate mediums and allowing layers to dry thoroughly prevents shrinkage stress and cracking. Sometimes, a little hairline cracking can be part of the charm, adding to an aged, distressed look, but if you want to avoid it, use proper mediums and allow layers to dry thoroughly.
- Surface Preparation: While impasto paint layers are robust, they still need a good foundation. Always ensure your canvas or board is properly primed with gesso. A well-prepared surface ensures better adhesion and prevents the thick paint from potentially flaking or detaching over time, especially with very heavy applications. Trust me, don’t skimp on this foundational step; it's the quiet hero of longevity for your artwork!
- The Weight Factor: This is often overlooked! The sheer volume of paint can add significant weight to a canvas, especially for larger pieces. This is a crucial consideration if you're planning to hang a substantial impasto artwork – always make sure your wall mounts and hanging hardware are robustly up to the task!
- Scale Considerations: What works for a small study might not translate directly to a monumental canvas. For larger impasto pieces, consider using a much firmer support, such as cradled wooden panels, rigid MDF boards, or even heavy-duty gallery-wrapped canvases with extra bracing, like solid cross-braces or robust French cleat systems, rather than standard stretched canvas which can sag significantly under the sheer weight due to the flexibility of the fabric and lack of internal support for the heavy paint. And for these monumental works, diligence with layer drying times and (for oils) 'fat over lean' principles becomes even more critical to prevent structural issues down the line.
- The Durability Factor: Once fully cured, a well-executed impasto painting is surprisingly robust. Those thick layers, if properly applied with suitable paints and mediums, are not inherently fragile. They’re built to last, often outliving flatter paint applications due to their structural integrity. Just treat them with the same care you would any artwork – avoid sharp impacts and extreme temperature fluctuations.
- Dust Attraction: Those wonderful peaks and valleys, as much as we love them, can be magnets for dust! A gentle, regular dusting with a very soft, clean brush or a microfibre cloth is usually enough. Choosing a semi-gloss or gloss varnish can also create a smoother, less 'sticky' surface for dust, though a matte finish is often preferred to emphasize the raw texture. And yes, a final spray varnish (matte or satin, depending on your desired finish) can also offer a smoother surface, making dusting a little easier, though be mindful it might slightly soften the perceived texture. It's a small price to pay for such a tactile surface, but worth being mindful of.
- Protection from Physical Damage: Beyond dust, impasto paintings benefit from careful handling. Avoid any direct pressure or sharp impacts, especially on raised areas, as this can cause chipping or cracking over time. When transporting, use appropriate packing materials that provide space around the textured surface, preventing anything from pressing directly against the paint. Extreme temperature fluctuations should also be avoided, as they can stress the paint layers and lead to damage. Think of it as caring for a delicate sculpture – it’s robust, but not invincible!
These aren't rules to stifle creativity, but insights to help you navigate the glorious, messy world of impasto with confidence and foresight. Ultimately, knowing these potential challenges upfront allows you to focus on the joy of creating.
FAQs About Impasto Painting: Your Questions, Answered (Often Over Coffee)
It’s natural to have questions when diving into something as wonderfully tactile as impasto. Here are some of the most common queries I receive, hoping to demystify any lingering doubts and share a few more nuggets of hard-won wisdom.
Here are some of the burning questions I get asked about impasto, along with my candid answers:
- Q: What kind of paint is best for impasto? A: Heavy body acrylics or oil paints are generally ideal due to their naturally thick consistency. Acrylics offer faster drying for impatient souls, while oils provide longer working times for blending. You can also mix fluid acrylics with dedicated impasto mediums (gels, pastes) to achieve the desired bulk.
- Q: How do I make my impasto dry faster? A: For oils, accelerating drying significantly without compromising quality is tough; good air circulation and specific quick-drying mediums can help, but patience is your best friend. For acrylics, ensure good air circulation; thinner layers will always dry quicker. Avoid direct heat, as it can cause uneven drying and potential cracking.
- Q: Will my impasto painting crack over time? A: With proper technique – using suitable paints and mediums and allowing layers to dry thoroughly – cracking is largely minimized. Minor, hairline cracking can occur with extreme thickness or rapid temperature changes, but it's often negligible or adds a unique, aged character, rarely compromising structural integrity.
- Q: Is impasto suitable for beginners? A: Absolutely! I actually think it's one of the most forgiving and liberating techniques for newcomers. It’s a wonderful way to explore expression without getting caught up in precise details. Just grab some thick paint and a palette knife and go! Experiment and discover what resonates with your personal style – there's no "wrong" way to start.
- Q: Do impasto paintings weigh a lot? A: Yes, quite a bit! The sheer volume of paint can add significant weight, especially for larger pieces. Plan your wall mounts and hanging hardware accordingly to ensure they are robustly up to the task!
- Q: How do I varnish an impasto painting? A: A spray varnish is usually best for an even coat without pooling, and it helps preserve subtle textures. If brushing, use a very soft brush and apply carefully, avoiding varnish collection in valleys. Always apply multiple thin coats rather than one thick one. Crucially, test the varnish on an inconspicuous area or a scrap piece of impasto application first to see how it affects the texture and sheen. Be mindful that heavy application can sometimes subtly soften or fill in the very fine details of your impasto, slightly reducing its tactile nuance. Also, consider that a matte varnish can help preserve the tactile quality, as a high gloss might flatten the perceived texture under certain lighting. Opt for archival spray varnishes designed for fine art to ensure longevity.
- Q: How can I achieve different finishes or sheens with impasto? A: The finish depends on your paint, mediums, and final varnish. The type of paint you choose (oils often have a natural luster, heavy body acrylics tend to be more satin to matte) also inherently contributes to the initial sheen before any varnish is applied. You can mix matte or gloss mediums into your paint, or use a final spray varnish for a specific effect (matte, satin, high-gloss). The application method itself influences light reflection, subtly altering perceived sheen. Thicker applications might absorb varnish differently, so testing is always a good idea!
- Q: How do I clean impasto tools? A: For acrylics, clean your tools immediately after use with warm water and soap. Seriously, dried acrylic on palette knives or brushes (especially if it soaks into porous wood handles, it's nearly impossible to remove!) is nearly impossible to remove! For oils, use mineral spirits or artist's brush cleaner, then soap and water. Don't let paint dry – it’s a battle you won't win easily!
- Q: How do I protect an impasto painting from physical damage? A: Handle impasto works with care, avoiding direct pressure or sharp impacts, especially on the raised textural elements, which can chip or crack. When moving or storing, use protective packaging that prevents anything from pressing against the surface. Also, try to avoid extreme temperature fluctuations, as these can stress the paint layers over time. Think of it as a robust sculpture that still deserves gentle treatment!
Hopefully, these answers clear up a few things and encourage you to dive deeper into the world of impasto with confidence!
My Final Thoughts: Just Start, Seriously.
If there’s one singular message I want you to take away from our chat today, it’s this: don’t be intimidated. Seriously. Impasto isn't about achieving some sterile, unattainable perfection; it’s about unbridled expression, about giving your art a voice that physically reaches out and truly grabs the viewer. It's a journey, an evolving conversation between you, your chosen tools, and the canvas before you. It’s about embracing the tactile, the spontaneous, and the beautifully imperfect marks that make a piece truly unique and enduring. When properly executed with quality materials, impasto works are surprisingly robust and can stand the test of time, carrying your narrative far into the future. I’m always exploring new ways to push boundaries in my own work, whether through a novel technique or simply a fresh perspective on a familiar one, continually experimenting with new mediums and unconventional tools to discover fresh textural languages, much like the broader evolution of my artistic journey. And if you're ever looking for a piece of art that truly speaks with its texture, you know where to find my latest creations. For further inspiration, I encourage you to seek out the impasto works of artists like Vincent van Gogh, Frank Auerbach, or Joan Mitchell – each used texture to define their unique voice. But above all, just remember to have fun with it. Art, at its core, should always be fun. It’s your canvas, your paint, your story – go make it wonderfully, messily yours, and let its texture whisper your truth for years to come. Just remember, sometimes the best masterpieces are born on days when you thought you were just cleaning your palette knife. Trust me, the joy of creating something you can feel is an unparalleled reward.


