
# A Beginner's Guide to Monotype Printmaking: Unleash Your Inner Spontaneity
Ever wanted to dive into printmaking but felt intimidated? Join me as I explore monotype, the most freeing and expressive printmaking technique perfect for beginners. Discover the magic of one-of-a-kind art.
A Beginner's Guide to Monotype Printmaking: Unleash Your Inner Spontaneity
I've always been drawn to the tactile nature of art, the way materials feel in your hands, the unexpected results. And let's be honest, sometimes the idea of starting a new art form can feel a little daunting, right? All those rules, all that precision... But what if I told you there's a world of printmaking that thrives on spontaneity, where every single print is a unique masterpiece, and mistakes are often celebrated as happy accidents? That, my friend, is the glorious realm of monotype printmaking.
This isn't your grandad's meticulous woodblock carving, nor is it the precise world of etching (though I admire both!). Monotype is, in essence, painting or drawing directly onto a smooth surface, then transferring that image to paper. The thrill? You get one shot, one pull, one incredibly personal print. For me, that's where the magic truly lies – in the immediacy, the surprise, and the absolute freedom to just create. It's why I think it's one of the best ways for a beginner to dip their toes into printmaking without needing a huge investment or years of technical training. It's truly a gateway to expressing that intuitive, abstract side of yourself, much like how I approach my own work.
What Exactly is Monotype Printmaking? My "One-Off" Discovery
When I first stumbled upon monotype, I was immediately intrigued by the idea of a "one-off" print. Unlike other printmaking techniques like linocut printing or screen printing, where you create a matrix (a block, a screen, a plate) that can be used to make multiple identical or very similar prints, a monotype yields just one, singular image. Hence the name, from the Greek "mono" (single) and "typos" (impression).
Imagine this: you're not carving into anything that will last forever, nor are you setting up a stencil for endless repetitions. Instead, you're painting with ink onto a non-absorbent surface, often called a plate (which can be anything from glass to plexiglass, or even a smooth piece of cardboard). Once your image is laid down, you press a piece of paper onto it, either by hand or using a press, and voila! The ink transfers, and you have your monotype. The plate is usually wiped clean (or mostly clean) afterwards, making the next print entirely different.
It's this ephemeral quality that makes monotype so special, and dare I say, so perfect for those of us who appreciate the beauty of the unique and the unrepeatable. It's a bit like a performance art piece, but for your wall.
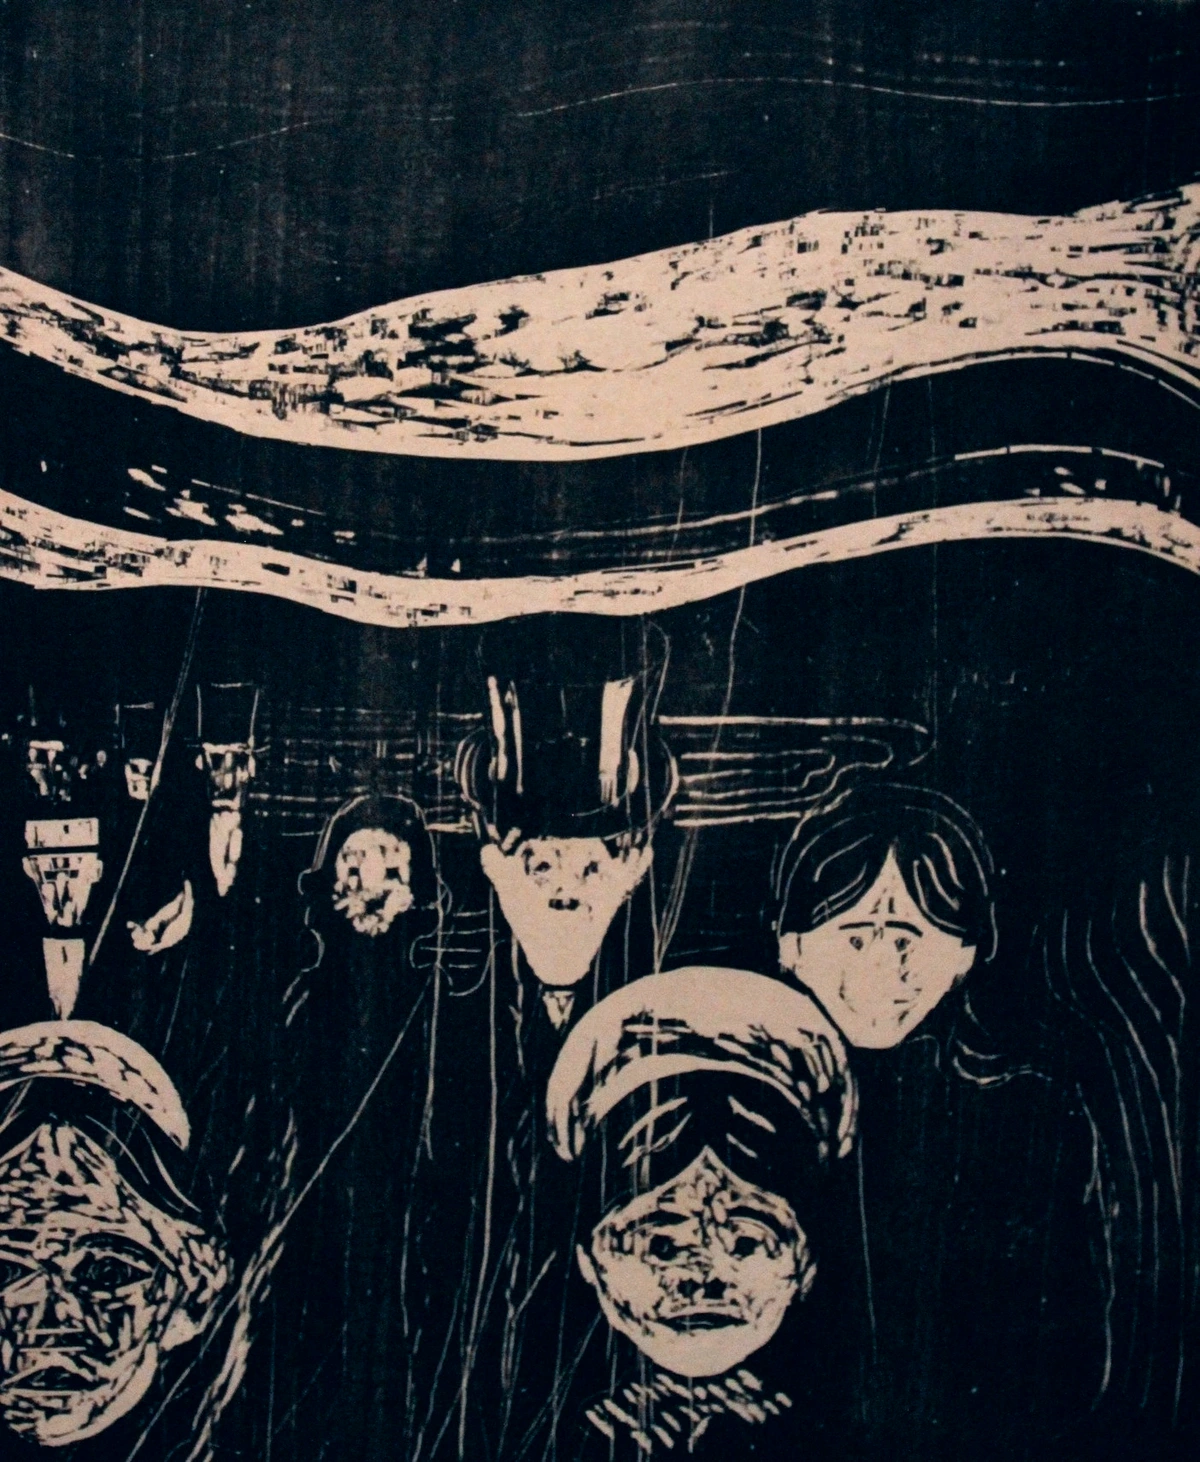
https://upload.wikimedia.org/wikipedia/commons/2/24/Edvard_Munch.Angst%281896%29_%E2%80%94_Woodcut_%2825075069075%29.jpg, https://creativecommons.org/licenses/by-sa/2.0
Monotype vs. Monoprint: A Tiny Distinction That Matters (to me, anyway)
Okay, so here's a little nuance that sometimes confuses people, myself included, when I was first starting. While often used interchangeably, there's a subtle but important difference between a monotype and a monoprint. Think of it this way:
A monotype is where the entire image is created on the plate without any permanent marks or repeatable elements. Each time you put ink on the plate, you're essentially painting a new picture from scratch. It's truly a single, unique impression.
A monoprint, on the other hand, involves some consistent, repeatable element, but each print is still unique due to variations in inking, pressure, or added elements. For example, you might use an etched plate as a base, but then apply ink in different colors or wipe it in different ways for each print, making each final piece distinct, even though the core line work is consistent.
For a beginner, I wouldn't get too hung up on this distinction right away. Just know that when we're talking about monotype, we're talking about pure, unadulterated uniqueness. But for those who like to know the nitty-gritty (and I know you're out there!), here's a little table to help clarify:
Feature | Monotype | Monoprint |
|---|---|---|
| Repeatability | Absolutely unique; plate is cleaned for each impression. | Some repeatable elements (e.g., etched lines) are consistent, but overall print is unique. |
| Plate | No permanent image on the plate. | Plate has a permanent image or texture. |
| Process | Drawing/painting directly on a smooth, non-absorbent surface. | Drawing/painting on or around a pre-existing matrix. |
| Result | A truly one-of-a-kind image. | A series of related, but distinct, variations. |
| Spontaneity | High | High (within the framework of the repeatable element) |
The Magic Ingredients: What You'll Need to Start Your Monotype Journey
One of the things I love about monotype is that you don't need a fancy studio or a massive budget to get started. I remember just grabbing a piece of old plexiglass and some oil paint for my first attempt – it was wonderfully low-stakes. Here's what I've found useful, and remember, you can always start simple and expand as you get more hooked (which you will!):
1. Your Printing Surface (The "Plate"):
- Plexiglass or Acrylic Sheets: This is my go-to. They're smooth, easy to clean, and affordable. You can get them at hardware stores or art supply shops. Glass works too, but be careful!
- Metal Plates (Zinc, Copper): A bit more professional, but still great.
- Smooth Cardboard: If you're really on a budget or just experimenting, a piece of smoothly coated cardboard (like from a cereal box, shiny side up) can work surprisingly well for a few prints. Just make sure it's not too absorbent.
- Gelli Plate: These soft, gel-like plates are fantastic for beginners, especially with water-based inks. They're very forgiving and offer a unique texture.
2. Inks:
- Oil-based Printmaking Inks: These are fantastic for rich, vibrant colors and longer working times. They clean up with mineral spirits or vegetable oil. They're often preferred by artists for their quality.
- Water-based Printmaking Inks: Easier cleanup (just water!), less odor, and faster drying times. Great for beginners, though they might dry quicker on the plate.
- Oil Paints (Artist Grade): Yes, you can even use good quality oil paints! Just mix them with a tiny bit of linseed oil or a printing medium to make them tackier and more suitable for printing.
3. Paper:
- Printmaking Paper: This is specifically designed for printmaking. It's usually softer, more absorbent, and often has a subtle texture. Brands like BFK Rives or Somerset are popular.
- Drawing Paper: A good quality drawing paper with a bit of tooth can work. I look for something around 80-100lb (160-200 gsm).
- Watercolor Paper: Again, a good quality, heavier watercolor paper can be fantastic, especially if you slightly dampen it beforehand (more on that later!). The key is paper that can absorb ink well and withstand a bit of pressure.
4. Tools for Applying and Manipulating Ink:
- Brayer (Roller): Essential for applying a thin, even layer of ink to your plate. Rubber brayers are common, but soft rubber or gelatin brayers are excellent for finer control.
- Brushes: Various sizes and types for painting directly onto the plate.
- Rags or Wipes: For subtractive techniques (wiping ink away) and cleanup.
- Q-tips, Cotton Swabs, Fingers: Any soft implement to remove or smudge ink.
- Stencils or Found Objects: Leaves, lace, textures – anything that can create an impression!
5. For Transferring the Image:
- Press (Etching or Relief Press): If you're getting serious, a press provides consistent, even pressure for the best transfer. However, it's a big investment.
- Hand Burnishing Tools: For printing without a press. A wooden spoon, a baren (a traditional Japanese burnishing tool), or even the back of a smooth, rounded rock can work beautifully. Your hands (with firm, even pressure) are also great!
Getting Your Hands Dirty: A Step-by-Step Monotype Process (My Go-To Method)
Alright, let's get to the fun part! This is how I usually approach a monotype. Remember, there's no single "right" way; experimentation is truly the heart of this process. It often reminds me of the intuitive painting process – you start, you react, and you let the piece guide you.
1. Prepare Your Plate and Workspace
First things first, gather your materials. I always lay down some newspaper or an old sheet to protect my surface (ink gets everywhere, trust me!). Clean your plate thoroughly with a bit of rubbing alcohol or soap and water to ensure there's no dust or grease. Have your paper ready – sometimes I'll slightly dampen my paper with a spray bottle and blot it with a towel; this can help with ink absorption, especially for oil-based inks and heavier papers.
2. Ink Up!
Now for the ink. Squeeze a small amount of ink onto a clean, flat surface (another piece of plexiglass or glass works well, or even a ceramic tile). Use your brayer to roll out the ink, making sure it's evenly distributed on the brayer and making a soft, sticky sound – that's the perfect tack! Then, roll a thin, even layer of ink onto your printing plate. I often aim for a relatively even, medium tone across the whole plate as my starting point. It's like preparing a canvas, but with ink.
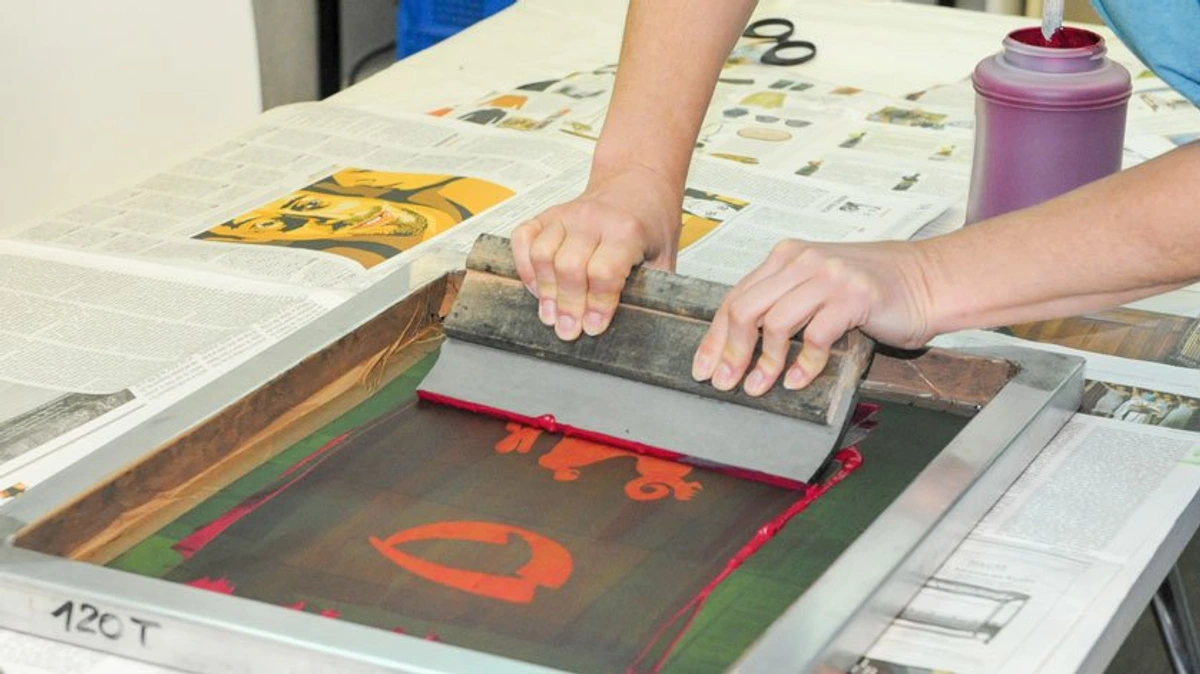
https://www.creativebloq.com/features/a-creatives-guide-to-different-types-of-printing, https://creativecommons.org/licenses/by-sa/3.0/de/
3. Create Your Image
This is where your artistic vision comes to life! You can use various techniques here:
Additive Method (Light Field): You're essentially drawing or painting onto the inked surface. Use brushes, sponges, or even your fingers to apply more ink, building up your image.
Subtractive Method (Dark Field): This is where you remove ink from the plate to create your image. Use rags, cotton swabs, Q-tips, or even your fingernail to wipe away ink, revealing the lighter areas of your composition. I often combine both, wiping away some areas to create highlights, then adding a few brushstrokes for darker details. This directness in mark-making is one of the reasons I find monotype so compelling – it really allows for that immediate, uninhibited expression often seen in abstract art. You can also press textures into the ink, lay down stencils, or place leaves or other flat objects onto the ink (then remove them) to create interesting patterns.
4. Position Your Paper
Carefully place your chosen paper onto the inked plate. I like to drop it from one side, letting it fall gently to avoid air bubbles. Once it's down, try not to move it!
5. Transfer the Image
Now for the reveal!
If you're using a press, carefully slide your plate and paper through. The consistent pressure will ensure a beautiful transfer.
If you're hand burnishing, this is where your muscle comes in. Place a clean sheet of paper or newsprint over your printing paper to protect it, then use a wooden spoon, baren, or your hands to firmly and evenly rub the back of the paper. Pay attention to all areas, making sure you apply consistent pressure across the entire surface. You'll literally be "drawing" the ink onto the paper from the back. I always hold my breath a little here!
6. The Reveal!
Carefully peel back your paper from the plate. This moment is always a surprise – sometimes it's exactly what I imagined, sometimes it's something entirely new and even better! The magic of the monotype lies in this reveal, the unique texture, and the nuanced tones that only this process can create. Lay your print flat to dry. And that's it! You've just created a one-of-a-kind piece of art. It's a truly exhilarating feeling, similar to when I see a vibrant new abstract painting come to life in my studio.
Techniques to Play With (Because Rules Are Just Suggestions, Right?)
Once you've got the basic process down, the real fun begins: experimentation! I mean, who doesn't love bending the rules a little? Or, in this case, exploring all the delicious possibilities that monotype offers. Here are a few techniques I love playing with:
Additive and Subtractive: The Yin and Yang of Monotype
As I mentioned, these are your foundational methods. Additive is painting on the ink, building up form and density. Subtractive is wiping away the ink, creating highlights and negative space. I find the most engaging monotypes often combine both. Think of it like drawing with light and shadow, but with ink.
Textural Tools and Found Objects
This is where you can really let your inner scavenger shine. Don't limit yourself to brushes! Try:
- Rags and crumpled paper: For organic textures.
- Q-tips or cotton swabs: For fine details or smudging.
- Fingers and palms: For bold, expressive marks.
- Stencils: Cut out shapes to create crisp edges.
- Leaves, lace, fabric, netting: Press these into the wet ink, remove them, and see the unique patterns they leave behind. This can create incredible depth and unexpected designs, much like the unexpected textures you might find in mixed media abstract art.
Ghost Prints
Don't toss that plate after your first pull! Often, there's still a residual layer of ink left on the plate, a faint echo of your original image. This is called a ghost print (or cognate). You can take a second, lighter impression from this ghost. It will be softer, more subtle, and often beautifully ethereal. Sometimes, I even use the ghost as a new starting point, adding fresh ink and marks on top of it for a layered effect. It's like getting a bonus print, and who doesn't love a bonus?
Multiple Colors
This might sound obvious, but don't just stick to one color! You can apply different colors of ink to different areas of your plate using separate brayers or brushes. Just be mindful of how they'll blend when pressed. The beauty of monotype is that you're painting with layers that will merge into a single impression.
Why Monotype? The Joys of Imperfection and Spontaneity
For me, monotype isn't just a printmaking technique; it's a philosophy of art-making that deeply resonates with my own approach to abstract creation. Here's why I'm such a big fan, and why I think you might be too:
Embrace the Happy Accident
One of the greatest freedoms of monotype is letting go of perfection. Because each print is unique, there's no pressure to get it "right" in a repeatable way. That smudge, that unexpected blend of colors, that slightly uneven press – these aren't mistakes; they're unique characteristics that give your monotype its soul. I've had so many moments where an "oops" turned into the most captivating part of a piece. It's a wonderful lesson in embracing the flow and unpredictability of the creative process.
Freedom from Replication
In a world obsessed with mass production, monotype stands out as an ode to individuality. You're not trying to make fifty identical copies; you're creating a singular statement. This liberates you from the technical constraints of other printmaking methods and allows for a more direct, painterly approach. It's about the journey of that particular print, not a series.
Directness and Immediacy
Unlike some other printmaking methods that involve complex stages (carving, acid baths, multiple layers), monotype is wonderfully direct. You apply ink, you make marks, you print. The feedback loop is almost instantaneous. This immediacy makes it incredibly satisfying and allows for a very raw, emotional, and intuitive form of expression. It's like a fast sketch, but with the depth and richness of a finished painting.
Developing Your Artistic Voice
For beginners, monotype is an incredible tool for developing your own unique artistic voice. It encourages experimentation, quick decision-making, and a playful approach to materials. It helps you understand how ink behaves, how colors blend, and how pressure affects an image. These are transferable skills that will enhance any other art form you choose to explore, from drawing to painting. It truly helps you become more spontaneous and fearless in your art.
Common Pitfalls and How I (Sometimes) Avoid Them
Like any art form, monotype has its quirks, and I've certainly run into my share of head-scratching moments. But hey, that's how we learn, right? Here are a few common issues and my two cents on tackling them:
Too Much or Too Little Ink
This is probably the most frequent issue I encounter.
- Too much ink: Your print might come out blobby, undefined, or smudge easily. It also makes cleanup a pain. My fix: Roll your brayer more on your inking surface before transferring to the plate, ensuring a very thin, even layer. You want enough to coat the plate but not so much that it's pooling.
- Too little ink: Your print will look faint, patchy, and lack vibrancy. My fix: Go back and roll a bit more ink on your brayer and apply another thin layer. It’s better to build up in thin layers than to start with a glob.
Paper Problems
Choosing the right paper really does make a difference. If your paper is too smooth or non-absorbent, the ink might not transfer well. If it's too rough, you'll get a very broken image.
My fix: For oil-based inks, I often slightly dampen my paper (especially heavier papers) with a fine mist of water, then blot it between towels until it's just damp, not wet. This helps the paper "grab" the ink. For water-based inks, a dry, slightly absorbent paper usually works best.
Uneven Pressure in Hand Burnishing
Ah, the bane of the press-less printmaker! If you don't apply even pressure, parts of your image will be crisp while others are faint or missing.
My fix: Use a smooth, rounded object like a wooden spoon or baren, and work methodically. I often draw a grid on the back of my protective paper (the one on top of the printing paper) to ensure I cover every square inch with firm, consistent rubbing. Lean into it!
Ink Drying Too Fast
This is particularly an issue with water-based inks or in dry, warm environments. If the ink dries on the plate before you print, it won't transfer.
My fix: Work quickly! Have all your tools and paper ready. If it's still an issue, you can add a tiny bit of glycerin or a retarder (for water-based inks) or a slow-drying medium (for oil-based inks) to your ink to extend its open time. Or, if you're really committed, try working in a cooler, more humid room.
My Favorite Monotype Artists (And Why You Should Check Them Out)
While monotype might feel like a niche, it's been embraced by some truly incredible artists throughout history and into the present day. It's often used by painters as a way to explore ideas quickly, or to create unique studies that stand alone as works of art.
For instance, I'm always drawn to the raw energy and expressive quality that artists can achieve through direct mark-making, which monotype facilitates so beautifully. Think of the intuitive lines of Joan Mitchell or the bold strokes of Willem de Kooning – while not strictly monotypists, their approach to spontaneity and gestural application finds a wonderful parallel in monotype. Historically, artists like Edgar Degas used monotypes extensively, often coloring them with pastels afterwards, showing how it can be a stepping stone or a mixed-media technique. Even someone like Katsushika Hokusai, famous for his woodblock prints, understood the power of a unique, hand-drawn impression in his preparatory sketches.
Monotype is a brilliant way to bridge the gap between drawing, painting, and printmaking, allowing for that pure, unmediated artistic expression. It's why I see it as such a valuable tool for anyone interested in exploring their abstract sensibilities or just wanting to play with materials in a less rigid way.
Frequently Asked Questions About Monotype Printmaking
Got more questions? I hear you! Here are a few I often get asked:
What kind of ink should I use for monotype?
For beginners, I usually recommend water-based printmaking inks because they're easy to clean up with just water and have less odor. However, oil-based printmaking inks offer richer colors and a longer working time, giving you more flexibility to manipulate the image on the plate. Good quality artist's oil paints can also work if mixed with a small amount of linseed oil or a printing medium.
Can I use a regular kitchen roller instead of a brayer?
While a kitchen roller might work in a pinch for very simple, large areas, it's not ideal. Kitchen rollers are designed for smooth surfaces like dough and don't typically pick up and distribute ink as evenly or thinly as a rubber brayer. A brayer has a specific tack and density that helps create that perfect, even layer of ink for printing. I'd definitely invest in an inexpensive rubber brayer if you're serious about trying monotype.
Is monotype printmaking messy?
Oh, absolutely! And that's part of the fun! You're working with ink, so expect to get a little messy. That's why I always recommend setting up a dedicated workspace, laying down newspaper, and having rags or paper towels handy. It's a hands-on process, and a little ink on your fingers just means you're really making art!
How do I clean up after monotype printing?
If you're using water-based inks, cleanup is a breeze! Just use soap and water for your plate, brayers, and brushes. For oil-based inks, you'll need mineral spirits or a citrus-based solvent. I personally prefer vegetable oil for preliminary cleaning, followed by soap and water; it's less harsh and often just as effective for removing most of the ink. Always wipe tools clean before washing them.
Do I need a press to make monotypes?
No, absolutely not! While a press will give you the most consistent and often crisp results, hand burnishing is a perfectly valid and widely used method. A wooden spoon, a baren, or even firm hand pressure can achieve beautiful prints. I encourage you to start without a press to truly understand the pressure needed and the subtle variations you can achieve by hand. It really connects you to the physical act of making.
Can I combine monotype with other art forms?
Yes, totally! Monotype is incredibly versatile. You can print monotypes onto previously painted or drawn surfaces, or add details with pastels, watercolors, or colored pencils onto your finished monotypes. This approach allows for wonderfully rich mixed media pieces. It's a great way to layer different artistic languages.
Ready to Make Your Mark? (A Final Nudge)
If you've read this far, I bet a little spark has ignited, hasn't it? The thought of pulling that first unique print, of seeing your spontaneous marks transform onto paper... it's a feeling unlike any other. Monotype printmaking is a wonderfully accessible and profoundly rewarding art form, especially for those of us who appreciate the immediate, the expressive, and the perfectly imperfect. It's a chance to just play, without the pressure of replication, and to truly connect with your inner creative self.
So, grab some ink, a smooth surface, and a piece of paper. Dive in! Embrace the mess, celebrate the unexpected, and let your unique artistic voice shine through. Who knows, you might just uncover a whole new world of creative joy. And when you're done, remember there's always more art to explore, both making your own and discovering pieces that speak to you, perhaps even something vibrant and unique from my own collection at /buy!


