An Artist's Intimate Guide: Oil Painting Preservation & Care
Unlock the secrets of oil painting preservation. This artist's intimate guide shares personal insights on careful cleaning, environmental protection, framing, and knowing when to call experts to safeguard your cherished art for generations.
An Artist's Intimate Guide: Preserving Oil Paintings with Care & Wisdom
There's a quiet magic to oil paintings, isn't there? They hold whispers of history, a tangible connection to the artist's hand, whether that hand last touched it centuries ago or just yesterday. When I look at an old oil painting, it’s not just an image; it’s a feeling, a story untold. And then, almost immediately, a tiny, anxious voice in my head pipes up, "How do you keep this magic alive? What if I ruin it?!"
It's a common fear, and one I share. We cherish our art – a family heirloom, a flea market gem, or a vibrant new piece from an artist whose work truly speaks to us (and yes, sometimes, that artist is me, and you might find some pieces for sale right here). The thought of cleaning and maintaining something so precious can feel daunting. I’ve certainly had my moments of paralysis, staring at a slightly dulling surface and wondering if a gentle wipe would be an act of love or an act of artistic blasphemy.
But we are temporary guardians of these beautiful creations. This guide isn't a dry manual; it's about finding a sensible, gentle approach to their care. In this journey, much like my own artistic timeline which is always evolving and learning, we’ll explore both preventative measures and cautious cleaning methods, ensuring your oil paintings look their best without inadvertently scrubbing off an entire sky. From simple dusting to understanding environmental impacts, proper framing, and knowing when to call in the experts, let's keep that magic alive, shall we?
Why Even Bother? The Soul, the Story, and the Artist's Intent
Think about it: an oil painting isn't just paint on canvas; it's a moment frozen in time, a tangible piece of someone's imagination and skill. It's a conversation across generations. As art enthusiasts, we often discuss the history of oil painting from ancient pigments to modern masterpieces and how these works have endured. Our job, as current custodians, is to ensure that conversation continues and, crucially, to honor the artist's original intent. When I create a piece, whether it's a vibrant abstract or a subtle landscape, I envision it speaking to viewers years, even centuries, from now. Preserving it means maintaining the integrity of the colors, the brushwork, and the composition, ensuring that the emotional state or philosophical ideas embedded in the work can be appreciated by future generations, just as the artist intended. It's about respecting the dialogue between the creator and the viewer, uninterrupted by neglect.
Beyond the sheer aesthetic pleasure and the historical narrative, there's also the intrinsic cultural and sometimes economic value that well-preserved art holds. This concept of provenance, the documented history of ownership and exhibition, significantly contributes to a painting's historical and monetary value. A well-preserved piece with clear provenance isn't just a beautiful object; it's a piece of history with an undeniable legacy. It’s a testament to its journey through time, a painting that has been lovingly cared for retains its integrity and tells its story more clearly, connecting us more profoundly to the artist's original intent.
Dust, grime, environmental factors – they're the silent saboteurs. They don't just obscure the beauty; they can actually degrade the materials over time, leading to irreversible damage. Who wants their beloved masterpiece slowly fading into obscurity? Not me, that's for sure. I want my art to shine, vibrant and full of life, just as I intended it. Even my abstract pieces, full of the language of line and texture, benefit from a little TLC. These small, consistent acts of care are the first line of defense against these subtle threats. So, how do we, as guardians, actively participate in this preservation?
Beyond grime, there's also the concept of patina – the natural, often beautiful, aged surface that develops on an oil painting over many decades or centuries. Patina is a desirable sign of age, a subtle mellowing of colors, a deepening of tone, a visual testament to the passage of time that many collectors cherish. It's distinct from harmful surface grime. Think of patina as the soft, inviting sheen on an antique wooden chest; grime is merely the dirt that obscures it. A professional conservator is trained to distinguish between this desirable patina and harmful surface grime, making sure that cleaning enhances, rather than erases, the painting's historical character. This delicate balance is part of the art of preservation itself. It's about respecting the artwork's journey, not trying to make it look brand new.
What stories will your painting tell in a hundred years?
The Regular Dusting Ritual: Less Chore, More Zen
Okay, "daily" might be a stretch for most of us, myself included. Let's call it "regular". This is the easiest, least intimidating step in oil painting maintenance, and honestly, it makes a huge difference. By regularly removing surface dust, we prevent it from becoming embedded, making future, more intensive cleaning far less likely. Every artist leaves their mark, sometimes literally with a signature or unique identifiers, which are just as vital to preserve. The frame itself also collects dust, and keeping it clean contributes to the overall presentation and prevents dust from migrating onto the painting's edges. For areas with pronounced impasto, extra care is always needed. Don't forget the backing of the painting (e.g., cardboard, foam board, or a sealed backing paper) – this crucial barrier also collects dust and, more importantly, deters pests, so keep it clean too. This backing, sometimes called a dust cover, is essential for protecting the canvas from airborne particles and environmental changes.
Imagine your favorite comfy sweater. You wouldn't throw it in the mud, right? But little bits of fluff and dust gather over time, making it look a bit tired. A gentle brush-off or a lint roller fixes that. Paintings are similar. Dust accumulation can become embedded over time, making future cleaning much harder and potentially requiring stronger (and riskier) methods. And contrary to some popular belief, oil paintings aren't inherently fragile in the sense that they can't be touched; they simply demand respectful and careful handling.
Here's my non-anxious approach:
- The Softest Touch: Grab a very soft, clean, natural-bristle brush (like a wide, soft makeup brush, or a dedicated, unused painter's brush specifically for delicate surfaces). Don't even think about your old paint brushes; we have articles about cleaning and caring for your paint brushes for a reason – they're not for your finished art!
- Gentle Sweeps: Hold the painting securely (or leave it on the wall if it's stable). With the lightest possible touch, gently brush the dust off the surface. Work from top to bottom, being extra careful around any impasto or textured areas, and especially around delicate areas like the artist's signature. I'm talking feather-light strokes, as if you're trying not to wake a sleeping kitten.
- Frequency: Once a month is a good routine. If your home is particularly dusty, maybe every couple of weeks. It takes literally seconds.
That's it. No chemicals, no water, no panic. Just a gentle sweep to keep the surface clear. It’s a simple dance, a quiet communion, keeping the painting vibrant and ready for its next viewer.

credit, licence
Are you giving your painting its monthly dose of zen?
When to Clean (And When to Absolutely, Positively, Not Try This At Home)
So, the dust is handled. But what if it's more than dust? What if it's... grime? This is where the tiny anxious voice gets louder, and frankly, it should. While dusting is our first line of defense, a dulling, hazy, or yellowish film often points to accumulated surface grime, tobacco smoke residue, or pollutants. This is a critical juncture where a wrong move can lead to irreversible damage. It's crucial to understand what you're dealing with before attempting any cleaning beyond dusting.
Identifying the Problem: Grime, Varnish Bloom, and More
Beyond simple dust, several issues can obscure your painting's beauty:
- Surface Grime: This often appears as a dull, slightly greasy film that can make colors appear muted. It's typically composed of airborne pollutants, dust embedded with moisture, or minor residues.
- Deep-seated Grime: This is more ingrained, perhaps from soot, heavy nicotine residue, or accumulated pollutants over many decades. It makes the painting look uniformly dark or intensely yellow and might even feel slightly sticky or gritty.
- Varnish Blooming or Clouding: This appears as a whitish, hazy film, often an indicator of moisture trapped in or under the varnish layer. It's commonly caused by rapid temperature/humidity changes or poor air circulation. This definitely requires professional intervention, as attempting to clean it yourself can easily cause irreversible damage.
The Golden Rule: When in Doubt, Don't
Seriously. It's far better to have a slightly dull painting than a ruined one. I've learned this through years of (sometimes painful) trial and error in art. Remember, some pigments, especially older or more organic ones like certain cochineal-based reds, indigo, or even some cadmium yellows, can be surprisingly sensitive to even mild cleaning agents. Their chemical composition might make them prone to discoloration or solubility, so caution is paramount. It’s a bit like trying to clean an antique silk dress with dish soap – you just don't know how it will react until it's too late. The history of cleaning methods itself is fraught with past mistakes; aggressive, solvent-heavy approaches often did more harm than good, reinforcing the need for today's refined, minimally invasive techniques.
And it's not just the pigments; the age of a painting is a critical factor. An antique piece from the Old Masters era, with its layers of traditional oil and varnish, will react very differently to cleaning than a contemporary work using modern materials. What might be a gentle touch for one could be catastrophic for another. For anything more than surface dust, we're talking about very specific, very gentle cleaning. This is distinct from restoration, which focuses on returning a damaged artwork to a semblance of its original state, often involving invasive repairs or repainting. Conservation, in contrast, prioritizes preserving the artwork's existing materials and structural integrity, using the least invasive methods possible to stabilize and protect it for the future. Our goal at home is always conservation-minded, never restoration-level intervention.
Understanding Varnish and Support Nuances
It's also crucial to understand the varnish itself. Traditional natural resin varnishes, like dammar or mastic, were once common, but they tend to yellow significantly and become brittle over time, making them harder and riskier to remove. Modern synthetic varnishes, developed with conservation in mind, are generally more stable, less prone to yellowing, and often easier for conservators to remove safely. And then there are the less common, but equally challenging, cases: a painting might have a shellac varnish (more common on decorative items, but occasionally found on paintings, and quite sensitive), or it might even be unvarnished, presenting a completely different surface dynamic that needs cautious handling. Each of these requires a distinct approach, and a professional understands these nuances. The type of varnish can drastically influence a painting's appearance and how it should be cleaned.
Furthermore, the support structure matters deeply. Historically, gesso, the preparatory ground layer applied to canvas or panel, provides a stable, non-absorbent surface for the paint. Its composition and condition significantly influence how the paint layers behave over time. A canvas painting might sag or become brittle, while a wood panel is more susceptible to warping, splitting, and insect damage, each reacting differently to environmental stress. Ensuring the canvas is properly stretched and maintained on sturdy stretcher bars, free from sagging or undue tension, is also critical as it directly impacts the stability of the paint layers. What appears to be stubborn grime on older works is often a combination of surface dirt and a yellowed, oxidized varnish layer, which only a professional should address. The underlying truth is this: a complex artwork is like a complex ecosystem, and every element interacts.

Feeling unsure? That's your cue to pause.
The "Gentle Refresh": My Step-by-Step for Surface Grime (Use with Extreme Caution!)
For those situations where it is just surface grime – that dull, slightly greasy film that obscures rather than deeply penetrates – and you feel confident, here's how I might approach it. This is distinct from deep-seated grime which might involve ingrained soot, nicotine, or a heavily discolored varnish layer, making the painting look uniformly dark or intensely yellow, and often has a texture or stickiness you can feel. That kind of grime is strictly for the professionals; attempting it yourself is a guaranteed trip to disaster. Again, proceed with extreme caution and at your own risk. Test in an inconspicuous area first. An "inconspicuous area" might be a dark, less detailed corner of the painting, a heavily shadowed edge, or a section that's completely covered by the frame. The goal is to find a spot where any potential adverse reaction would be least noticeable, and this testing in an inconspicuous area is non-negotiable. Surface grime often feels like a faint film that can be gently lifted, while deep-seated grime might feel slightly sticky, gritty, or simply resistant to superficial efforts.
- Gather Your Supplies (Simplicity is Key):
- Distilled water (no tap water – the minerals can leave residues!).
- Cotton balls or very soft, lint-free cloths.
- Another soft, dry cloth for blotting.
- A clean, soft brush for initial dusting.
- Initial Dusting (Non-Negotiable): Always, always start with a thorough dry dusting as described above. You don't want to rub dust particles into the paint.
- The "Spit Test" (Seriously, but with a slight grin): Okay, I know this sounds a bit unorthodox, perhaps even a little gross, but trust me, it's a technique professional conservators sometimes employ. Your saliva contains enzymes that can gently break down certain types of surface grime without harming oil paint. It’s more of an indicator of surface dirt than a full cleaning method. Lightly moisten a cotton swab with your own saliva (yes, really, just a tiny bit, like you're politely tasting something). Test on a tiny, inconspicuous spot. If it lifts grime without affecting the paint, you may consider proceeding with extreme caution, but only after thorough testing. If nothing happens, or if you see any change to the paint, stop immediately. This really drives home how incredibly gentle we need to be! Who knew my own bodily fluids held such… potential? (Mostly for awkwardness, if I'm being honest).
- The Distilled Water Wipe (Extreme Caution):
- Lightly dampen a cotton ball or soft cloth with distilled water. It should be barely moist, not dripping.
- Gently roll (don't rub) the cotton ball across a very small area of the painting. Observe carefully. Is dirt coming off onto the cotton? Is the paint stable?
- Immediately follow with a dry cotton ball or soft cloth to absorb any excess moisture.
- Repeat, using a fresh, clean section of cotton for each new area, until the entire surface is gently cleaned. Change cotton balls frequently.
- NEVER scrub or apply pressure. If you see any paint coming off, or if the surface feels sticky, STOP IMMEDIATELY.
- Let it Breathe: Allow the painting to air dry completely. Don't rush it.
I know, it sounds a bit like performing surgery with a cotton swab. It sort of is! That's why I reiterate: when in doubt, don't. When it comes to something precious, sometimes the best action is no action at all.
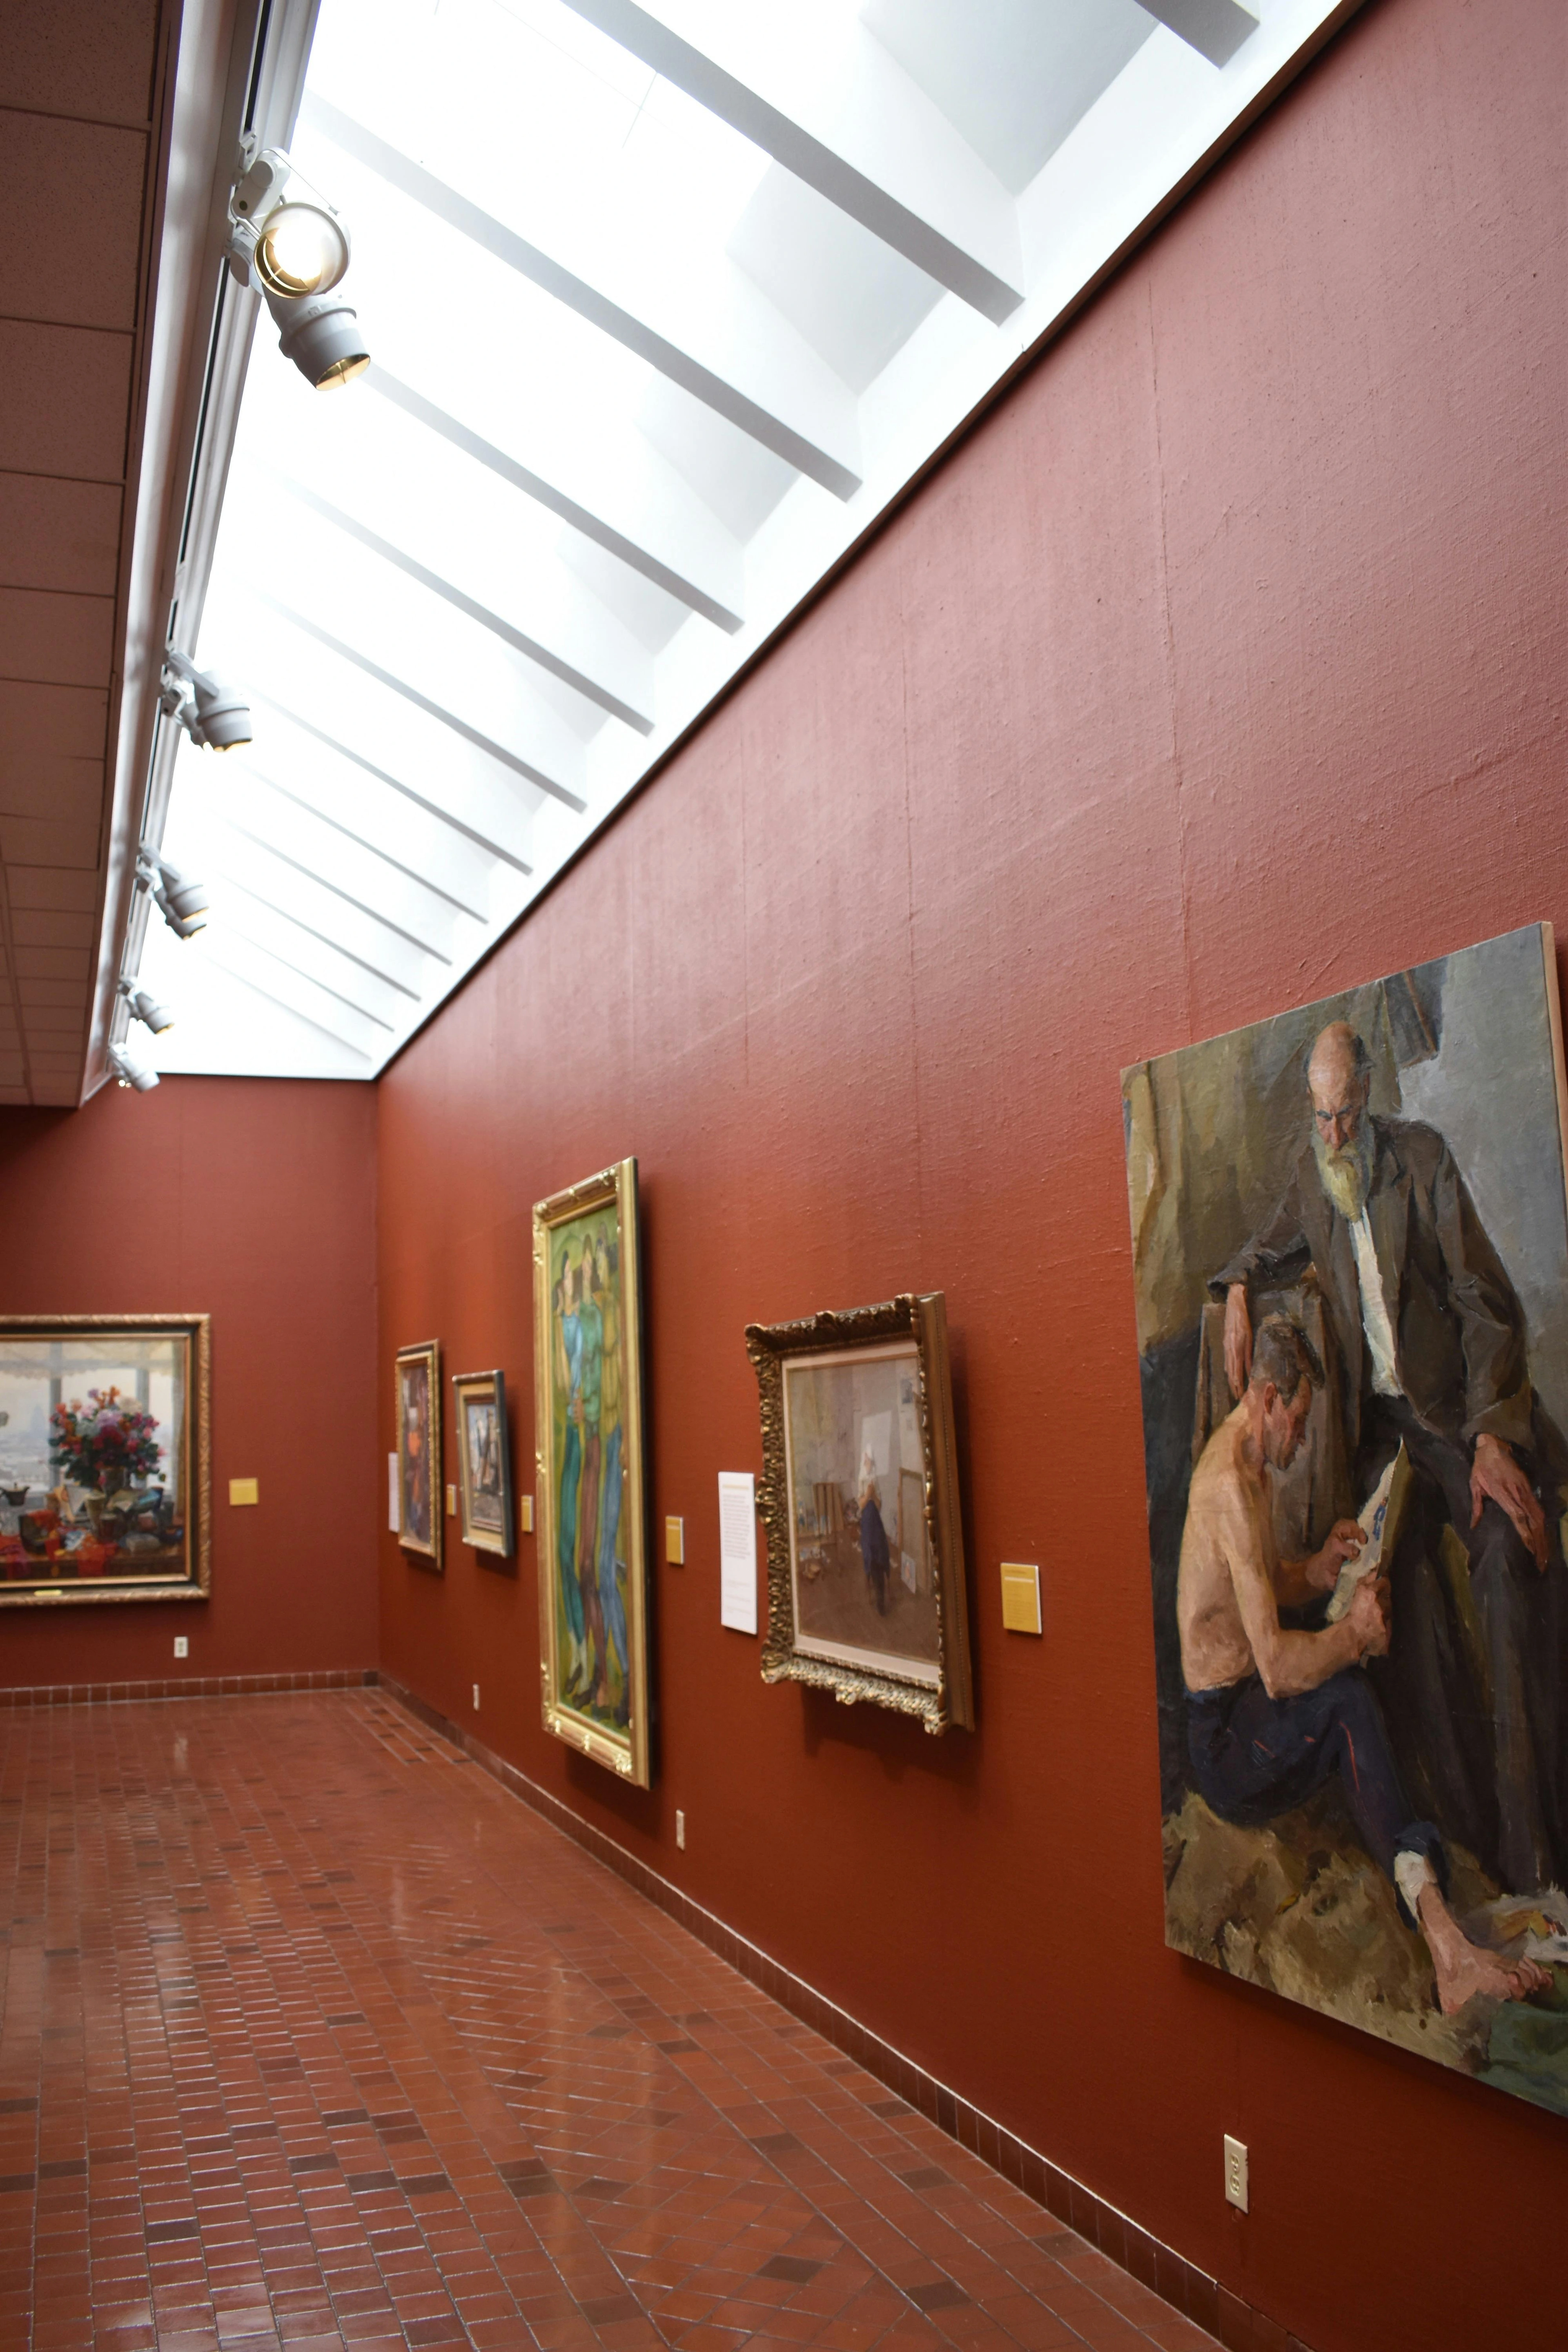
Environmental Hugs: Giving Your Painting the Best Home
Your painting is clean; now, let's talk about its long-term happiness. Much like us, paintings thrive in a stable, comfortable environment – consistency is key. Extreme changes are the enemy. It's a bit like my mood swings if the heating breaks – the canvas and paint layers expand and contract, and nobody's happy. Environmental factors directly impact the paint layers and the backing structure, like stretcher bars and canvas. Fluctuations can cause these elements to expand and contract, leading to cracking, flaking, or warping over time. It's not just the extremes, but sudden, drastic changes in temperature or humidity that are particularly damaging. A slow, gentle shift is far less stressful for a painting than being abruptly moved from a dry, warm room to a damp, cold basement. Beyond temperature and humidity, we also need to guard against the tiny, silent invaders: insects and pests. Woodworms can tunnel through panels, silverfish can munch on canvas and paper supports, and even dust mites can contribute to grime. A stable, clean environment is surprisingly effective at deterring these unwelcome guests, preventing them from turning a treasured piece into a buffet. And don't forget the support structure itself – whether it's a canvas (which can sag or become brittle) or a wood panel (prone to warping and splitting), the underlying material needs a stable environment to maintain its integrity. Additionally, constant vibrations from heavy traffic, nearby construction, or even a frequently slamming door can slowly destabilize fragile paint layers or compromise the structural integrity of the support over time. I once had a piece hanging near a main road, and I swear I could feel its subtle tremor; it made my own nerves buzz. Stagnant air, too, is particularly detrimental because it allows pollutants and moisture to concentrate, creating localized pockets of high humidity and chemical exposure that can accelerate degradation. Furthermore, be mindful of acidity in surrounding materials, like old cardboard backings or wooden frames, which can off-gas and cause chemical degradation or discoloration of the artwork over time. Archival, acid-free materials are always preferred.
I remember once, early in my career, I had a small abstract piece stored in a less-than-ideal spot in a previous studio – too close to a window, experiencing daily temperature swings. I noticed subtle cracking emerge over just a few months. It was a stark lesson in why these 'environmental hugs' are so crucial; even my most abstract pieces, full of the language of line and texture, crave stability. My creative process, too, thrives in a calm, controlled space. It’s hard to focus on my timeline of artistic exploration if I’m constantly worrying about my art physically deteriorating. My studio in 's-Hertogenbosch is climate-controlled precisely for this reason – it's crucial for preserving art. It's about creating a tranquil sanctuary, a silent guardian against the elements, preventing the slow creep of damage from turning beauty into dust. Perhaps I'm a bit overly protective, but after seeing a few pieces suffer from neglect, my anxiety meter for environmental stability is permanently set to high.
Creating the ideal conditions for your oil painting involves controlling several key factors, as outlined in this guide:
Factor | Ideal Range | Avoid | Why it matters |
|---|---|---|---|
| Temperature | 68-72°F (20-22°C) | Extreme heat/cold, rapid changes in temperature | Fluctuations cause expansion/contraction of materials, leading to cracking, flaking, and structural instability. |
| Humidity | 45-55% Relative Humidity (RH) | Too dry (cracking), too humid (mold, swelling) | Low humidity causes paint/canvas to dry and crack; high humidity promotes mold growth, swelling, and paint delamination. |
| Light | Indirect, diffused sunlight | Direct sunlight, harsh artificial light | UV light causes pigments to fade irreversibly, damages varnish, and degrades canvas/paper supports over time. |
| Airflow | Good, gentle circulation | Stagnant, damp pockets | Prevents stagnant air, which can lead to mold and mildew growth and concentrate pollutants, accelerating degradation. |
| Vibrations | Minimal | Heavy traffic, slamming doors, machinery | Can destabilize fragile paint layers and compromise structural integrity over time. |
| Pests | None! | Unclean areas, unchecked infestations | Insects (woodworms, silverfish) can damage canvas, wood panels, and paper supports. |
Is your painting's home truly a haven?
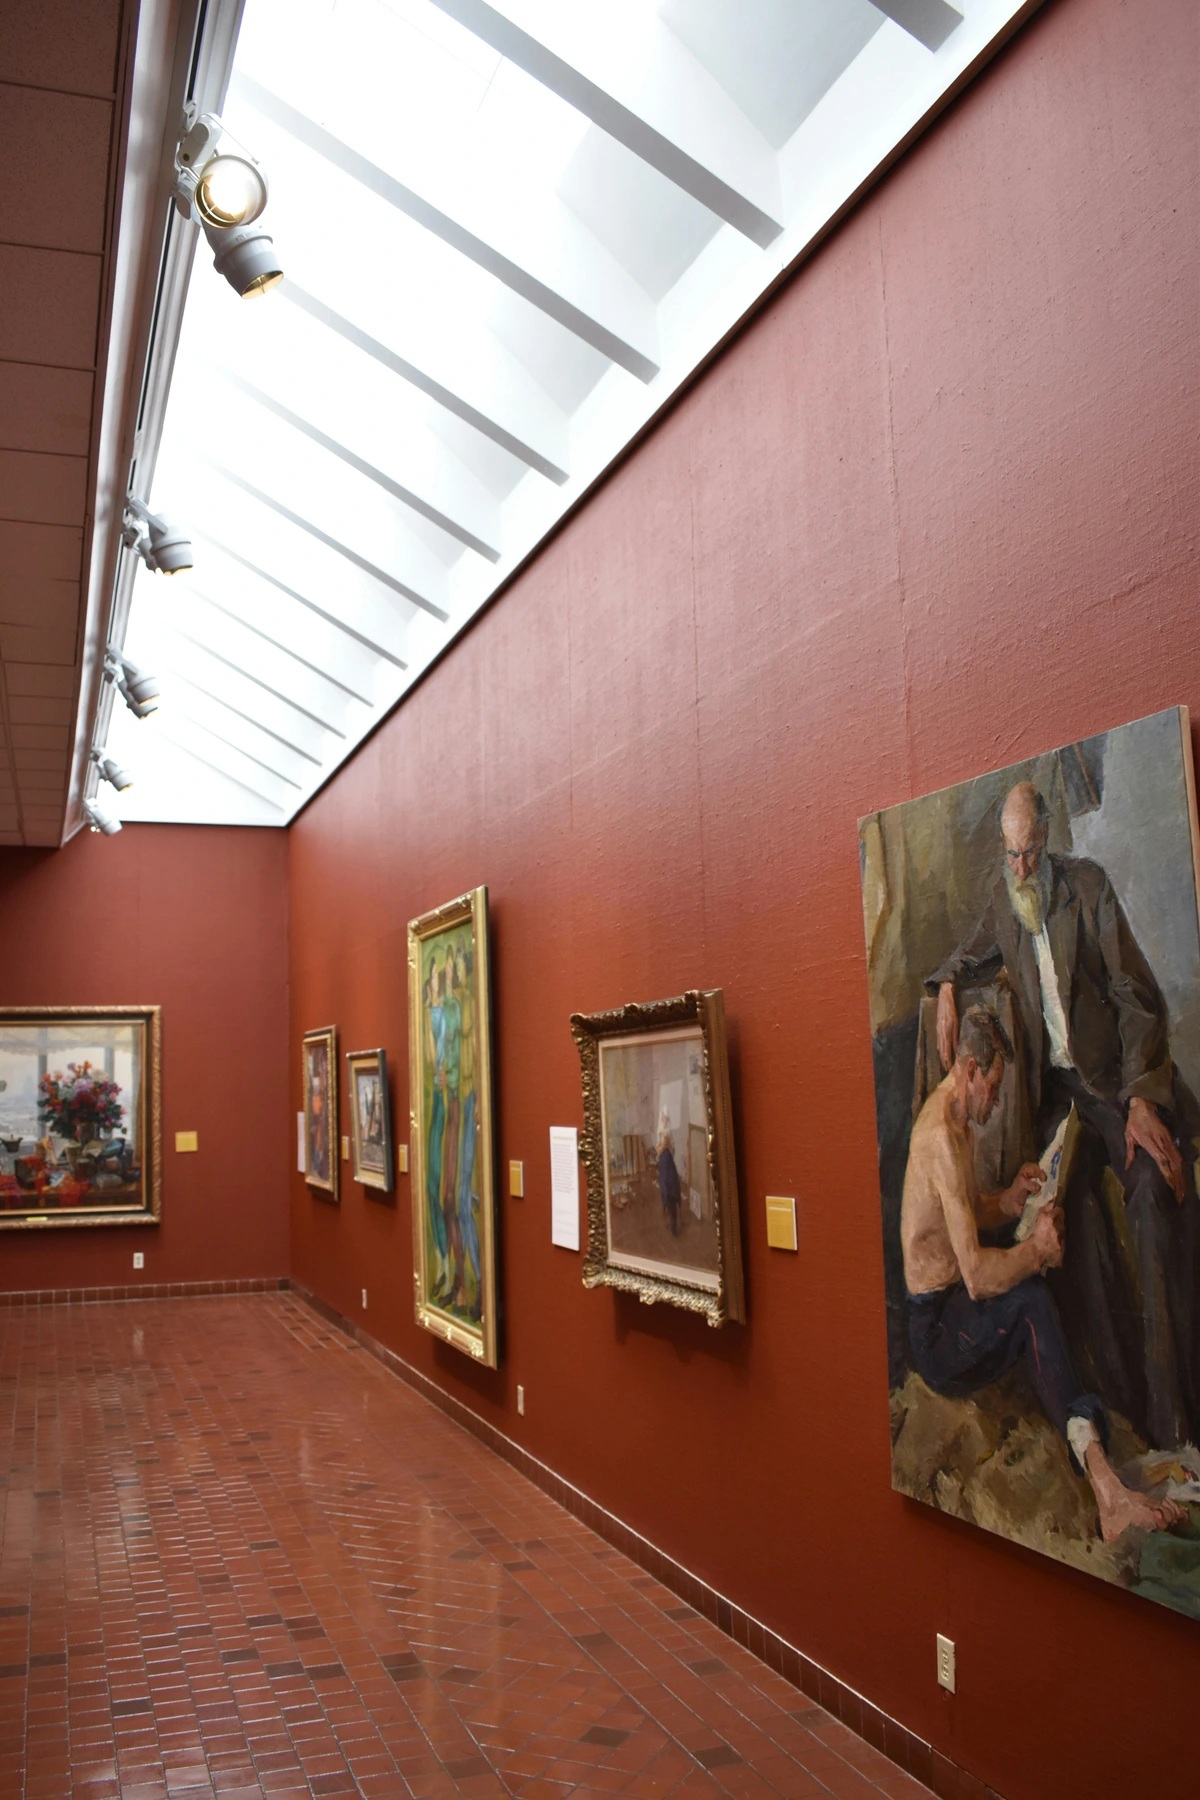
Framing and Display: More Than Just Decoration
A frame isn't just for aesthetics; it's a critical layer of protection for your artwork. It shields the edges, makes handling safer, and can keep dust off the very edges of the canvas. It’s the painting’s personal bodyguard, really. If framing behind glass, ensure there's a space between the glass and the painting's surface (a mat or spacers) to prevent the paint from touching the glass. This is especially vital for paintings with impasto, where the paint is thick and textured. Always consider archival, acid-free backing materials behind the painting to further protect it from environmental contaminants, acidic components of the frame itself (which can cause discoloration or degradation, a process called off-gassing), and even pests like silverfish that might otherwise get behind the canvas. This hidden layer of protection is often overlooked but crucial for long-term health.
When hanging, make sure the wall anchors and hanging hardware (like D-rings and picture wire) are sturdy and appropriate for the painting's weight and size. There's nothing worse than the thought of a treasured piece taking a tumble. Trust me, I've had a few close calls with my own works, especially when experimenting with new hanging systems; that moment of a slight wobble is enough to send a jolt of pure panic right through you. The anxiety is real, and it's why I always double-check! Additionally, avoid placing artwork directly above heat sources like radiators or fireplaces, or in direct proximity to air conditioning vents, as these create localized temperature and humidity fluctuations that are detrimental. Proper lighting is also key: diffused, indirect natural light is best, and if using artificial light, opt for UV-filtered options that don't generate excessive heat. Direct sunlight is an absolute no-go, as UV rays will cause irreversible fading of pigments over time.
credit, licence
Is your painting securely displayed and thoughtfully protected?
The Absolute Don'ts: Mistakes That Make Conservators Spontaneously Combust (Almost)
Let's be unequivocally clear: some things are just plain bad ideas. These actions are the express route to irreversible damage and guaranteed heartbreak for any art lover (and probably a conservator having a very bad day, muttering under their breath about the horrors they've witnessed). This is where my tiny anxious voice becomes a blaring alarm. Think of this as your essential checklist of what not to do if you cherish your artwork.
Chemicals and Liquids to Avoid:
- Commercial Cleaners: Windex, furniture polish, anything meant for household cleaning. These contain harsh chemicals that are utterly incompatible with oil paint and varnish. They can strip, discolour, or severely damage your painting. Trust me, your painting doesn't need to smell like lemon-fresh polish. It's like trying to polish a delicate butterfly with sandpaper – entirely the wrong tool for the job.
- Excessive Water: While distilled water can be used sparingly for surface grime, never douse a painting or use a very wet cloth. Water can get behind the paint layer, causing swelling, blistering, or mold. It’s not a swimming pool, folks.
- Rubbing Alcohol, Solvents, Turpentine (unless you're painting): These are for artists in the studio, not for cleaning finished works. They are designed to dissolve paint or varnish. It's like using paint stripper when you just wanted to dust your masterpiece – effective at removal, but disastrous for preservation.
Physical Actions to Avoid:
- Harsh Brushes, Cloths, Sponges, or Vacuum Cleaners: Anything abrasive will scratch the surface, even if you can't see it immediately. Think soft, softer, softest. And never use a household vacuum cleaner directly on a painting, even with a brush attachment. The suction is too powerful, and static electricity generated can pull off delicate paint flakes or embedded dust, causing irreparable harm.
- Touching with Bare Hands: Skin oils, even seemingly imperceptible ones, can transfer to the painting surface over time, attracting dust and grime and potentially causing subtle discoloration or degradation to the varnish or paint layers. Think of it as leaving tiny, invisible fingerprints that accumulate over decades. If you must handle the painted surface for any reason (though it's best to avoid), clean cotton gloves are a good idea.
- Placing Objects Against the Surface: Don't lean anything against the front of your painting, especially anything with sharp edges or that could leave marks. Treat it like a sleeping baby – no poking, no prodding.
- Using Sticky Tapes or Adhesives: Never apply sticky tape, adhesive putty, or any other sticky material directly to the painting's surface, frame, or backing. These can leave residue, lift paint, or cause irreparable damage upon removal.
- Placing Magnets Directly on Paintings: If your painting has any metal components (e.g., in the frame or hanging system), avoid placing magnets directly on it. Magnetic forces can potentially cause stress, deformation, or even demagnetize elements over time, especially with older, more fragile works.
Environmental No-Gos:
- Food or Drink Near the Painting: Obvious, perhaps, but accidents happen. A spilled glass of wine is a nightmare scenario for any art lover. Keep your snacks and sips at a safe distance.
- Hanging in High-Risk Areas: Kitchens and bathrooms are notorious for fluctuating humidity, grease, steam, and cleaning product fumes. These environments are a recipe for disaster for oil paintings, promoting mold, grime buildup, and material degradation. Your masterpiece doesn't belong in the spa.
- Extreme Temperature Fluctuations during Moving or Storage: Abrupt shifts in temperature (e.g., from a warm house to a cold, unheated truck or storage unit) can be highly detrimental, causing rapid expansion and contraction of materials that lead to cracking and paint loss.
I remember once watching a friend carefully wipe a valuable antique painting with what looked suspiciously like a damp kitchen sponge. I nearly had to sit down. The horror! The temptation to 'just try a little bit of [insert random household cleaner here]' is real, but resist it like it's the last slice of cake after a diet – it's just not worth the consequence. In short, if it's not specifically designed for delicate artwork, or explicitly recommended by a professional conservator, keep it far away. The message here is simple and unyielding: when it comes to cleaning oil paintings, extreme caution and restraint are not just recommended, they are absolutely essential for their survival. When these 'don'ts' are ignored, or when the issues are simply beyond the scope of home care, it's time to seek professional help.
What's the one "don't" you've been most tempted to break? (Confess, I won't tell.)
When to Call in the Big Guns: Professional Help
Sometimes, despite our best efforts, a painting needs more than a gentle dust or wipe. If your painting has:
- Cracks or flaking paint
- Major discolouration or yellowing varnish (especially varnish blooming/clouding)
- Mold growth
- Tears or holes in the canvas
- Paint loss or significant abrasion (including minor scratches that penetrate the varnish/paint layer)
- Deep-seated grime that doesn't budge with gentle methods
- Been exposed to smoke, fire, or water damage
...then it's time to call a professional art conservator. They have the expertise, the specialized tools, and the safe chemicals to address these issues without causing further damage. Think of them as the highly specialized doctors for your art. It's an investment, yes, but often a necessary one to preserve the artwork's integrity and value. I've seen the incredible work they do, giving pieces a new lease of life, and it's truly inspiring. When dealing with issues like a heavily yellowed varnish or significant structural damage, their intervention is not just recommended, but essential. And remember, always document any professional conservation work done on your painting, including any previous treatments. This includes details of the treatment, the conservator's report, and any before-and-after photos. This documentation adds significantly to the painting's provenance, helps inform its future care, and is crucial for insurance purposes should you ever need to make a claim after damage.
Know when to trust the experts; your painting's future depends on it.
Frequently Asked Questions About Oil Painting Care
Your burning questions, answered, because a little knowledge goes a long way to ease that persistent art anxiety!
Q: How do I handle a recently completed oil painting that is still drying?
A: A freshly completed oil painting can take anywhere from 6 months to several years to fully cure, depending on paint thickness and pigments. During this crucial time, it's vital to:
- Avoid touching the surface: The paint is still soft and easily damaged by oils from your skin or even a light bump.
- Ensure good airflow: This helps with the drying process, but avoid direct drafts or extreme air currents.
- Protect from dust: While still delicate, a light, loose covering (like a clean sheet draped over, not touching the surface) can offer some protection without trapping moisture. Do NOT varnish a painting until it is fully cured, as this will trap solvents and hinder proper drying, potentially leading to cracking or hazing later.
Q: My painting looks dull. Is it just dirt, or could it be old varnish?
A: It could be either! Or both. If gentle cleaning doesn't restore the vibrancy, it's highly likely that the original varnish has yellowed and oxidized over time. Varnish is a protective layer, but over decades, traditional natural resin varnishes (like dammar or mastic) can significantly discolour, often developing a strong yellow or brown tint that obscures the original colors. This yellowing can make colors appear muted and dull. Removing old varnish is a delicate process that should only be performed by a professional conservator. Trying it yourself is a recipe for disaster. Modern synthetic varnishes are often preferred by conservators for their non-yellowing properties and easier removability.
Q: Should I revarnish my oil painting?
A: Modern varnishes offer UV protection and a removable layer that can make future cleaning easier. However, varnishing needs to be done correctly (after the paint is fully cured, using appropriate materials). There's also a distinction between a retouch varnish, which can be applied to areas of paint that have dulled (sunken in) during drying to even out the sheen before a final varnish, and a final varnish, which is applied over the entire fully dried painting (typically 6-12 months after completion). Retouch varnish is particularly useful for achieving a uniform finish on a painting that has dried unevenly, often appearing as dull spots. If you're not experienced, it's best to consult a professional or a reputable art supply store for guidance, or have a conservator do it. Different types, like matte, satin, or gloss varnishes, can also subtly alter the painting's appearance. Matte varnishes reduce sheen for a softer, more subdued look, which can be useful for reducing glare. Satin offers a subtle lustre, providing a balanced finish. Gloss enhances color saturation and depth with a high shine, often making colors appear more vibrant. Choose carefully, as the finish significantly impacts how the artwork is perceived.
Q: My painting has a minor scratch or abrasion. Can it be repaired?
A: Minor scratches or abrasions, especially if they penetrate the varnish or paint layers, typically require a professional conservator. Attempting to "touch up" or fill these yourself can lead to further damage, uneven appearance, and a more complex repair job for a conservator down the line. A conservator can carefully clean the area, fill the loss, and in-paint to seamlessly integrate the repair, ensuring the integrity and value of the artwork. Don't risk making a small problem a much bigger, more expensive one.
Q: How should I clean the frame of my oil painting?
A: Cleaning the frame requires a different approach than the painting itself, and it depends greatly on the frame material:
- Gilded Frames: These are very delicate. Use a soft, dry brush (like for the painting) to gently dust. Never use water or chemicals, as they can dissolve gilding or dull the finish. For more stubborn grime, consult a professional frame conservator.
- Wood Frames (unpainted/unstained): Dust with a soft cloth. For light grime, a slightly dampened cloth with plain water (distilled, if possible) can be used very sparingly, followed immediately by a dry cloth. Avoid oils or polishes that can seep into the wood or attract dust.
- Painted or Modern Metal Frames: These are generally more robust. Dust regularly. For smudges, a very lightly dampened cloth with a tiny drop of mild, pH-neutral soap (like dish soap, diluted heavily) can be used, followed by a clean, damp cloth and then immediately dried. Always test in an inconspicuous area first.
Q: Can I use olive oil or other natural oils to clean my oil painting?
A: Absolutely not! While oil paint is, well, oil-based, applying cooking oils or other natural oils to a finished painting can attract dust, turn rancid (oxidize and break down, creating a sticky, discolored film over time), and create a damaging film that is incredibly difficult to remove safely later on. These oils are not designed for archival preservation and will cause more harm than good. Stick to the methods above or professional help.
Q: How do I store an oil painting if I need to move it or put it away?
A: Great question! Whether you're moving house or simply rotating your collection, careful handling and storage are paramount.
- Wrap it: Use archival, acid-free materials. Glassine paper is excellent for directly covering the painted surface (if dry). Then, wrap it in bubble wrap (bubbles facing out, away from the paint) or a moving blanket. Avoid wrapping freshly varnished or still-drying paintings in anything that might stick or prevent airflow.
- Protect the corners: Cardboard corner protectors are a lifesaver, especially during transit.
- Store vertically: Never store a painting flat on its surface. Stand it upright on its shortest side, preferably in a sturdy art crate or box, to prevent pressure damage.
- Avoid attics/basements: Go for a stable, climate-controlled environment, much like where you'd display it. Extreme temperature and humidity fluctuations are the enemy of stored art.
- Handling during Transit: When moving a painting, always hold it by the frame or the stretcher bars, never by the canvas itself. Wear clean cotton gloves if you must touch the frame to avoid transferring oils.
Q: My painting was exposed to smoke. What should I do immediately?
A: If a painting has been exposed to smoke, the most important immediate step is to avoid rubbing or wiping it, as this can embed the smoke particles deeper into the paint or varnish. Gently remove it from the smoky environment if safe to do so. Isolate it in a clean, stable room, and then contact a professional conservator as soon as possible. They have specialized techniques to remove smoke residue safely without damaging the artwork.
Q: How do I properly photograph my painting for documentation or insurance?
A: High-quality photographic documentation is crucial for provenance and insurance. Here are key tips:
- Lighting: Use even, diffused lighting to avoid harsh shadows or reflections. Natural indirect light from a window is often best, or use two lights placed at 45-degree angles to the painting.
- Camera: Use a high-resolution camera. A smartphone can work for basic documentation, but a DSLR with a good lens is ideal for professional records.
- Setup: Position the camera directly in front of the painting, ensuring it's level and square to avoid distortion. Use a tripod for stability.
- Color Accuracy: Include a color checker card in one of the initial shots to aid in color correction later. Photograph in natural light before any color adjustments.
- Details: Take overall shots, as well as close-ups of the artist's signature, any labels on the back, and specific textured areas or imperfections. Include a ruler for scale in detail shots.
- File Format: Save high-resolution images in a lossless format like TIFF or high-quality JPEG.
What other questions keep you up at night about your treasured art?
My Final Thought: Guardians of Beauty and Legacy
Caring for an oil painting is more than just a chore; it's an act of respect. It's an acknowledgment of the artist's dedication (and my own timeline shows that artistic journey is rarely simple!), the materials' potential, and the artwork's capacity to bring joy and reflection into our lives. It's about being a link in a long chain of custodians, ensuring that the visual stories and profound emotions contained within these works can continue to resonate for future generations.
As an artist, my aim is not just to create, but to create something that lasts, something that can carry its essence through time. The act of preservation is, in a way, an extension of the artistic process itself – ensuring the initial intent, the passion, and the message endure. It's a silent collaboration between creator and caretaker, a shared commitment to legacy. So, take a deep breath, approach your cherished pieces with care and a gentle hand, and remember that sometimes, the most loving thing you can do is simply admire them, and know when to step back and let the experts take over. Your art, like your spirit, deserves that thoughtful attention, a legacy passed on from one guardian to the next. The magic is yours to protect. And perhaps, as you care for these pieces, you might even consider adding a new story to your collection – one of my own perhaps? You can always explore my available works or delve deeper into my artistic timeline.

credit, licence


