Mastering Broad-Edged Calligraphy: A Beginner's Journey to Beautiful, Mindful Writing
Discover the meditative art of broad-edged calligraphy. This guide covers essential tools, foundational scripts like Italic and Foundational Hand, basic strokes, common mistakes, and how to find your unique artistic voice, stroke by intentional stroke.
Mastering Broad-Edged Calligraphy: A Beginner's Journey to Beautiful, Mindful Writing
When I look at a beautifully penned piece of calligraphy, I'm often struck by a mix of admiration, a touch of envy, and certainly a profound curiosity. It's like watching a chef effortlessly julienne vegetables; it looks so simple, so elegant, but you know there's a world of practice behind it. Or, thinking about my own abstract art, it's like seeing a complex composition that appears spontaneous, yet is built upon an intricate understanding of color, form, and line – the underlying structure that makes the freedom possible. For the longest time, I thought calligraphy was this arcane art, reserved for monks or people with impossibly steady hands and a secret ancient scroll. It felt like something beyond my grasp, a skill requiring an almost supernatural stillness. Turns out, it's just... practice. A lot of it, sure, but the fundamentals? Totally approachable. This guide is my attempt to demystify calligraphy, showing you that this ancient art is well within your reach, transforming frustration into a meditative flow. So, let's start with the absolute essentials!
What are we diving into, then? In this guide, I'll walk you through the absolute essentials I learned, from the tools you actually need and how to hold them, to the fundamental strokes that unlock beautiful writing, sharing how I stumbled my way into it, and how you can too. We'll specifically focus on broad-edged calligraphy, often called italic or chisel-tip calligraphy, which is a fantastic starting point for beginners due to its clear line variation and accessible tools. We'll explore foundational scripts like Foundational Hand and Italic to build a strong base, understanding how their simple forms and elegant slants are perfect for developing consistent control and muscle memory. Beyond these, you'll find a broader world of styles like Uncial, Carolingian Minuscule, and Gothic script awaiting your exploration. We'll also take a quick peek into the rich history of this art form and the diverse styles awaiting your exploration. This isn't just about pen and paper; it's about finding a rhythm, a connection to ancient traditions, and a quiet, focused space in a noisy world. It's a journey into finding your own artistic voice, much like the one I found in my abstract and colorful pieces.
Your First Steps: Demystifying Your Essential Tools (and What You Don't Need)
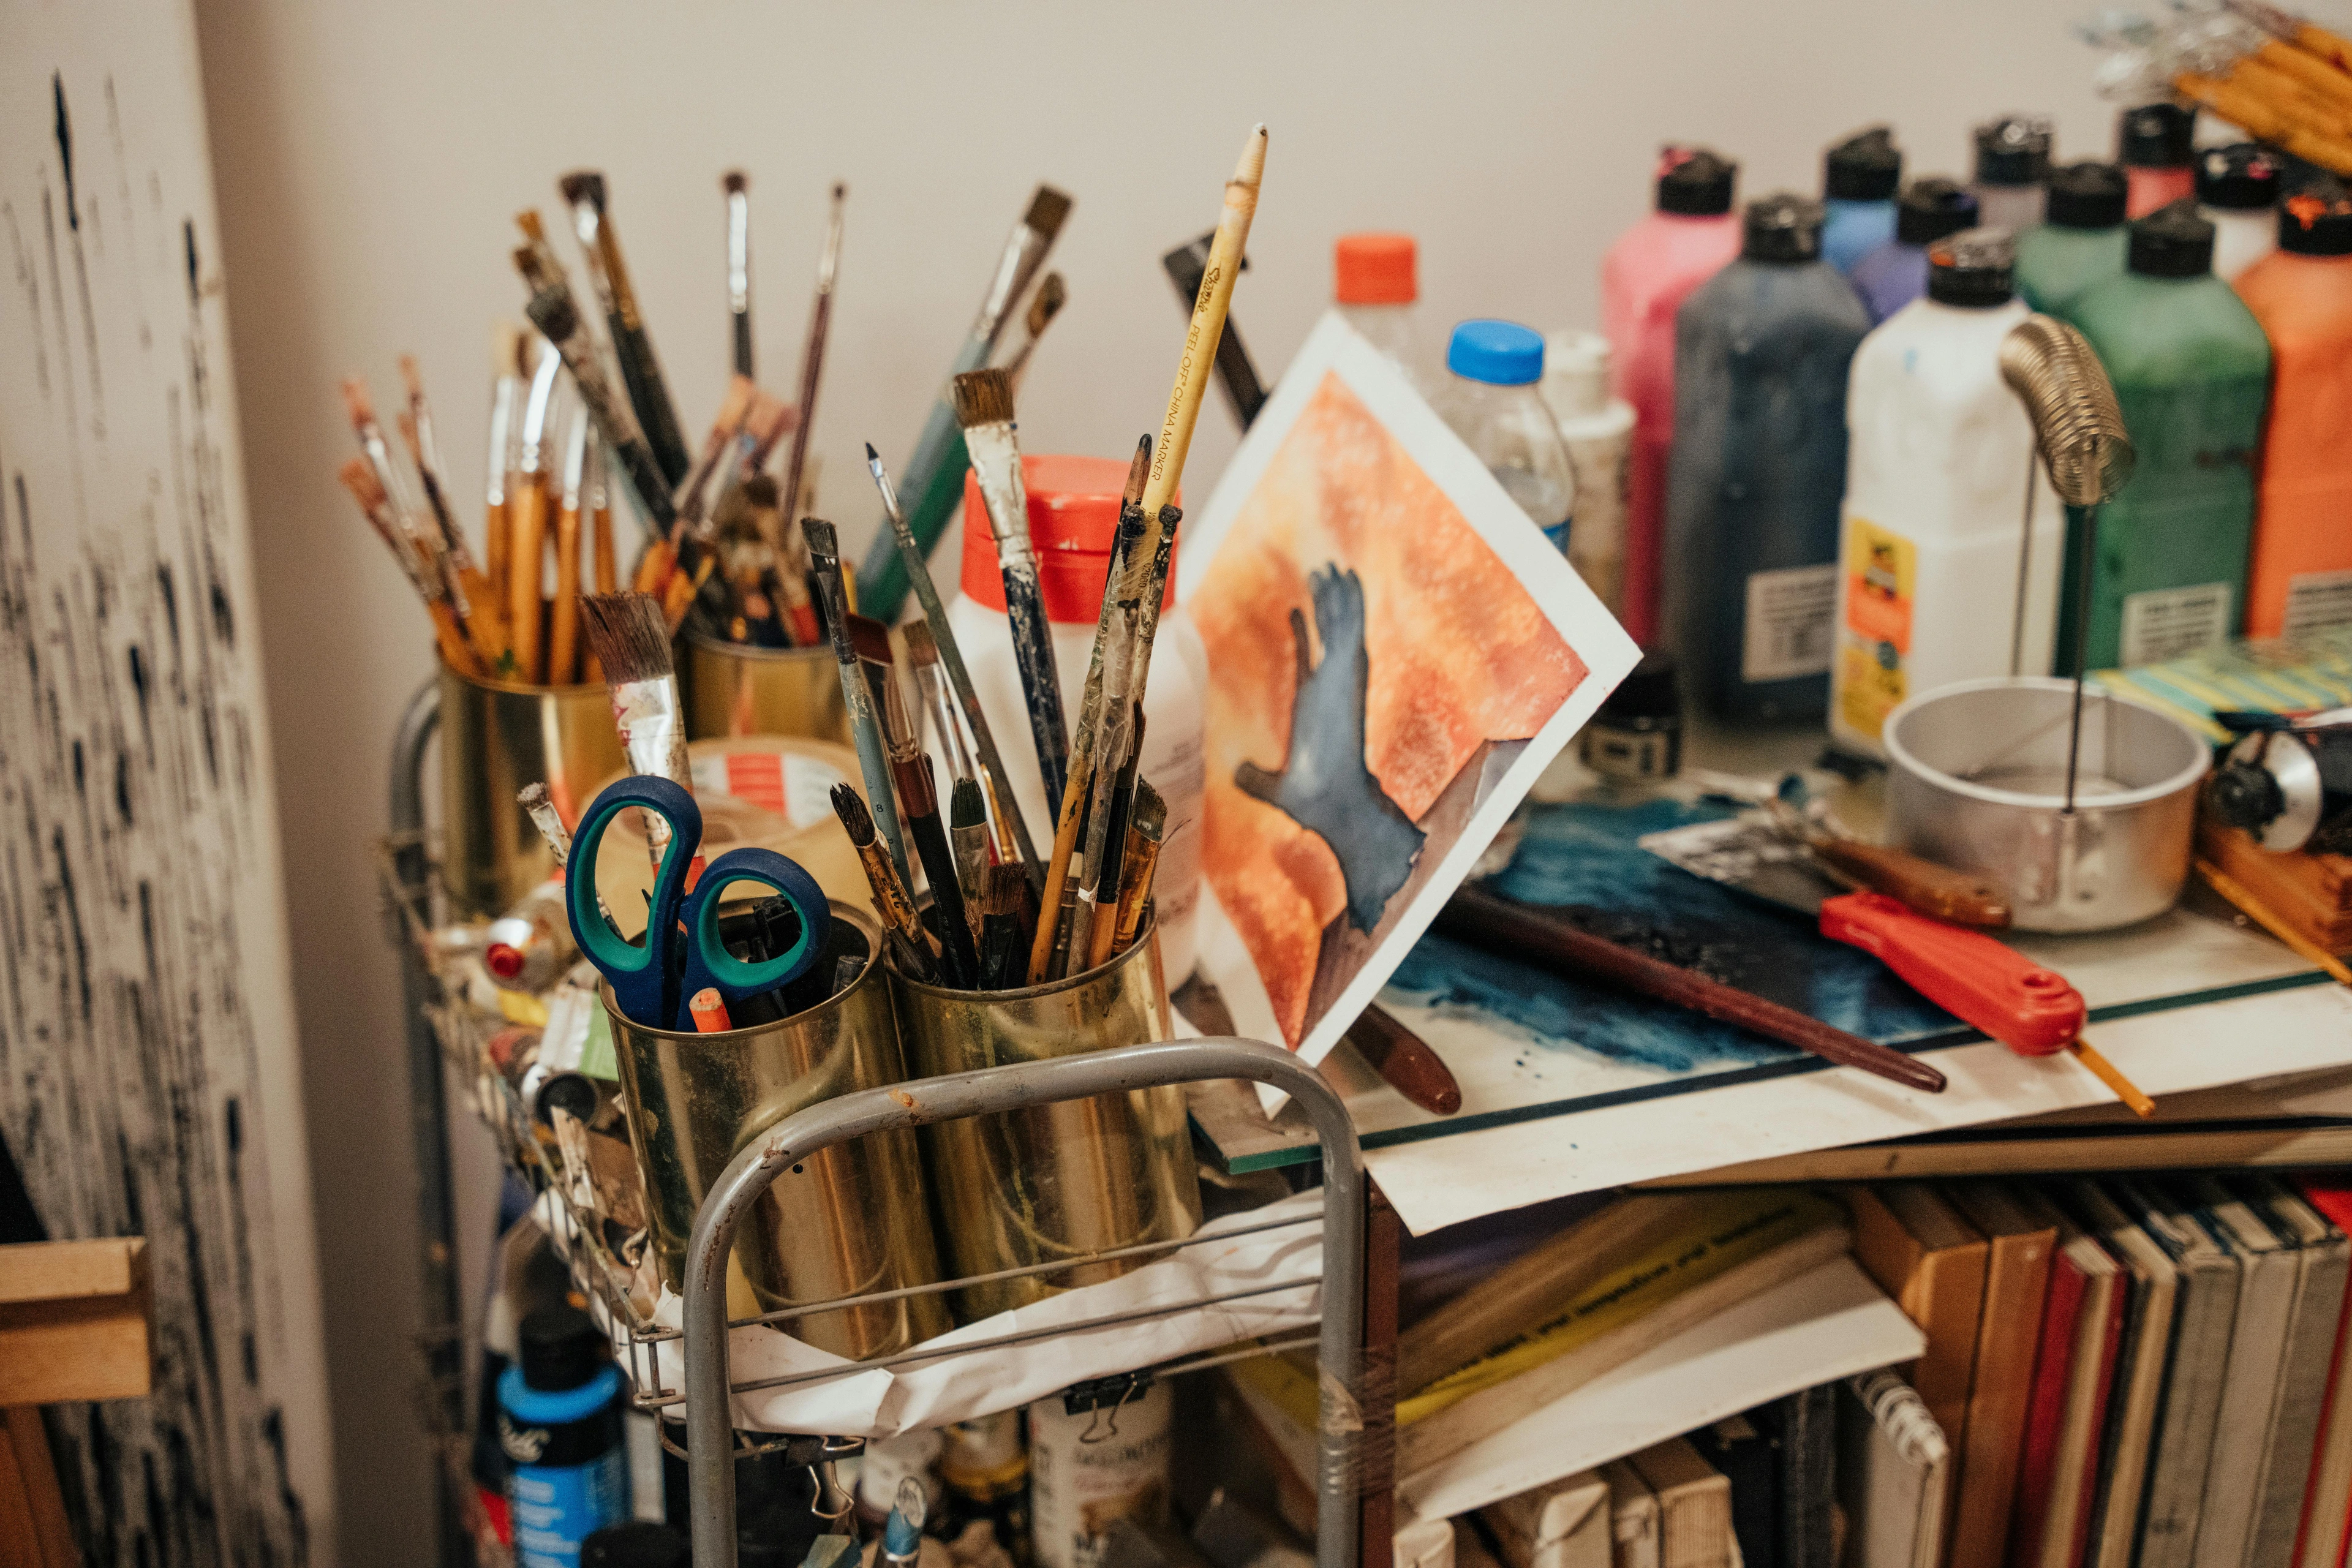
I remember vividly standing in the art store, staring at rows and rows of pens, inks, and papers, feeling utterly overwhelmed. My initial thought was, "I need everything," which, as my wallet quickly reminded me, was neither practical nor necessary. It was like trying to navigate a forest with a thousand paths – where do you even begin? The truth is, you don't need much to start. You really don't. Think of it as painting: you can buy a million colors, or you can start with primary colors and learn to mix. Calligraphy is similar. That initial overwhelm? It's a common hurdle, and my advice is always to simplify. Let's demystify those first purchases.
The Humble Pen and Paper: Your Essential Starter Kit
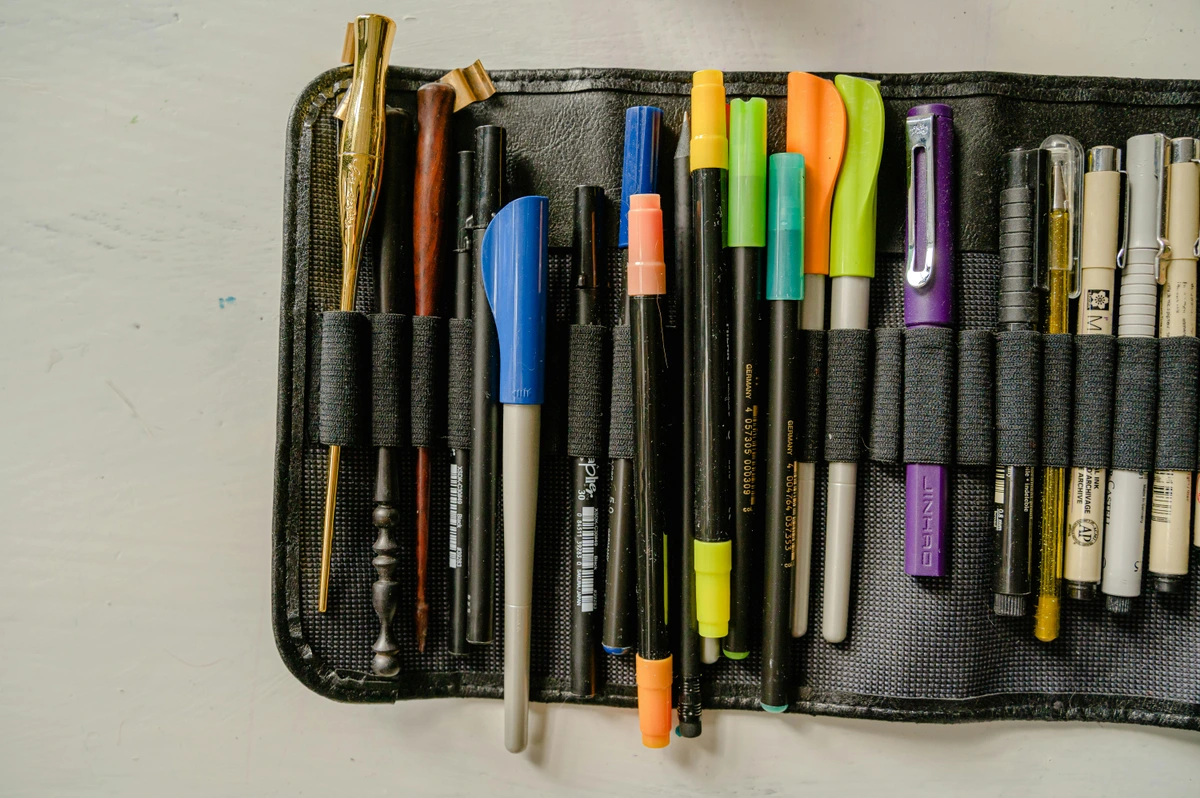
Seriously, don't overthink this part. When I started, I just grabbed a basic calligraphy pen set and some smooth paper. The fancy antique dip pens, exotic inks, and gilded quills can wait. What you're looking for is something that feels comfortable in your hand, allows for consistent ink flow, and paper that doesn't bleed. That's it.
When I say "smooth paper," I really mean it – textured paper, which I mistakenly bought early on, can catch your nib, cause skipping, and lead to frustrating, uneven ink flow. For now, avoid it like a bad habit. For beginners, look for smooth papers like bristol smooth, good quality marker paper, or even specialized calligraphy practice pads from brands like Rhodia or Canson. Generally, aim for paper around 90-120gsm; too thin and it might buckle, too thick and it can absorb ink too quickly, especially for dip pens. The quality of your practice paper directly impacts your experience; a smooth surface helps your nib glide, reducing frustration and allowing you to focus on form.
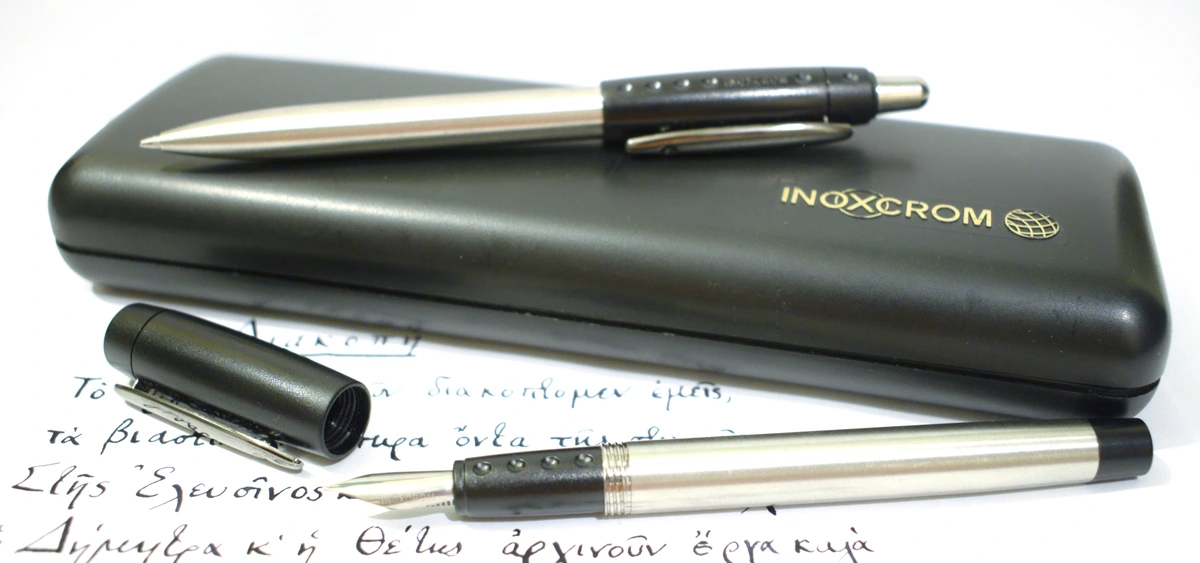
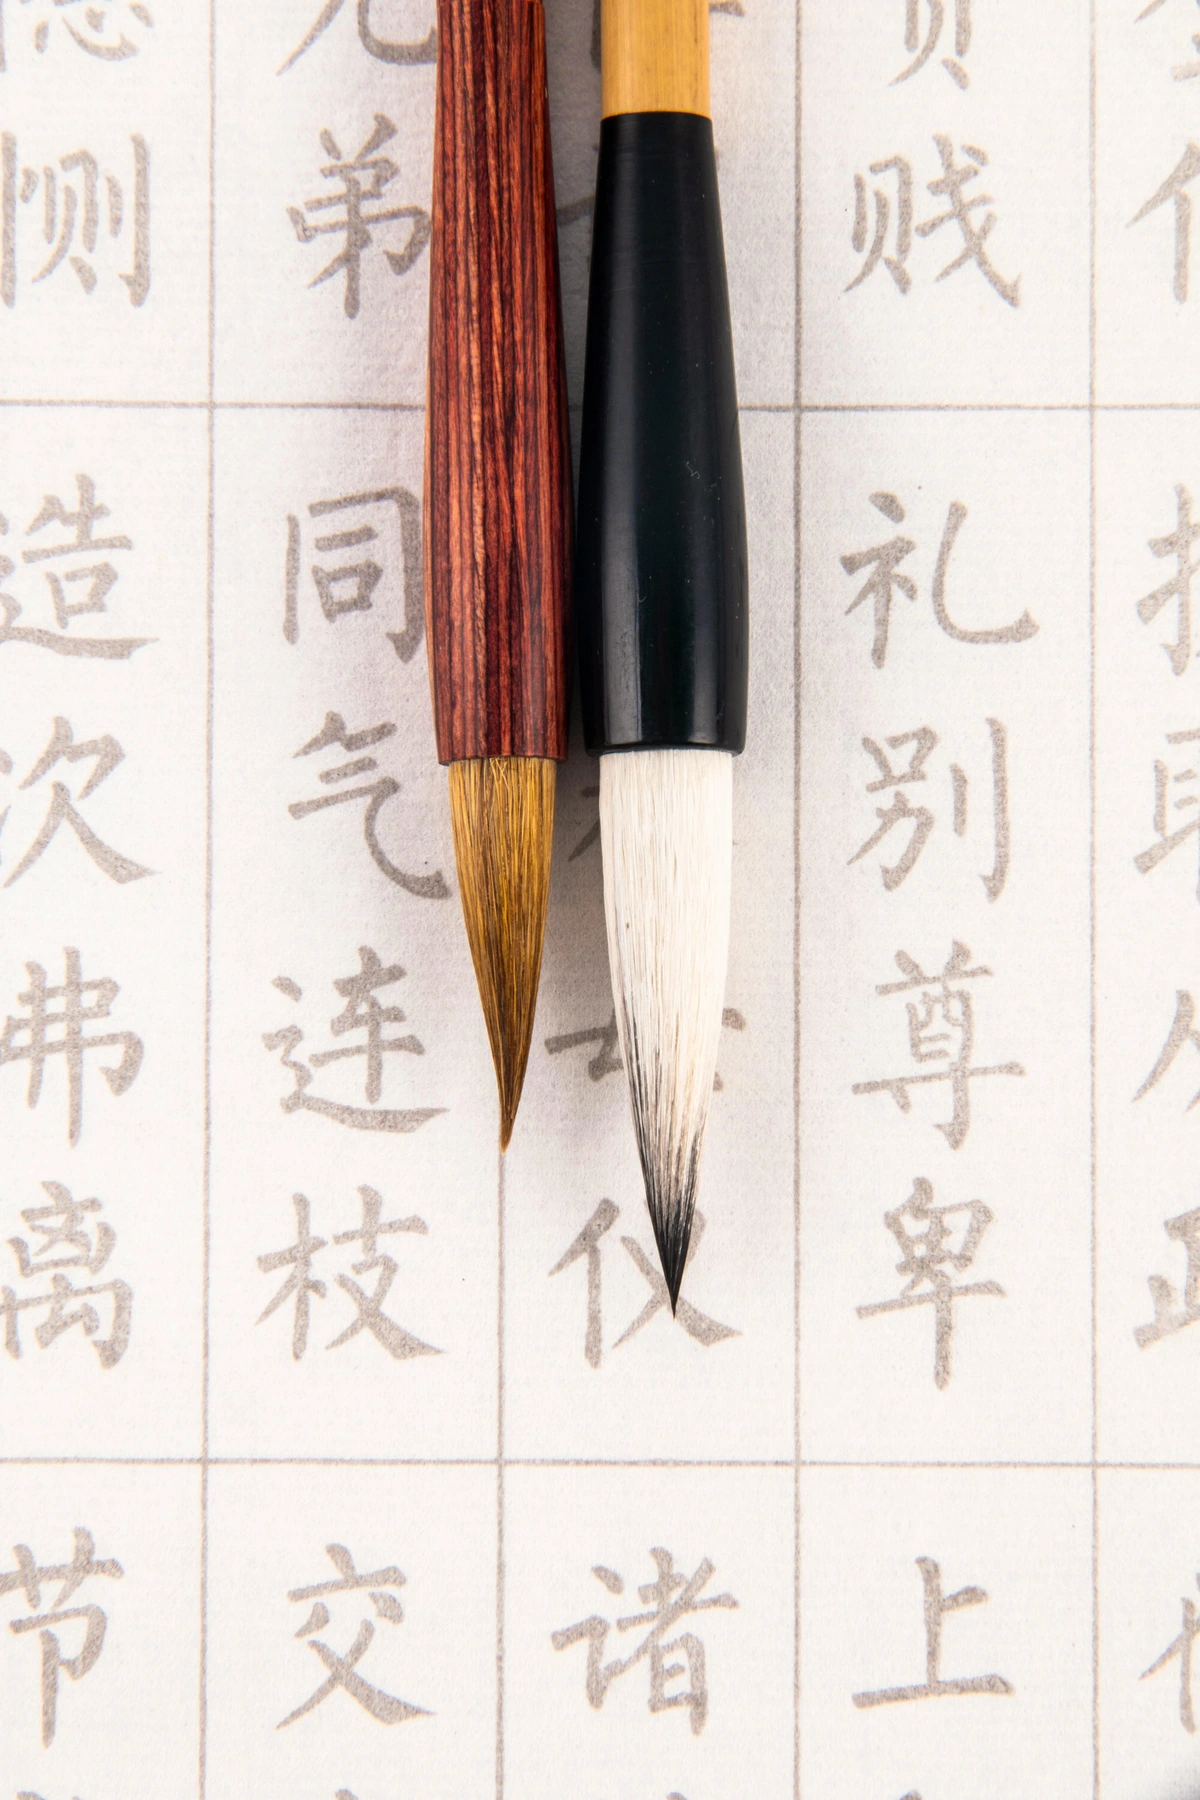
My personal journey began with a rather unassuming felt-tip calligraphy pen, and honestly, it was perfect for getting a feel for the strokes without the added pressure of managing inkwells. Felt-tips are fantastic for beginners because they remove the challenge of ink loading and consistency, allowing you to focus purely on the forms of the letters and the movements. Pilot Parallel Pens, for instance, are beloved for their consistent ink flow and crisp lines, making them an excellent choice for broad-edged practice. Tombow Fudenosuke brush pens or even simple Staedtler calligraphy felt-tip pens are popular and excellent choices many beginners love, offering varied flexibility for exploring line dynamics. Later, I dabbled with brush pens, which offer a different kind of flexibility and are excellent for learning pressure control – a skill that translates surprisingly well to other art forms, even my abstract and colorful pieces. I even ventured into fountain pens with specialized calligraphy nibs like those found in a Rotring ArtPen. What makes these "specialized"? Often, they have broader, stiffer tips or unique grindings that create crisp thick-and-thin lines not achievable with a standard fountain pen nib. You'll discover that even within specific pen types, different nibs – the shaped point that delivers the ink – offer varying flexibility and line quality. For broad-edged calligraphy, the nib has a flat, chiseled tip, allowing for distinct thick and thin lines depending on the direction of your stroke and the nib angle, which we'll discuss later.
For dip pens, look for a basic broad-edged nib (often called a round-hand or italic nib), and a medium size (like a 2 or 3) is a great starting point, paired with a simple wooden pen holder. Round-hand nibs, as the name suggests, have a slightly more rounded tip, offering a smoother, less sharp line, while italic nibs have a crisper, sharper edge for more defined lines. Brands like Speedball, Brause, or Manuscript offer great starter nibs. Some modern fountain pens even come with stub nibs (a type of broad-edged nib with a flat, chiseled tip, offering less flexibility but still producing thick-and-thin lines) or flex nibs (which allow for significant line variation based on pressure, more akin to pointed pen calligraphy, but require a delicate touch). Each offers a unique personality, and finding the one that speaks to you is part of the fun. A common frustration with dip pens can be nib creep, where ink accumulates on the top of the nib, or ink drying on the nib itself, leading to inconsistent lines; a quick wipe with a damp cloth can often resolve this.
Speaking of ink, for beginners, I'd suggest starting with a good quality calligraphy-specific ink. If you're using dip pens, non-waterproof India ink is a classic choice. When I say India ink, I mean a thicker, often shellac-based ink that gives rich, opaque lines and dries to a permanent, lightfast finish. It's fantastic for crisp, bold results, but remember, the shellac content means it will clog and potentially damage your precious fountain pens! Always clean your dip pens immediately after using shellac-based inks to prevent permanent damage to the nib. For fountain pens, you'll always need fountain pen-specific inks, which are typically dye-based and formulated to flow smoothly without clogging the delicate feed system. Pigment-based fountain pen inks exist and offer excellent lightfastness and vibrancy, but they demand more diligent cleaning and can be prone to clogging if not used regularly. Think of them like those high-maintenance celebrities: they look amazing, but demand constant attention. The primary takeaway: India ink is for dip pens; fountain pen inks are for fountain pens. A simple black ink is perfect for getting started; vibrant colors can come later, as consistency is your first goal. For those looking ahead, some fountain pen inks can also display "shading" (variations in color intensity within a stroke) or "sheen" (a metallic-like shimmer at certain angles), adding another layer of artistry to explore.
Getting a Grip (Literally): Holding Your Pen Just Right
This might sound obvious, but it's crucial. Your grip can make or break your calligraphy. It's not like holding a normal writing pen. For most broad-edged scripts, you want to maintain a consistent nib angle, often around 30-45 degrees, relative to the baseline. This specific angle is vital because your broad-edged nib creates thick lines when its full width is parallel to the stroke direction (like a downstroke) and thin lines when it's perpendicular (like an upstroke). Maintaining a consistent angle ensures those thick-and-thin contrasts are even and predictable across your writing. (And yes, different scripts, even within broad-edge, might subtly shift this angle, so don't be afraid to experiment a little once you master the basics.) My first attempts often looked as though a spider had dipped its legs in ink and tap-danced across the page – messy, erratic, and far from elegant. This was primarily because my pressure was inconsistent, and my nib angle was all over the place, leading to uneven ink flow and wobbly lines. It wasn't until I truly focused on relaxing my hand, letting my entire arm lead the stroke (not just my fingers!), and keeping that nib angle steady that things began to look less like a crime scene and more like actual letters. It was a slow, sometimes frustrating, journey of unlearning old habits.
The Right Posture, Hand Position, and Workspace
Proper posture also plays a huge role. Sit upright, keep your feet flat, and ensure your arm can move freely from the shoulder. This isn't just about comfort; it's essential for achieving the long, fluid strokes that define beautiful calligraphy. A relaxed arm means less tension, and less tension means more control over your lines – a lesson I learned the hard way after many cramped sessions. And here's a crucial, often overlooked point: ergonomics. Calligraphy can be intense, and avoiding strain is paramount. Ensure your chair and table are at comfortable heights, and take regular breaks. My own early hand cramps were a harsh reminder that good posture and a relaxed grip aren't just for aesthetics; they're vital for longevity and comfort in your practice. Remember, your fingers are for guiding the pen, your arm is for the movement. Also, don't underestimate the importance of a well-lit and comfortable writing surface. A stable, non-slip surface and good natural or artificial light can significantly reduce eye strain and improve your focus. Your workspace is your creative sanctuary, after all. Another subtle but important tip: try to orient your paper with the grain running in the direction of your strokes, especially with dip pens. This can significantly reduce friction and allow your nib to glide more smoothly, preventing snags and inconsistent ink flow.
With your grip perfected and your body aligned, we're ready to explore the very building blocks of beautiful writing.
The Core of the Craft: Basic Strokes That Build Everything
Once you have your basic tools and a comfortable grip, the real magic happens when you start to understand the fundamental movements that form every letter. This is where the transformation truly begins, as you learn the language of the pen. Calligraphy, at its heart, is about a series of controlled movements. Think of them as the alphabet of movement, the building blocks from which every elegant letter is constructed. You learn these few basic strokes, and suddenly, every letter you see breaks down into familiar components. It's like learning scales on a piano; boring at first, but absolutely essential for playing anything beautiful later – a necessary discipline, much like the repetitive layering I use in my abstract work to build up to that sense of spontaneous freedom. This deep focus on fundamental forms also connects to my broader artistic philosophy: that true freedom in art comes from understanding and mastering its underlying structure. A crucial part of this understanding is also recognizing the x-height (the height of your lowercase letters without ascenders or descenders, like 'a' or 'c'), the ascender line (for letters like 'b', 'd', 'h'), and the descender line (for letters like 'g', 'j', 'p'). These invisible lines are your silent mentors, helping you maintain consistent letter proportion and alignment right from the start, long before you even touch guide sheets.
I remember one particular downstroke I struggled with for ages. It always wobbled halfway through, no matter what. It felt like trying to draw a perfectly straight line on a roller coaster. Eventually, I realized I was tensing my shoulder. The moment I consciously relaxed, letting my whole arm lead, it was like magic – smooth, even, and consistent. It's a small victory, but those small victories are what make the practice so rewarding.
Understanding Contrast: The Soul of Calligraphy
The foundational strokes are fairly universal across many scripts, and they are where you learn the secret to calligraphy's distinctive beauty: contrast. This isn't just about rendering thick and thin lines; it's about the deliberate interplay of pressure and how your broad-edged nib (or the flexible tip of a brush pen) moves across the paper, which creates those stunning variations. A broad-edged nib has a flat, chiseled tip, creating thick lines when pulled downwards or horizontally across its full width, and thin lines when pulled perpendicular to its edge (like an upstroke). In contrast, a pointed nib has a sharp, flexible point, and line variation comes from flexing its tines with pressure, creating thick lines on downstrokes and thin lines on upstrokes, similar to how a brush pen works. Understanding how your pen's broad edge or fine tip creates these differences unlocks the visual rhythm of the art. Your nib angle also plays a crucial role here, typically maintained at 30-45 degrees relative to the baseline for broad-edged scripts, dictating the width of your strokes and the consistency of your thick and thin lines. We'll stick to broad-edge for now, as it's a great place to begin.
- Upstrokes: Always light pressure, moving upwards. Think of it as a delicate whisper or a gentle lift, allowing only the very finest edge of your nib to kiss the paper. These often form the thin, elegant lines in a letter, like the subtle curve leading into an 'i' or the gentle start of an 'n'. Crucially, remember to lift your pen slightly at the end of an upstroke, rather than dragging it, to ensure a clean, crisp finish. It's a subtle dance of control and release.
- Downstrokes: Always heavy pressure, moving downwards. This is your bold statement, the foundational strength, creating the thick, prominent lines as the broad edge of your nib presses firmly against the page. The interplay between these two, the whisper and the roar, is crucial for contrast. The main stem of a 't' or 'l', or the second stroke of an 'n', are classic downstrokes, grounding your script.
- Ovals: The building blocks for 'o', 'a', 'c', 'd', 'e', 'g', 'p', 'q', 's', and countless other round forms. Tricky to get smooth, my first ovals looked less like perfect circles and more like startled amoebas! They teach you consistent curve control and are essential for many letter bodies.
- Diagonal Strokes & Compound Curves: Often overlooked, these are crucial for letters like 'v', 'w', 'x', 'y', 'z', and for connecting many other letter forms smoothly. They teach you how to maintain consistent line width and pressure while changing direction, blending the principles of upstrokes and downstrokes.
- Entry/Exit Strokes: Think of them as the elegant little 'waves' or 'tails' that gracefully lead into or out of a letter, like a gentle handshake to start or finish a word. They add fluidity and ensure your letters never look abruptly cut off, giving your writing a natural, connected feel.
I remember my hand cramping, my lines wobbly, and my patience thinning. But then, after filling sheet after sheet of paper (and trust me, you'll go through a lot of paper), something clicked. A line would be straighter, an oval a little more circular. It's a small victory, but it feels monumental. This is where the practice truly pays off. Calligraphy isn't just about the finished product; it's a wonderfully meditative practice, a quiet escape that brings a sense of calm and focused concentration. For me, it mirrors the intense, mindful presence I find when I'm truly lost in the strokes of a painting, where the world outside fades and only the canvas and the brush exist. The act of creation itself, stroke by stroke, can be incredibly mindful and satisfying, a direct connection to the present moment. You're building muscle memory, refining your eye, and finding your rhythm, one deliberate movement at a time – much like the focused discipline required to evolve an abstract idea into a cohesive piece of art.

A Journey Through Time: The Enduring Art of Calligraphy
But before we get our hands delightfully dirty with ink and practice, let's take a quick, appreciative stroll through history. Remembering that you're connecting to millennia of dedication can add so much meaning to each stroke. Calligraphy has a rich, global history, dating back millennia. From the beautifully illuminated manuscripts of medieval monks to the intricate scripts used in ancient cultures like China and the sophisticated designs of Arabic calligraphy, this art form has always been about elevating the written word. Understanding this lineage, however briefly, adds another layer of appreciation to the craft you're about to embark on. It's a connection to centuries of human expression and dedication. The diligent work of scribes in monasteries, for instance, was crucial in preserving knowledge and artistic traditions throughout various historical periods.
Consider the majestic Book of Kells, a prime example of illuminated Uncial script from early medieval Ireland, where scribes painstakingly crafted each letter. Uncial, with its beautifully rounded, majuscule (uppercase) forms, developed from Roman scripts and was widely used for Christian texts. For me as a beginner, studying Uncial was like a master class in consistent curve control and even spacing – vital principles for any script I'd tackle, directly honing my skill for perfect ovals. Or think of the elegant, dynamic cursive scripts developed during China's Tang Dynasty, often seen in the works of masters like Huaisu, whose grass script (Cǎo Shū) is renowned for its explosive speed and expressive freedom. And don't forget the incredible geometric precision and flowing beauty of Islamic calligraphy, where the written word of the Quran was elevated to a sacred art form, often seen in intricate Thuluth or Naskh scripts – each a marvel of balance and flow that can inspire our own sense of structure.
Later, the more structured Carolingian Minuscule introduced distinct upper and lower cases, laying groundwork for many modern alphabets with its clear, simple forms; its emphasis on legibility is perfect for understanding basic letter structure and consistent spacing. Even the angular, dense forms of Gothic script (often called Blackletter), popular in medieval Europe, relied on precise stroke work to achieve their dramatic, often compressed effect, demanding the kind of control we're striving for. The elegant, slightly slanted Italic script, emerging from the Renaissance, then brought a sense of humanism and readability, leading into more decorative styles like Copperplate in the 18th century. Each historical style, in its own way, is a testament to the enduring power of these foundational movements and the desire to create beauty with words, and understanding them gives context to our own broad-edged journey.
Common Calligraphy Scripts for Beginners
If you're wondering where to actually start within this rich history, I've found that two broad-edged scripts are particularly friendly for beginners:
- Foundational Hand: This script, developed in the early 20th century by Edward Johnston, is a simplified, beautifully clear, and upright script. It's perfect for learning because it emphasizes consistent basic strokes, clear letterforms, and steady nib angle, building solid muscle memory without overly complex flourishes. It teaches you the core principles of proportion and spacing without too much distraction.
- Italic: A more flowing and slightly slanted script that emerged during the Renaissance. It's a fantastic next step after Foundational because it introduces the elegance of a slight slant and more connected letterforms, helping you develop a sense of rhythm and fluidity. While it looks sophisticated, its underlying structure is still quite approachable, and it's highly readable.
While Western calligraphy forms the focus of this guide, remember that traditions like Chinese brush calligraphy or the intricate geometric patterns of Islamic calligraphy offer equally profound and beautiful explorations of the written line. Learning about calligraphy in its broader context truly enriches your personal practice. These scripts aren't just historical artifacts; they subtly inform and inspire contemporary calligraphers, offering a vast reservoir of aesthetic principles and techniques. Knowing their stories can give your own practice a deeper sense of purpose and connection.
Ready to make your own mark on history? Let's get down to some serious practice.
The Fundamental Drills: Practice, Practice, Practice
This is where the rubber meets the road. Or, rather, the nib meets the paper. You'll want to dedicate time to drilling these basic strokes. Seriously, draw columns of upstrokes, then downstrokes, then rows of ovals. Over and over again. It feels monotonous, I know. My brain screams for variety, but my calligrapher-self knows this is the way. Think of it as meditation, but with ink. Consistency is your friend here, and slow, deliberate movement is your secret weapon for control. Each repetitive stroke builds muscle memory and refines your eye, bringing you closer to fluidity and grace. The initial monotony can be a mental block, but trust me, it's the fastest path to mastery. Plus, watching a perfectly consistent line emerge from your hand, even a simple one, is incredibly satisfying. Ready to put those drills into practice?
To make your practice more effective, try these steps:
- Warm-up: Start with simple, light lines and figure-eights to loosen your hand and arm.
- Focus on one stroke: Dedicate a full page to consistent upstrokes, focusing solely on light pressure and upward movement. Then move to downstrokes, concentrating on heavy, even pressure. This isolates the skill and helps build dedicated muscle memory.
- Combine strokes: Once individual strokes feel more natural, practice connecting them. This is where the magic really starts! Try forming an 'i' from an upstroke and a downstroke, or using ovals to create the bodies of an 'a' or 'o'. Even better, practice connecting letters: try 'on' or 'at', focusing on the seamless flow from one stroke to the next, training your hand for smooth transitions.
- Use guide sheets: Don't just freehand it at the start; guide sheets with baselines, ascender lines, and x-height lines are incredibly helpful for maintaining consistent size and slant. When using guide sheets, pay close attention to the x-height (the height of your lowercase letters without ascenders or descenders, like 'a' or 'c'), the ascender line (for letters like 'b', 'd', 'h'), and the descender line (for letters like 'g', 'j', 'p'). These lines are your silent mentors, helping you maintain consistent letter proportion and alignment. You can often print these online or draw your own.
Remember, each stroke is a tiny victory building towards mastery. You've got this!
From Strokes to Letters: Forming Your First Words
Once those basic strokes start to feel a little more natural – and trust me, they will – you can begin assembling them into letters. This is often where people get impatient. "Just show me how to write 'hello'!" they plead. But remember those scales on the piano? You build from the smallest units. Each letter is a carefully constructed puzzle of your foundational strokes. For instance, let's break down the letter 'e'. It typically begins with:
- a light upstroke forming the top curve, then
- a smooth transition into a heavier, rounded downstroke for the main body, often finishing with
- a subtle exit stroke.
The key is to see these components and focus on a smooth, controlled flow from one stroke to the next, while maintaining consistent ink flow – especially crucial for dip pens where a dry nib means a broken line. Every curve, every line, is intentional.
Let's break down a few more, step by step:
- An 's' often begins with an initial light upstroke, flowing into a heavier curved downstroke, and concluding with a lighter finishing exit stroke. The challenge here is the continuous, smooth pressure modulation.
- A 'p' typically starts with a strong downstroke, then an oval shape is attached to its right for the bowl, connecting back to the main stem, often with an exit stroke. Think of it as a vertical line combined with a smaller oval.
- For a letter like 'r', you'd combine a downstroke, followed by a lighter upstroke that forms the shoulder, and then another downstroke that completes its leg, often with a small exit stroke. It's about that gentle lift and fall.
- And what about an 'h'? It begins with a tall, strong downstroke (your heavy pressure), followed by a lighter upstroke that curves over to form the shoulder, leading into a second downstroke that forms the leg, often concluding with a small exit stroke. Notice how those thick and thin lines, the contrast, define its elegance.
- Let's try a more complex one, like 'M': This typically involves 1: a strong initial downstroke, 2: a lighter upstroke curving into a second downstroke, and then 3: another lighter upstroke curving into a final strong downstroke. Getting the symmetry and consistent width for the broad-edged 'M' is a fantastic challenge that combines multiple basic strokes into a cohesive form.
- Or consider 'W': Similar to 'M', it involves a series of alternating downstrokes and upstrokes: often starting with a downstroke, then a gentle upstroke, another downstroke, and a final upward curve. The key is maintaining that consistent broad-edged width and smooth transitions through the valleys and peaks.
- Even 'Q' can be broken down: It starts with a large oval (much like an 'O'), combined with a distinctive descender stroke that cuts across or extends from the bottom right. This teaches you about combining an established letterform with a unique flourish.
- For 'a': This letter is essentially an oval connected to a downstroke. Start with the oval, then lift your pen and add the vertical downstroke that joins the oval, finishing with a small exit stroke. It's a great exercise in connecting distinct shapes.
- A 'b': A tall downstroke followed by an attached oval on the right. Focus on making the downstroke straight and the oval a smooth, consistent curve that meets the stem cleanly.
- A 'g': Similar to 'a' in its initial oval, but then a descending downstroke with a loop (or just a simple curve) takes it below the baseline. This is your chance to practice descenders.
- For 'k': A tall downstroke, then two diagonal strokes from the middle: one lighter, upward diagonal forming the arm, and one heavier, downward diagonal for the leg, often finishing with a small foot or exit stroke. This helps with managing those important diagonal lines.
- And 'y': Often a combination of an initial upstroke or oval component, transitioning into a strong downstroke, followed by a lighter, looping descender that crosses below the baseline. It brings together several fundamental movements.
Pay attention to the spacing between strokes and letters. Calligraphers call the horizontal space between individual letters kerning – it's about ensuring each letter has just enough breathing room, not too cramped, not too distant. Think of it as the careful adjustment of space needed between, say, an 'H' and an 'e' so they don't look awkwardly separated or jammed together. Then there's leading, the vertical space between lines of text, which is like giving your sentences enough head-room to feel uncrowded. Both are crucial for legibility and aesthetic balance, creating a sense of natural flow and harmony across the page. My "hello" initially looked like "h e l l o" with awkward gaps and misaligned parts, devoid of the natural contrast that makes calligraphy pop. And don't forget the counter-spaces – the enclosed or partially enclosed white areas within letters, like the bowl of an 'o', 'a', 'b', 'e', or the negative space within a 'P' or 'R'. These essential "white spaces" are just as important as the inked strokes; mastering them is key to consistent, beautiful letterforms and overall visual balance. It's a process, not an event, and consistent ink flow is the silent partner in making those contrasts and connections beautiful.
As you form words, you'll start to see your individual strokes come alive, but remember, mistakes are just opportunities to learn. And trust me, you will make them. But that's part of the fun!
Common Beginner Mistakes and How to Avoid Them
We all stumble when we start something new, and calligraphy is no exception. I certainly did, and still do! Recognizing common pitfalls can save you a lot of frustration, because let's face it, nobody enjoys a perpetually wobbly line or an unexpected ink blob. Ever found yourself making these common slips? Here's my take on the usual suspects:
Mistake | Cause | Solution |
|---|---|---|
| Over-thinking the 'Perfect' Stroke | Fear of failure, unrealistic expectations | Embrace learning; focus on process not just product; allow for joyful experimentation |
| Inconsistent Slant | Uneven hand angle, lack of guidelines | Use slanting guide sheets, focus on consistent nib angle |
| Uneven Spacing (Kerning & Counter-spaces) | Rushing, lack of conscious attention | Practice slow, deliberate spacing; squint at work from distance |
| Over/Under-inking | Incorrect ink loading, inconsistent pressure, paper absorbency, or nib condition | Dip nib halfway into inkwell, ensuring even saturation. For brush pens, ensure tip is consistently wet. Use smooth paper, check nib cleanliness. |
| Finger vs. Arm Movement | Old writing habits, tension | Move entire arm from shoulder, let fingers guide, relax hand |
| Rushing | Impatience, lack of mindfulness | Slow down, focus on each deliberate stroke, breathe |
| Over-reliance on Guide Sheets | Dependency on external aids | Practice occasionally without guides to develop intuitive feel |
| Poor Tool Maintenance | Dried ink, dirty nibs | Clean nibs thoroughly with water and mild soap after every use |
| Incorrect Paper Choice | Using textured or too-thin paper | Opt for smooth, non-absorbent paper (e.g., bristol, marker) around 90-120gsm |
| Ignoring X-height & Guidelines | Lack of understanding of letter proportion | Utilize guide sheets with clear line indicators; consciously practice consistent letter heights |
| Ignoring the 'Lift' in Upstrokes | Dragging pen, lack of awareness of precise finish | Consciously lift pen slightly at the end of each upward stroke for clean, crisp edges. |
Let's elaborate on some of these:
- Inconsistent Slant: This is when your letters lean at different angles. My first lines of text looked like they were caught in a strong crosswind! To fix it, use a slanting guide sheet underneath your practice paper, or draw light pencil guidelines. Focus on maintaining a consistent angle from the very first stroke of each letter and throughout words.
- Uneven Spacing: Often called "white space management," this refers to the gaps between letters and words. Too much or too little space makes your work hard to read. Practice writing the same word repeatedly, consciously trying to keep the internal, enclosed spaces of letters (counter-spaces, like the white area inside an 'o', 'e', 'a', 'g', or 'P') and the spaces between them (kerning) consistent. Squinting at your work from a distance can help you spot uneven areas. This often means adjusting the space not by a fixed amount, but by eye, which is a skill in itself.
- Over-inking or Under-inking: An ink blotch can ruin an otherwise perfect stroke, while too little ink leads to scratchy, inconsistent lines. For dip pens, only dip the nib about halfway into the inkwell, ensuring the reservoir is filled but not dripping. For brush pens, ensure the tip is evenly saturated. Practice making consistent lines on scrap paper before committing to your main piece. If your nib drags, you might need more ink, or your paper isn't smooth enough. Remember, thicker paper around 90-120gsm tends to handle ink better without feathering or bleeding, providing a smoother surface for your nib.
- Arm vs. Finger Movement: Beginners often write using only their fingers, which results in jerky, small strokes. Calligraphy, especially larger scripts, benefits from arm movement. Try to move your entire arm from the shoulder, letting your fingers simply guide the pen, not do the heavy lifting. This allows for smoother, more elegant curves and longer, more controlled strokes. It takes conscious effort to break old habits, but the difference is truly transformative.
- Rushing: This is probably the biggest culprit for most mistakes. Calligraphy demands patience. Every stroke should be deliberate and slow. I had to learn to breathe, literally, with each movement. Slow down, focus on the pressure and angle, and let the process unfold. The beauty is in the mindful act of creation, not just the speed. This practice is a marathon, not a sprint.
- Over-reliance on Guide Sheets: While incredibly helpful initially, don't become too dependent on guide sheets. Eventually, you want to develop an intuitive feel for spacing and slant. Try practicing without them occasionally to train your eye and hand to work independently. It's like learning to ride a bike without training wheels – a little wobbly at first, but ultimately liberating.
- Poor Tool Maintenance: Dried ink is the enemy of a happy nib. I've ruined a few good ones by being lazy! Always clean your dip pen nibs with water and a soft cloth or specialized nib cleaner immediately after each use. For fountain pens, periodic flushing is essential. This prevents clogging and ensures smooth ink flow for your next session. Proper care ensures your tools last longer and perform better, keeping them ready for your next creative session.
- Ignoring the 'Lift' in Upstrokes: This is a subtle but critical detail. Many beginners just drag their pen at the end of an upstroke, leading to a fuzzy or uneven line. Consciously lifting your pen with a delicate, almost imperceptible flick at the end of each upward movement ensures crisp, clean edges, which are vital for the contrast that defines beautiful broad-edged calligraphy.
But here's a secret: these "mistakes" are simply stepping stones. They're part of the process, and sometimes, they even lead to something wonderful.
Embracing Imperfection: It's All Part of the Art
But here's a secret: those "mistakes" we just talked about? They're simply stepping stones. They're part of the process, and sometimes, they even lead to something wonderful. Here's the thing about art, and calligraphy is absolutely art: it doesn't have to be perfect. My early attempts were full of wobbly lines, ink blobs, completely inconsistent letter sizes, and sometimes, even an inconsistent slant. And you know what? That's okay. It's part of the learning curve. Each "mistake" is just feedback. A blob tells you too much ink or inconsistent pressure; a wobbly line suggests you might need to relax your grip or slow down. If your downstroke is too thin, it probably means you're not applying enough pressure, or your nib angle is off. Treat these as clues, not failures. Embrace the journey of discovery, because in art, sometimes the most beautiful things emerge from the unexpected.
I remember one abstract painting I was working on, meticulously trying to get every line and color field just right. I made a tiny, unintentional drip of paint that seemed to ruin a perfectly smooth area. I was devastated, much like that ink splatter next to my 't' in calligraphy. I almost scrapped the canvas. But instead, I leaned into it, incorporating a few more subtle drips and splatters around it, transforming what I thought was an error into a deliberate texture and an artistic element. It taught me that sometimes, the 'happy accidents' are where true creativity lies, a principle I now consciously embrace in my abstract paintings. Don't let the pursuit of perfection paralyze you. The beauty often lies in the human touch, the slight variation that machine-made letters can never capture. This embrace of the imperfect, the unique human touch, is precisely what I strive for in my own abstract art; they're certainly not about straight lines or perfect symmetry, but about the energy and character found in those subtle variations. If you're curious to see how that philosophy manifests in my art, you can explore some of my abstract and colorful pieces.

So, with a relaxed mindset and a willingness to explore, let's look at where this artistic journey can take you next.
Beyond the Basics: Where Do We Go From Here?
Once you've got a handle on the basic strokes and forming simple letters, a whole new world opens up. This is where the real fun begins – experimenting with different calligraphy styles. This is also where the acceptance of imperfection truly allows for growth and personal expression. You might delve into the angular density of Gothic script – those dramatic, imposing medieval letters characterized by dense, compressed forms and sharp, broken lines that command attention. Or perhaps the flowing elegance of Italic, with its distinctive graceful slant, speaking of Renaissance humanism, known for its readability and speed. Then there's the intricate flourishes of Copperplate (a highly decorative, delicate script popular in the 18th century for invitations and formal correspondence, characterized by intricate flourishes and significant line variation from a pointed nib, not a broad edge), or the modern, expressive freedom of brush lettering and bounce lettering – playful styles that really let your personality shine with fluid, variable-width strokes. Brush lettering often uses a flexible brush pen to create variable line widths based on pressure, while bounce lettering is a playful, modern style where letters deliberately sit at different heights on the baseline, creating a dynamic, informal look. Each style offers a unique challenge and reward, inviting you to develop your own unique voice, much like an artist explores different mediums and subjects to find their signature style. For beginners, Foundational Hand is an excellent choice as it emphasizes clear, simple shapes and fundamental strokes, making it ideal for building a strong base.
You can also try different pens and inks, and even explore adding decorative elements and flourishes – those beautiful, expressive swirls, extensions, or elaborate capital letters that elevate a piece from mere writing to true art. While flourishes are extensions of the letterforms themselves, ornamentation refers to broader decorative elements that complement the text but are separate from the letters, like borders, illustrations, or larger design motifs. Flourishing, itself a distinct skill, builds upon your understanding of letterforms and negative space to add movement and elegance. And for those interested in a completely different approach, pointed pen calligraphy offers an equally captivating journey, focusing on flexible pointed nibs that create delicate hairlines on upstrokes and broad, dramatic downstrokes through pressure. My journey, for instance, has taken me from precise strokes to more expressive, abstract forms, much like the path many artists take when they discover their own style. It's a natural evolution. If you're interested in seeing how my own artistic journey has unfolded, you can check out my timeline. It's been a winding road of discovery, much like mastering any art form or appreciating the historical and aesthetic richness found in the masterpieces at a place like the museum in 's-Hertogenbosch, where every stroke and brushwork tells a story across time.
Remember, calligraphy isn't just about beautiful writing; it's a meditative practice, a creative outlet, and a wonderful way to slow down in a fast-paced world. It offers a tangible sense of accomplishment and a quiet space for focused concentration, boosting mindfulness and satisfaction. It's about finding joy in the process, one stroke at a time, and letting your own unique artistic voice shine through. So, grab your pen, find some paper, and let the beautiful journey of calligraphy begin! I'm genuinely excited to see what you'll create – embrace the process, share your triumphs, and remember every stroke tells a story, much like every piece of art holds a narrative. Your journey into beautiful writing is just getting started.
Frequently Asked Questions (FAQ)
Got more questions? That's great! Here are some common queries I hear from beginners, hopefully helping to clear up any lingering uncertainties you might have.
What's the difference between calligraphy and lettering?
This is a great question and often a point of confusion for beginners! In simple terms, calligraphy is the art of writing beautiful letters, where each stroke is made with a specific pen in a specific order, creating pre-defined forms. It's about precision and following historical letterforms. Lettering, on the other hand, is the art of drawing letters. It's more illustrative, focusing on composition and design, where you can modify, embellish, and create unique letter shapes outside of strict calligraphic rules. Think of calligraphy as playing a musical instrument with practiced technique, and lettering as composing a unique song. While calligraphy is about executing letters with a pen, lettering is more about designing them. Both are beautiful, but they involve different approaches. For me, calligraphy is the foundational discipline, much like learning classical painting techniques before moving into more experimental art.
What are the basic principles of letter construction in calligraphy?
At its core, letter construction in calligraphy involves combining fundamental strokes (upstrokes, downstrokes, ovals, entry/exit strokes, diagonals) with mindful attention to contrast (thick and thin lines), consistent nib angle, and appropriate spacing (kerning, leading, and counter-spaces). It also crucially involves understanding the importance of x-height and ascender/descender lines for maintaining consistent letter proportion and alignment. It's a deliberate dance of pressure and movement, building letters from simple forms into elegant wholes – quite a thoughtful process, really.
What's the best pen for a calligraphy beginner?
If you're just dipping your toes in, I'd personally recommend starting with a simple felt-tip calligraphy pen or a brush pen, like a Pilot Parallel, Tombow Fudenosuke, or a Staedtler Calligraphy pen. They're forgiving because they don't require an inkwell, offer controlled ink flow, and let you focus on stroke mechanics and nib angle without too much fuss. These are ideal for brush lettering or getting comfortable with broad-edged forms without the added complexity of dip pens. Once you're comfortable, then you can absolutely move onto dip pens and specialized nibs, but begin simple. Don't add unnecessary hurdles to your learning curve!
How do I achieve consistent thickness in my downstrokes?
Ah, the consistent downstroke – a true test of patience! The key, in my experience, is consistent, even heavy pressure applied from start to finish with a broad-edged nib. Don't press too hard at the start and then lighten, or vice-versa. Your nib angle also plays a crucial role, so ensure it remains constant throughout the stroke and your broad nib edge is fully engaged with the paper. Practice applying steady, unwavering pressure, and slow down your movement. It really is about feeling that connection between your hand, the pen, and the paper. My own breakthrough came from focusing on a smooth, deliberate glide rather than a quick push.
How often should I practice calligraphy?
Consistency is definitely more important than duration. Even 15-20 minutes a few times a week is far more effective than one long, infrequent session. I try to make it a daily ritual, even if it's just a few lines or practicing a single letterform. A good routine might be 15 minutes daily, focusing on one specific stroke or letterform each day to build targeted muscle memory. Remember, slow, deliberate movement is key for control, especially when starting out. Think of it as a small, mindful break in your day, a chance to find your flow and reconnect with a quiet creative act.
What kind of paper is best for calligraphy?
For calligraphy, you absolutely want to look for smooth, non-absorbent paper to prevent ink bleeding and ensure your nib glides effortlessly. Bristol paper, marker paper, or even good quality printer paper (around 90-100gsm) can work well for felt-tips and brush pens. For dip pens and heavier inks, something thicker like watercolor paper or special calligraphy pads with a very smooth finish (like Rhodia or Canson) might be beneficial. Avoid textured paper initially, as it can catch the nib and make smooth strokes difficult, which is extra frustrating for beginners. The right paper can make all the difference in your experience!
Is it okay if my calligraphy isn't perfect?
Absolutely! Calligraphy is a skill, and like any skill, it takes time and practice. Embrace your imperfections; they're part of your unique artistic voice and your journey. Nobody starts perfect, and often, the most interesting pieces have those subtle human touches – just like my abstract art. It's about the process and the learning, not just a flawless outcome. I've learned to appreciate the unique character that emerges from those slight deviations, just as I do in my paintings.
Can I learn calligraphy without a teacher?
Definitely! While a good teacher can accelerate your learning and offer immediate feedback, there are countless online resources, books, and videos that can guide you. I mostly taught myself through trial and error, and the sheer joy of experimentation. The key is dedication and a willingness to learn from your own attempts and see mistakes as learning opportunities. You are your own best teacher, if you pay attention. There's a certain satisfaction in discovering things for yourself, too.
How should I clean and maintain my calligraphy pens?
For felt-tip and brush pens, generally just replace the cap tightly after use to prevent drying. For dip pens, always clean your nib thoroughly with water and a soft cloth or specialized nib cleaner immediately after each practice session. Dried ink can damage the nib, affect ink flow, and ultimately shorten the life of your tools. For fountain pens, periodic flushing with water is essential. Proper care ensures your tools last longer and perform better, keeping them ready for your next creative session. Think of it as caring for any valuable art supply – a little attention goes a long way.
What are the most common calligraphy styles for beginners to start with?
Many beginners find great success starting with broad-edged scripts like Foundational Hand or Italic. Foundational Hand is excellent for learning basic letterforms and consistency due to its clear, simple shapes and emphasis on fundamental strokes. Italic offers a graceful, flowing introduction to a slightly more complex style, prized for its legibility and elegant slant. Brush lettering is also very popular for its expressive nature and ease of tool management. My advice? Choose what excites you most – enjoyment is key to sustained practice! If you're passionate about a style, you'll be more likely to stick with it.
What's the difference between broad-edged and pointed pen calligraphy?
As we discussed earlier, broad-edged calligraphy uses a flat, chiseled nib to create thick and thin lines by varying the direction of the stroke relative to the nib's edge, much like using a chisel. Think of it as an architect's precise tool. Pointed pen calligraphy, in contrast, employs a flexible, pointed nib where line variation comes from applying pressure – pressing harder for thick downstrokes and lighter for thin upstrokes. This is more akin to a dancer's fluid movements, responding to delicate pressure. They are distinct techniques with different tools and approaches to line creation, each with its own beautiful challenges and rewards.
How do I practice calligraphy without getting bored?
Monotony is real, I know! To keep practice engaging, I try to introduce variety without losing focus. Instead of just endless drills, apply your strokes to simple words or short quotes once you feel a basic grasp. Experiment with different colors of ink (once consistency is there) or try different paper types to see how they react. Set small, achievable goals each session, like mastering just one letter or a particular connection. Listening to music or a podcast while practicing can transform it into a meditative, enjoyable ritual. And remember, the joy is in the journey, not just the destination – embrace the quiet, focused space it creates. Sometimes, even just observing how your hand moves and the ink flows can be a fascinating study in itself. Perhaps look for inspiration in the museum in 's-Hertogenbosch for historical pieces!


