The Dance of Light: Mastering Exposure for Artistic Photography
Discover how light exposure transforms photography into vibrant art. Practical techniques, gear tips, and creative insights for photographers at every level.
# The Dance of Light: Mastering Exposure for Artistic Photography I remember this one afternoon in my studio, wrestling with a stubborn overcast [light](/finder/page/understanding-light-sources-in-art). My abstract compositions looked flat, lifeless. Until I realized—[light](/finder/page/understanding-light-sources-in-art) isn't just illumination, it's the **subject itself**. It sculpts textures, whispers emotions, and becomes the paintbrush for our visual stories. If you've ever stared at an image and felt its soul, you've witnessed light's artistry. Today, we'll explore how harnessing exposure transforms mere photographs into living art. ## Why Light Matters More Than You Think Photography at its core is **captured light**. Every image we create is a negotiation between darkness and illumination, shadow and highlight. Think about the last photo that truly moved you—chances are it wasn't the subject alone that created that connection, but how light transformed that subject into something more. Light doesn't just illuminate; it **defines**. It tells us whether a surface is rough or smooth, whether an emotion is tender or fierce, whether a moment is mundane or magical.  [credit](https://images.pexels.com/photos/157852/sunglasses-glasses-sun-sun-protection-157852.jpeg), [licence](https://creativecommons.org/public-domain/) Understanding exposure is about gaining fluency in light's language. When you master exposure, you're not just learning camera settings—you're learning to **converse with photons**. You're learning to ask light questions: "What story do you want to tell? What emotions do you want to reveal?" The most compelling artistic photographs don't just document reality; they interpret it through the lens of light's infinite possibilities. 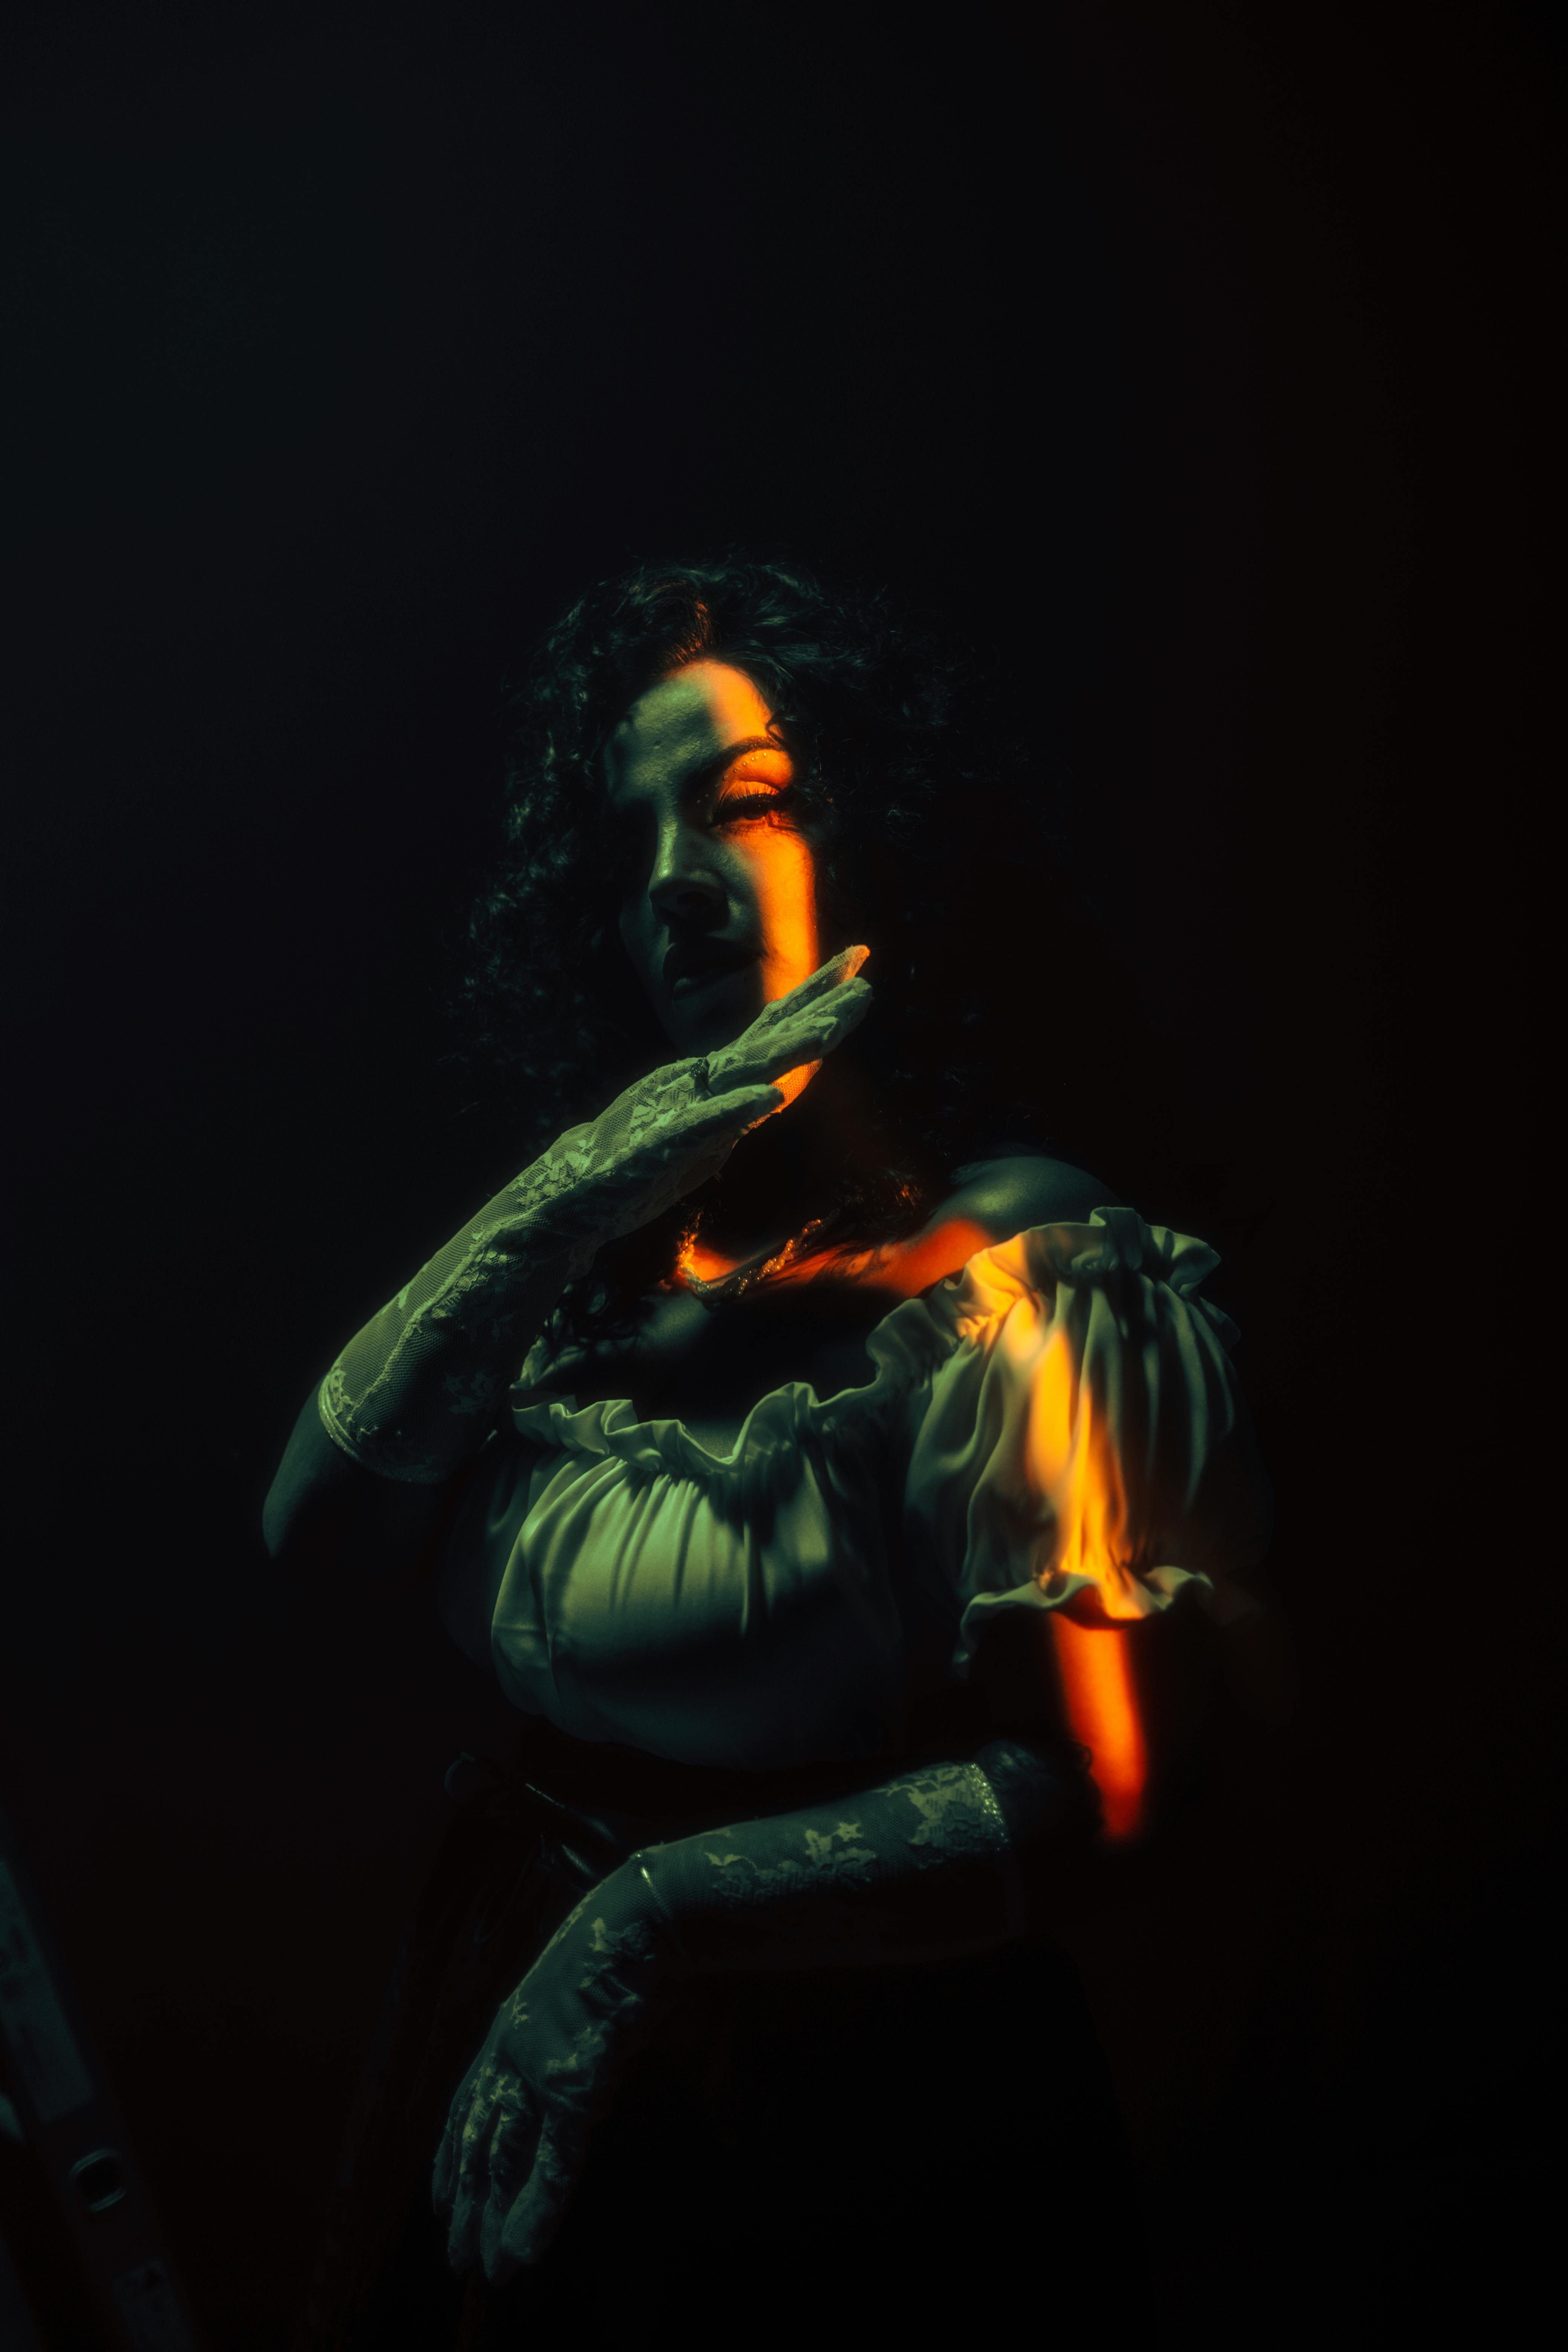 [credit](https://images.pexels.com/photos/19615521/pexels-photo-19615521/free-photo-of-woman-in-light-and-shadow.jpeg), [licence](https://creativecommons.org/public-domain/) ## Understanding Exposure as Your Medium Exposure basics can feel like textbook rules—shutter speed, aperture, ISO. But I’ve found the real magic happens when we stop treating them as numbers and start seeing them as **creative partners**. Think less about technical perfection and more about intentional dialogue with light. ### The Exposure Triangle: Your Creative Toolkit | Element | What It Controls | Artistic Effect | Practical Tip | |---------|-------------------|-----------------|--------------| | **Shutter Speed** | Motion capture | Silk-water waterfalls, ghostly traffic trails | Start with 1/60s for handheld; use tripods for 1s+ | | **Aperture** | Depth of field | Dreamy bokeh vs. focus stacking | f/1.8 isolates subjects; f/11 keeps landscapes sharp | | **ISO** | Light sensitivity | Grainy textures vs. clean shadows | Keep 100-400 for daylight; embrace 3200+ for mood lighting | These settings don’t just measure light—they sculpt reality. I once shot a desert landscape at f/22, rendering every grain of sand in focus like a miniature world. The same scene at f/2.8 dissolved into dreamy abstraction. Which "truth" was better? That’s your call not the camera’s. 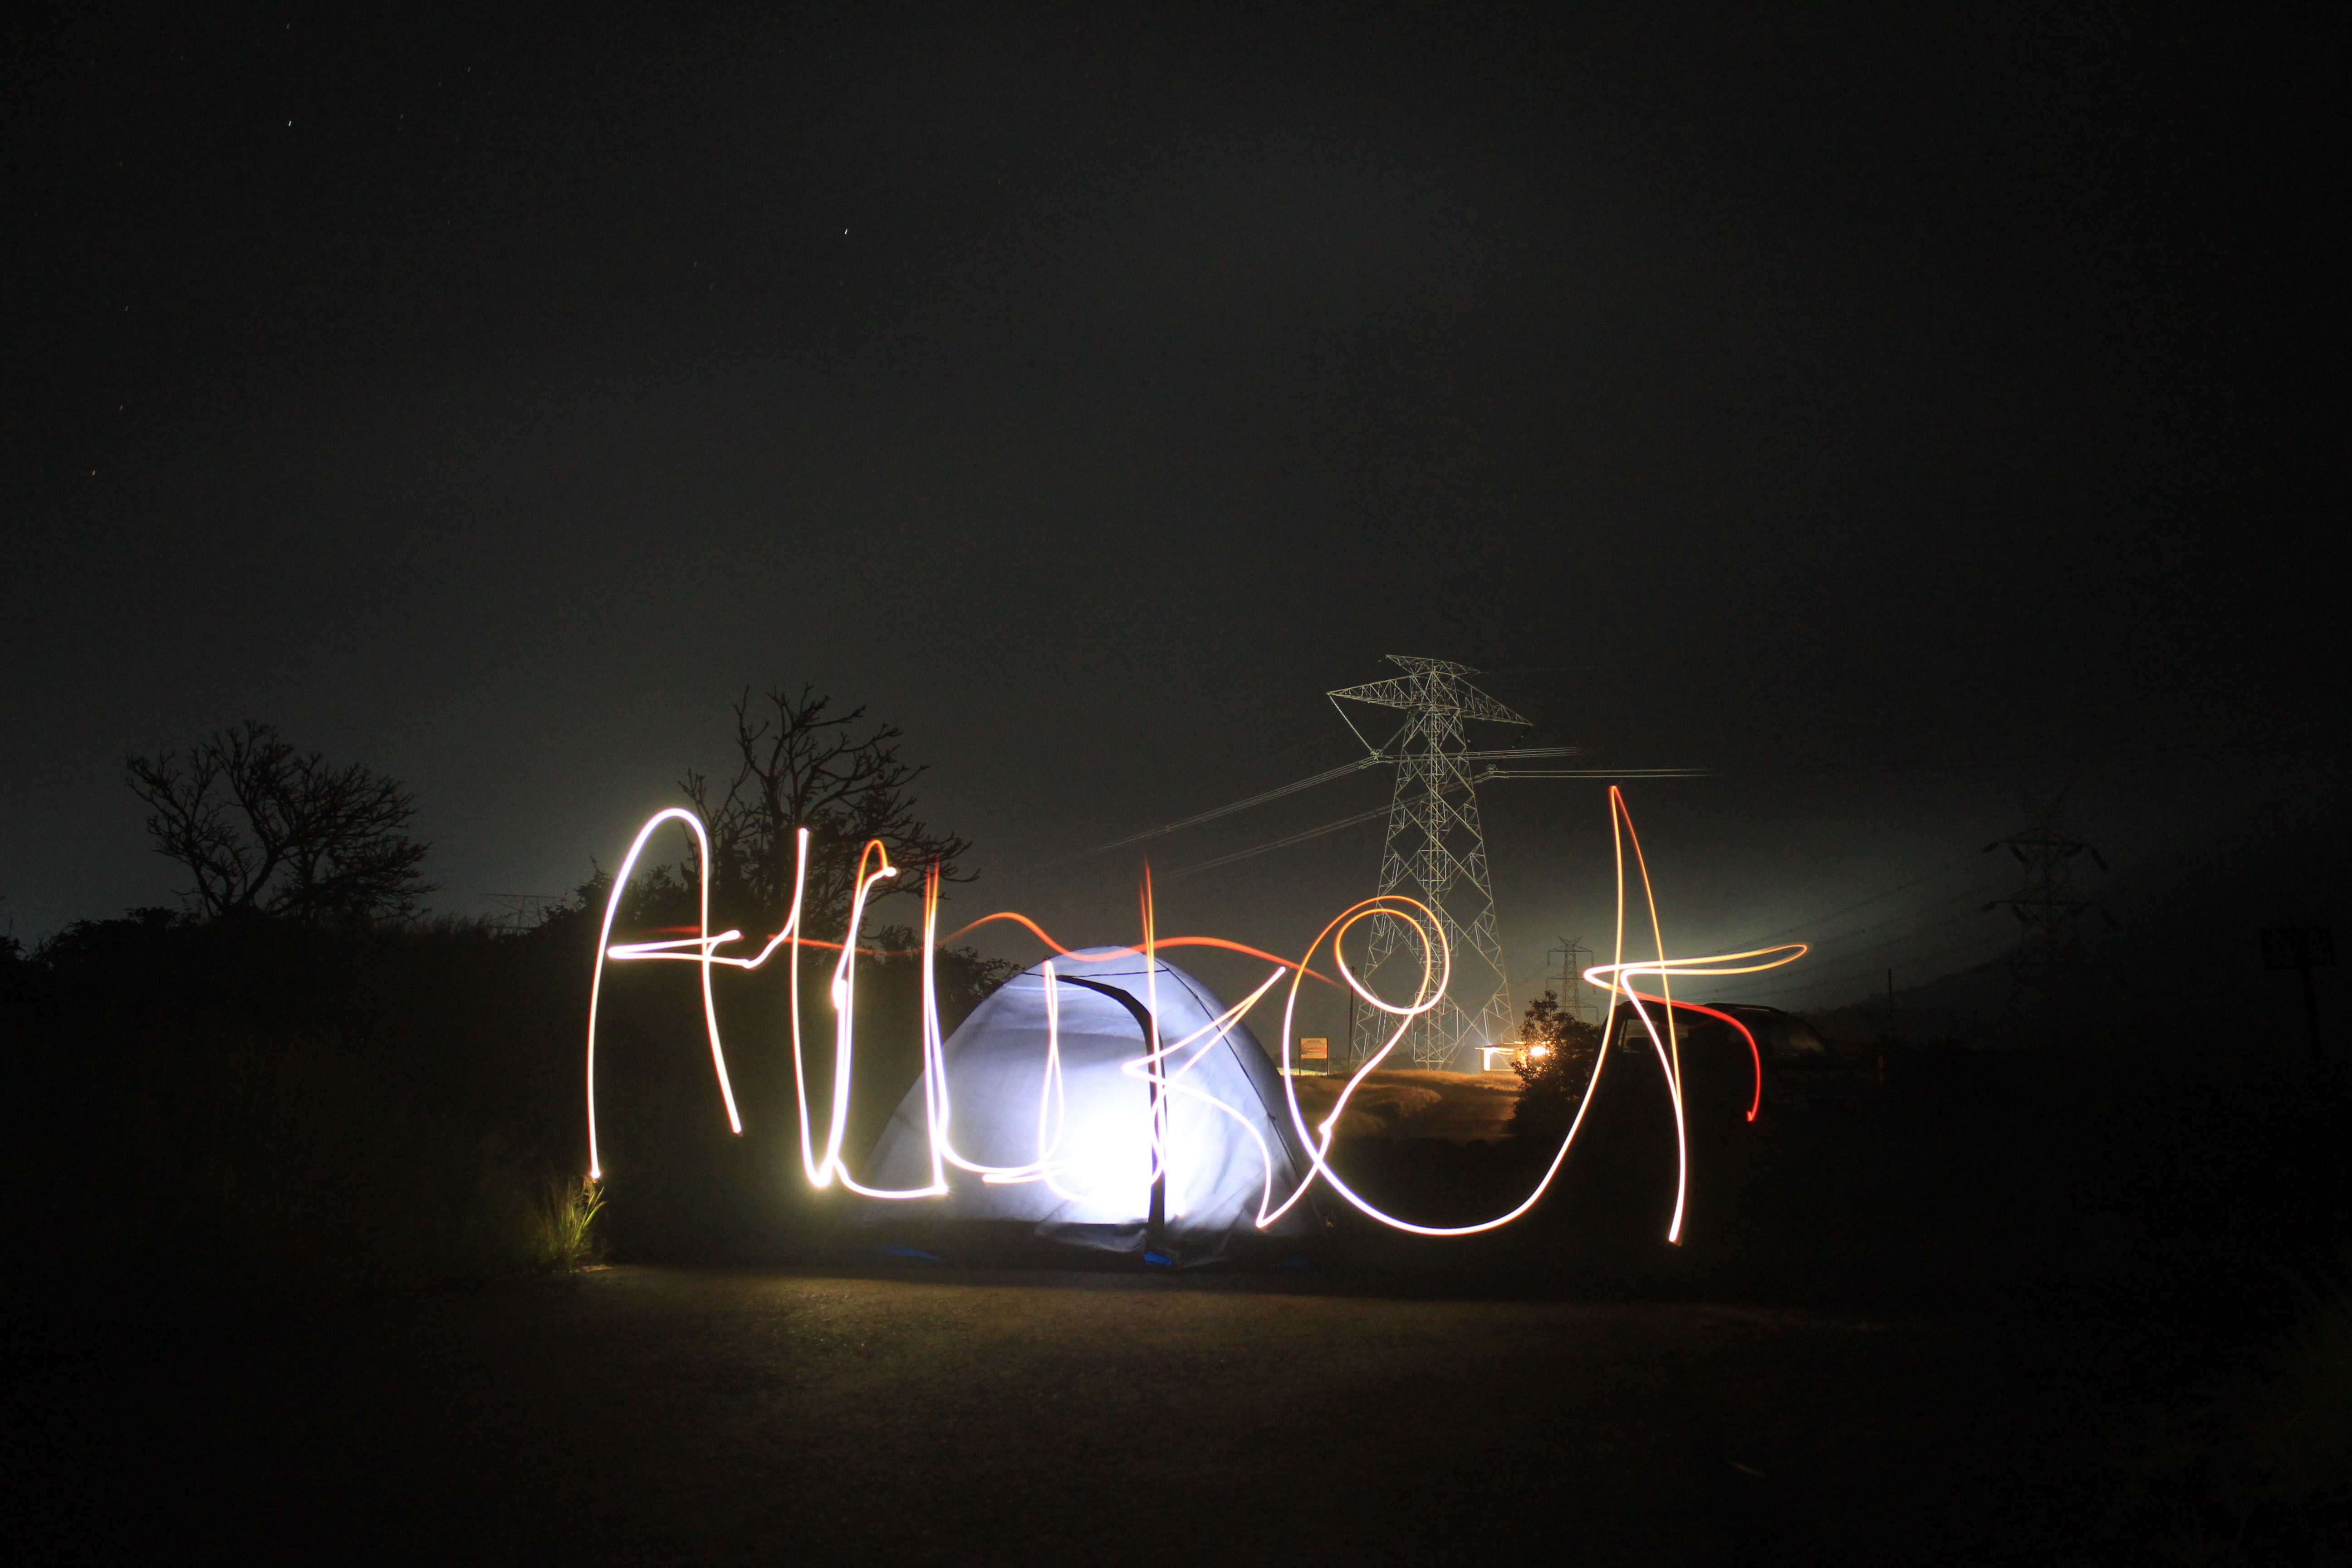 [credit](https://upload.wikimedia.org/wikipedia/commons/5/52/Camping_long_exposure_light_painting_tent_clicks_%281%29_06.jpg), [licence](https://creativecommons.org/licenses/by-sa/4.0) ### Light’s Personality Light has temperament. It’s **soft and diffused** on misty mornings, wrapping subjects like velvet. Then there’s **hard directional light** at noon—sharp, dramatic, unforgiving. The trick? Let the light dictate your vision. I once abandoned a perfect composition because the harsh afternoon light turned my model’s face into a mask of deep shadows. But those shadows became the story. 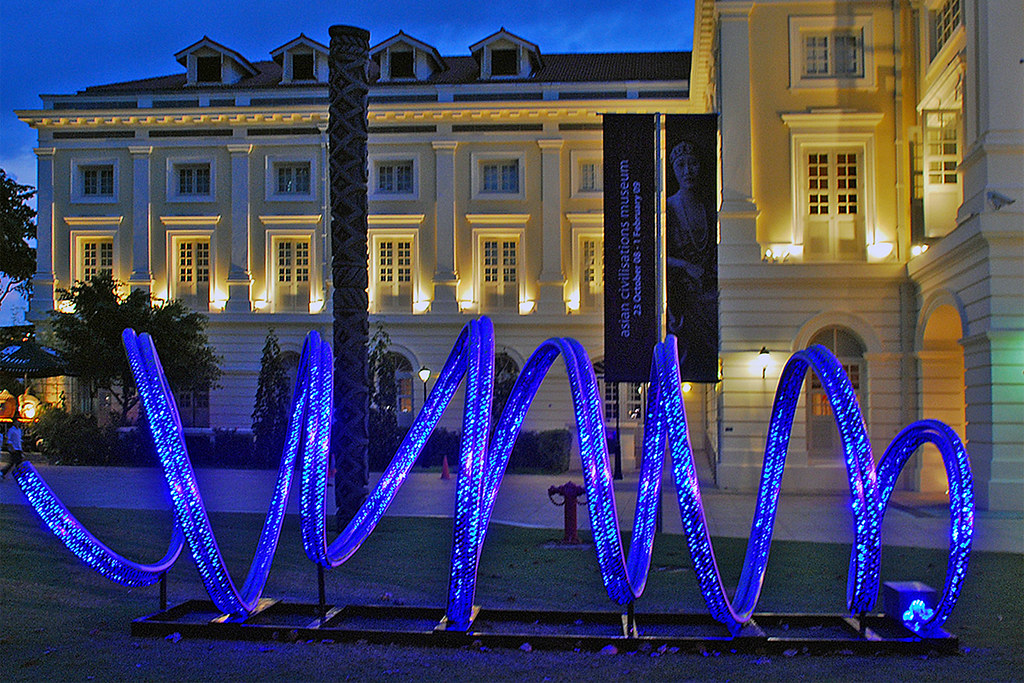 [credit](https://live.staticflickr.com/3240/3072144985_431f495bcf_b.jpg), [licence](https://creativecommons.org/licenses/by-nc-sa/2.0/) ## Creative Techniques for Light Artists ## Advanced Exposure Techniques: Beyond the Basics ### Exposure Bracketing for Dynamic Range Sometimes a single exposure can't capture the full story of a scene. That's where **exposure bracketing** becomes your [secret weapon](/finder/page/what-is-your-secret-weapon-in-art). By shooting multiple versions of the same scene at different exposures, you capture the complete tonal range: | Exposures | Best For | Post-processing Approach | |-----------|----------|-------------------------| | **3 shots** | Most scenes with moderate dynamic range | HDR or manual blending | | **5+ shots** | Extreme contrast scenes (sunsets, interiors) | Manual exposure stacking | | **Auto-bracket** | Fast-moving scenes where manual timing is impractical | Camera HDR (use with caution) | The key to great bracketing is consistency. Use a tripod, manual focus, and don't touch anything between shots. The magic happens in post when you blend these exposures to reveal details in both the brightest highlights and deepest shadows that were invisible to the naked eye. ### High Dynamic Range (HDR) Done Right HDR gets a bad rap because of those oversaturated, cartoonish images. But when done well, HDR creates **tonal poetry**. Here's my approach: 1. **Shoot raw files**—they contain more data to work with 2. **Use 5+ exposures** with 1-stop increments 3. **Manual blend** in software like Photoshop or Lightroom 4. **Preserve natural contrast**—don't crush shadows or blow highlights 5. **Embrace subtlety**—the best HDR looks like it wasn't HDR at all ### Long Exposure: Painting with Time Ever noticed how oceans turn ethereal in long exposures? That’s time becoming visible. I’ve spent hours on coastlines with tripods, watching clouds and water become **brushstrokes of motion**. Essential tips: 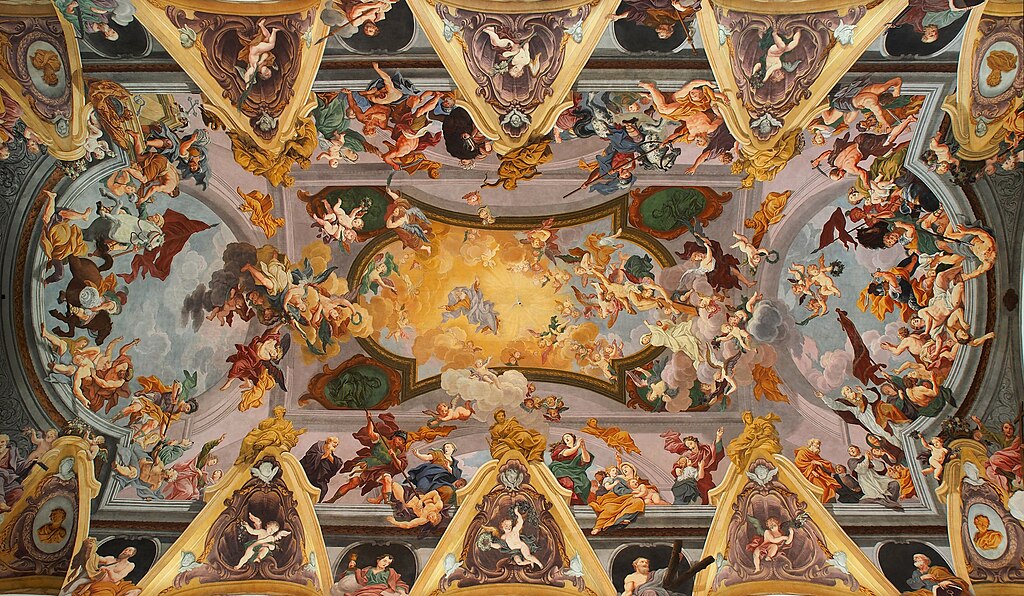 [credit](https://commons.wikimedia.org/wiki/File:Baroque_ceiling_frescoes_%28Ljubljana_Cathedral%29.jpg), [licence](https://creativecommons.org/licenses/by-sa/4.0) - Use a **neutral density (ND) filter** to cut glare and keep skies moody. - **Exposure bracketing**: Shoot multiple shots at different timings later. - **Post-processing secrets**: Blend exposures for dynamic range—no HDR gimmicks needed. ### Light Painting: Sculpting in Darkness Turn off all lights. Shine a flashlight, sparkler, or phone across your subject during a long exposure. Last winter, I "drew" constellations onto frozen branches in my backyard. The result? Magically surreal forest fairytale scenes. No fancy gear required—just curiosity and stillness.  [credit](https://images.pexels.com/photos/29958070/pexels-photo-29958070.jpeg?cs=srgb&dl=pexels-aminniak-29958070.jpg&fm=jpg), [licence](https://creativecommons.org/public-domain/) ### Light Painting Gear and Techniques Light painting is one of the most accessible art forms—you can start with just your phone and a [dark room](/finder/page/how-to-decorate-with-art-in-a-room-with-no-natural-light). But as you advance, consider these tools: | Tool | Effect | Best For | |------|--------|----------| | **LED Flashlights** | Controlled, precise lines | Writing, outlining, detailed work | | **Sparklers/Fire** | Organic, flowing light | Abstract patterns, magical effects | | **Glow Sticks** | Neon colors, movement trails | Colorful, energetic compositions | | **Phone Screens** | Digital patterns, text | Modern, tech-inspired art | | **Fiber Optics** | Tiny, precise points | Star fields, constellations | **Advanced Technique**: Try **multiple exposure light painting**. In Photoshop, stack multiple light painting layers and blend them to create complex, multi-dimensional scenes that tell stories through light and shadow. ### Intentional Overexposure "Expose to the right" is common advice, but pushing highlights into pure white? That’s where **emotional abstraction lives**. I once overexposed a tulip field, turning yellows into molten sunlight. The tulps dissolved into golden orbs—a memory rather than a document.  [credit](http://commons.wikimedia.org/), [licence](https://creativecommons.org/publicdomain/mark/1.0/) ### Backlighting for Silhouettes Position your subject against a light source (sun, window, even car headlights). Let form dissolve into shape. Remember: shadows create mystery where light explains it. I’ve shot dancers against sunset, their bodies becoming fluid silhouettes—identity melts into movement. ## Practical Gear Without the Hype You don’t need a $5,000 camera to play with light. Here’s what actually matters:  [credit](https://commons.wikimedia.org/wiki/File:Painter_David_Brewster_creating_work_for_the_Art_of_Action_project.jpg), [licence](https://creativecommons.org/licenses/by/1.0) - **Lenses over bodies**: A cheap 50mm f/1.8 creates dreamy bokeh that pro gear can’t match. - **Tripod essentials**: Any shaky light experiment requires stillness. Mine’s held for 8+ hour star trails. - **Reflectors are magic**: A white foam board bounced into shadows sculpts beauty out of flat light. But the ultimate gear? Your eyes. Train them to see light not just as bright/dark, but **color temperature, texture, and story**. I’ve shot stunning work with disposable cameras—focus doesn’t matter if feeling hits.  [credit](https://images.pexels.com/photos/30652466/pexels-photo-30652466.jpeg?cs=srgb&dl=pexels-amar-30652466.jpg&fm=jpg), [licence](https://creativecommons.org/public-domain/) ## Composition: Light as Your Choreographer Light guides the eye. Place key highlights along **rule-of-thirds intersections**. Use shadows to create "[negative space](/finder/page/role-of-negative-space-abstract-art)" that breathes. I once shot a model standing in a doorframe—her body backlit, the frame’s shadow slicing diagonally across the scene. No editing needed; the light directed the entire narrative. 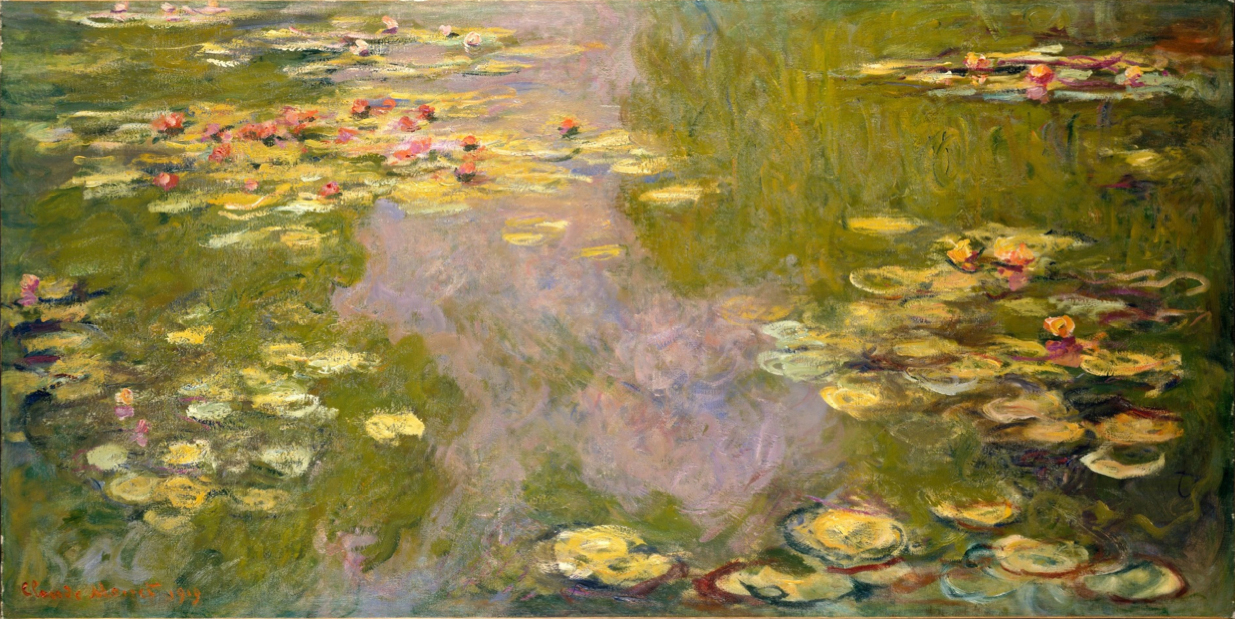 [credit](https://upload.wikimedia.org/wikipedia/commons/9/9e/WLA_metmuseum_Water_Lilies_by_Claude_Monet.jpg), [licence](https://creativecommons.org/licenses/by-sa/2.5) ## Post-Processing: Enhancing Not Fixing Raw files are your digital sketchpads. Adjust exposure to recover *moods*, not details. Push blues in shadows for mystery, warm highlights for nostalgia. But remember: if your image needs heavy editing, you *might* have missed the light’s magic on location. Though—I’ll admit I’ve rescued many flat shots in postprocessing. We’re all human here. ## How-To: Light Painting Step by Step 1. **Setup**: [Dark room](/finder/page/how-to-decorate-with-art-in-a-room-with-no-natural-light) (or night outdoors). Camera on tripod, manual mode. 2. **Exposure**: ISO 100, f/8, shutter speed 30+ seconds (experiment!). 3. **The Move**: With flashlight/smartphone, "draw" onto/around your subject. 4. **Pro tip**: Wear dark clothes to avoid appearing as a ghost in your own frame! ## Advanced Light Painting Guide ### Setting Up for Success **Location is everything** for light painting. You need complete darkness and interesting subjects: | Environment | Best For | Considerations | |-------------|----------|----------------| | **Indoor Studio** | Controlled experiments, product shots | Complete darkness, interesting textures | | **Backyard/Nature** | Organic subjects, environmental art | Weather protection, interesting foregrounds | | **Urban Settings** | Cityscapes, architectural details | Safety, finding interesting angles | | **Desert/Beach** | Minimalist compositions, star trails | Remote locations, carrying gear | **Technical Setup**: - Use **manual focus** (prevents hunting in darkness) - Set **white balance** manually (auto WB can shift during long exposures) - Use **remote shutter** or timer (prevents camera shake) - Consider **multiple exposures** for complex scenes ## Frequently Asked Questions **Q: What if I only have a phone camera?** <br>A: Phones excel at light play! Use apps like Halide for manual controls. Long-expose waterfalls at night with traffic trails or shoot streetlights through wet pavement for abstract bokeh. Constraint breeds creativity I swear. **Q: How do I avoid "flat" lighting outdoors?** <br>A: Shoot during golden hour (sunrise/sunset) or embrace harsh midday shadows. Add a reflector to lift faces. If light feels boring? Wait for storm clouds—they’re nature’s softboxes. **Q: Can you intentionally underexpose for effect?** <br>A> Absolutely! Moody noir scenes rely on crushed shadows. I once underexposed a cityscape at twilight, turning skyscrapers into ominous monoliths. "Correct" exposure is boring. Challenge exposure norms regularly. **Q: How do I shoot in mixed artificial lighting?** <br>A> Set a fixed white balance (e.g., tungsten), then shoot RAW so you can adjust later. Embrace the color clash—magenta streetlights and yellow shops create cyberpunk magic. Don’t fight light; celebrate its chaos. ## The Artistic Imperative: Embrace Imperfection I’ve missed perfect sunrises by fiddling with settings, then found beauty in accidental lens flares. Light exposure isn’t mastery—it’s surrender. Let it surprise you. Break the rules. Experiment until your camera becomes an extension of your heart. After all, why create art if not to feel something raw and real? If these spark ideas explore my [own abstract light studies](/buy). Sometimes the best light art lives behind a lens—other times it starts right here in your curiosity.  [credit](https://upload.wikimedia.org/wikipedia/commons/d/d1/Amsterdam_-_Rijksmuseum_1885_-_The_Gallery_of_Honour_%281st_Floor%29_-_Interior_of_the_Church_of_St_Bavo_at_Haarlem_1636_by_Pieter_Jansz._Saenredam.jpg), [licence](https://creativecommons.org/licenses/by-sa/4.0) ## 30-Day Light Photography Challenge Ready to deepen your relationship with light? Try this **progressive challenge**: **Week 1: Observation** - Day 1-3: Photograph only light sources (no subjects) - Day 4-7: Capture shadows as the main subject **Week 2: Technique** - Day 8-10: Shoot with only shutter speed variations - Day 11-13: Shoot with only aperture variations - Day 14: Shoot with only ISO variations **Week 3: Creative** - Day 15-17: Light painting practice - Day 18-20: Silhouette photography - Day 21: Intentional over/under exposure **Week 4: Integration** - Day 22-24: Combine techniques from previous weeks - Day 25-27: Shoot in challenging lighting conditions - Day 28-30: Create a cohesive series exploring one light theme **The goal isn't perfection**—it's awareness. By the end of 30 days, you'll see light differently. You'll notice things you never saw before. And that's when the real magic begins.  [credit](https://live.staticflickr.com/5601/15426133956_328fc403b7_b.jpg), [licence](https://creativecommons.org/licenses/by-nc-nd/2.0/) --- **Share your light photography experiments!** Drop a comment below with your favorite technique. Let’s learn from each other’s luminous mistakes.